
Debug firmware with ease
How it works
One of our goals is to make development with the Crazyflie 2.X as easy as possible. Due to the small size of the platform there are limitations in what connectors we can have and therefore we designed a debug-adapter kit that makes connecting a debugger to either of the MCUs a lot easier, by converting the connector pinouts to standard JTAG and SWD pinouts.
Specifications
Features
- Includes everything needed to easily debug the MCUs (STM32F4 and nRF51)
- Multiple debug pinouts supported (including 20-pin JTAG and 10-pin Cortex debug)
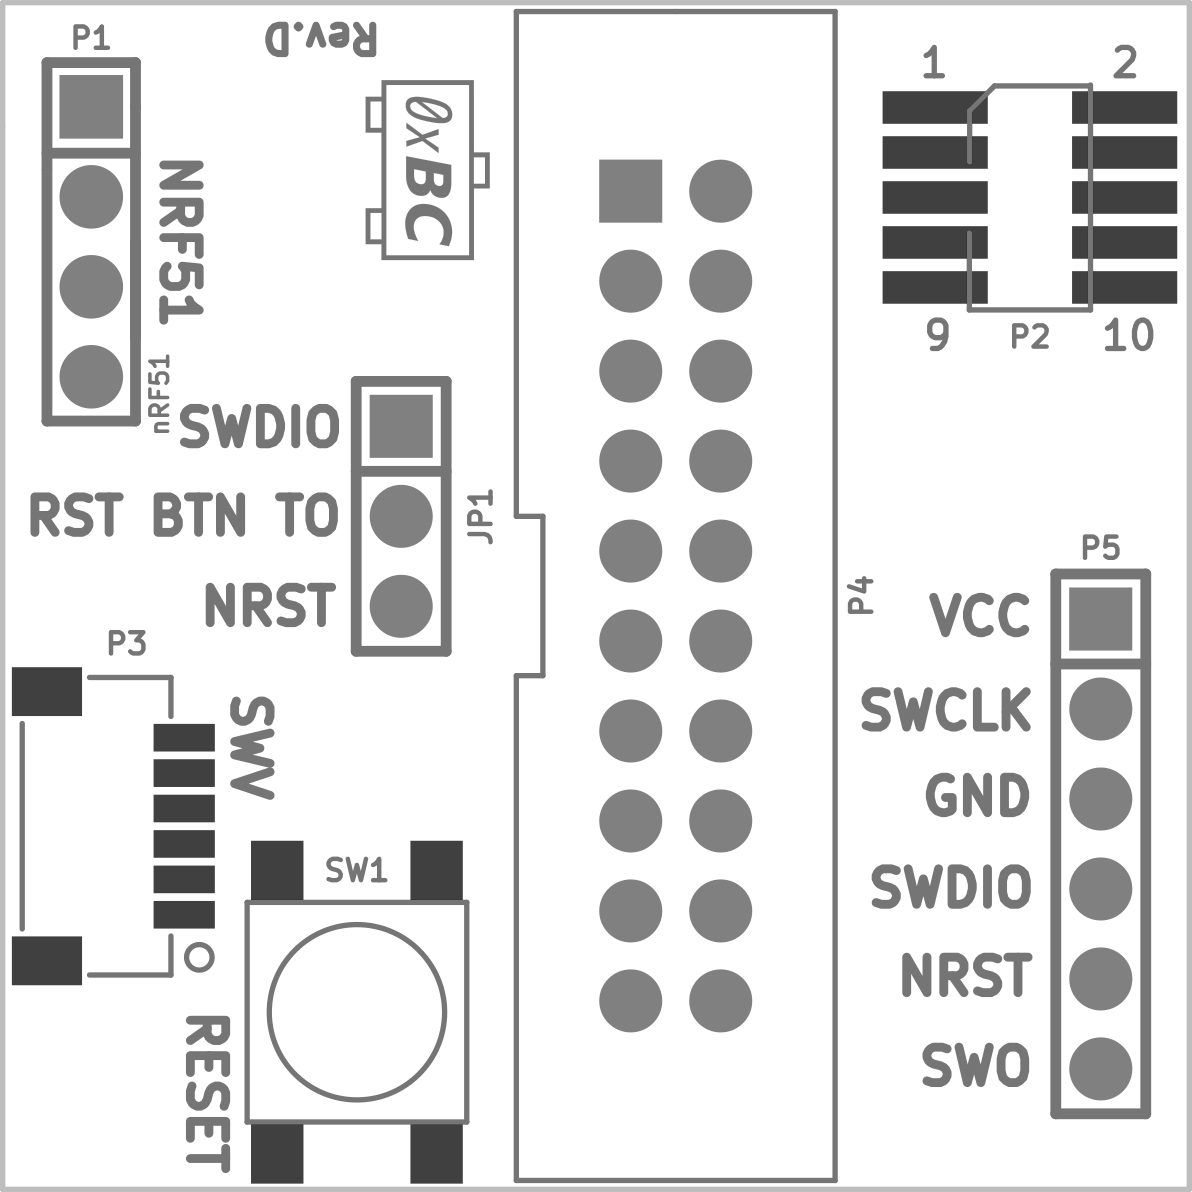
Electrical specification
- Supported debugger pinouts:
- Custom pinout that matches ST Discovery board debug interfaces (P5)
- Standard Cortex SWV debug 2x6 1.27mm (50mil) SWV interface (P2)
- Standard 2x10 2.54mm (100mil) JTAG interface (P4)
- Has reset button with jumper for reset support on either STM32F4 and nRF51 (SW1)
- Converts to the Bitcraze standard debug connector (P3)
Usage
Assembly
The Debug adapter kit contains the following:
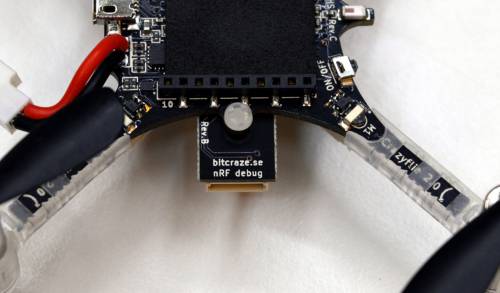
- The nRF debug connector for soldering to the Crazyflie 2.X
- A nylon screw and nut for securely attaching the nRF51 debug connector
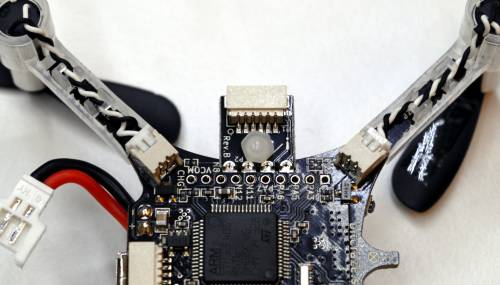
- The debug adapter for connecting the debugger
- A cable for connecting to the Crazyflie 2.X
Below are two images showing how the nRF51 debug connector should be soldered to the Crazyflie 2.X.
Connectors
All the connectors are connected together, so any combination of debuggers will work. I.e using the STM32 Discovery board for debugging of the nRF51, or a ARM JTAG to Cortex M debug converter.
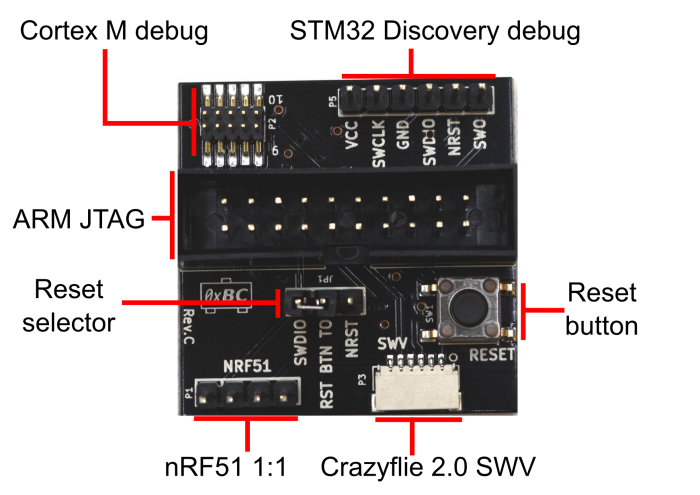
Here’s a short explanation of the connectors:
- Cortex M debug: Pinout compatible with Cortex M debug for SWD/SWO/JTAG
- STM32 Discovery debug: Pinout compatible with SWD/SWO of STM32 Discovery boards (so you can directly use these boards for debugging the Crazyflie)
- ARM JTAG: Pinout compatible with ARM JTAG 20 pin
- Reset button: Used to reset the target you are debugging
- Reset selector
- Reset btn to <-> SDWIO: For nRF51 debugging (reset done by holding SWD IO line low)
- Reset btn to <-> NRST: For STM32F debugging (reset done by holding NRST low)
- Crazyflie 2.0 SWV: Connect to Crazyflie 2.X for nRF51 or STM32F4 debugging
- nRF51 1:1: 1:1 match with nRF51 debug pinout on the Crazyflie 2.X, pinout:
- SWIO
- GND
- VCC
- SWCLK
Debug instructions
For some basic debug instructions go to the instructions for the STM32 or the instructions for the NRF of the crazyflie.
Resources
If you have any further questions please contact support@bitcraze.io