The Color LED deck
The Color LED Deck gives the Crazyflie® 2.x and Crazyflie® Brushless the ability to light up with custom WRGB (White, Red, Green and Blue) colors, making the Crazyflie able to provide visual feedback in research, be a dazzling addition to a show, and much more. This Getting started guide shows how to get up and running with the Color LED deck in the client.
Prerequisites
Before you start using the Color LED deck, you should do the following:
- Follow the Getting Started Guide for your Crazyflie platform to set up your Crazyflie and the client.
- Update your Crazyflie to the latest firmware. For more information on how to update the firmware, see the Firmware Upgrade section in the client documentation.
- Update to the latest version of the Crazyflie client.
This guide assumes that you have already set up the Crazyflie and client, and that you are familiar with how to connect to your Crazyflie in the client.
Top and Bottom Versions
The Color LED deck comes in two versions based on its position on the Crazyflie: top and bottom. They can be attached at the same time if you have both versions. It is important to attach the deck correctly since it only works in its intended position.
If you are unsure about what version you have, check the following:
- The bottom version (left in the image below) has the text “front up” and has visible connectors.
- The top version (right in the image below) has the text “front down” and no visible connectors.
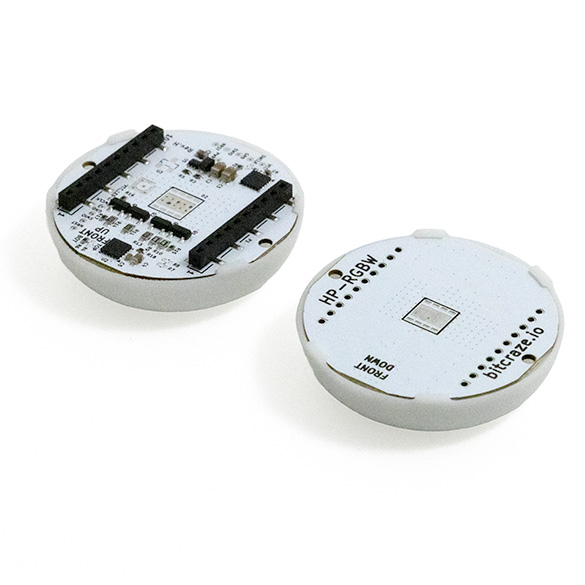
Attaching the deck works the same way for both versions. Make sure the Crazyflie is powered off, position the deck in the correct orientation and line up with the pins. For more information about how to mount an expansion deck, please see the Getting started with expansion decks tutorial.
Attaching the bottom version:
Attaching the top version:
Controlling Colors with the Color LED tab
- After you have attached the Color LED deck in the correct position, connect to your Crazyflie in the client.
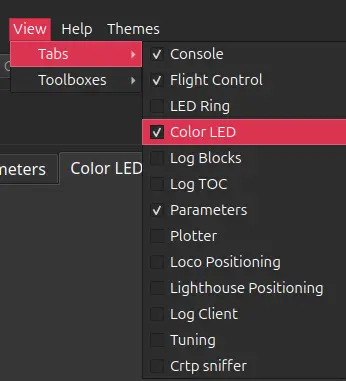
- In the client, go to View -> Tabs and select the Color LED tab in the menu.
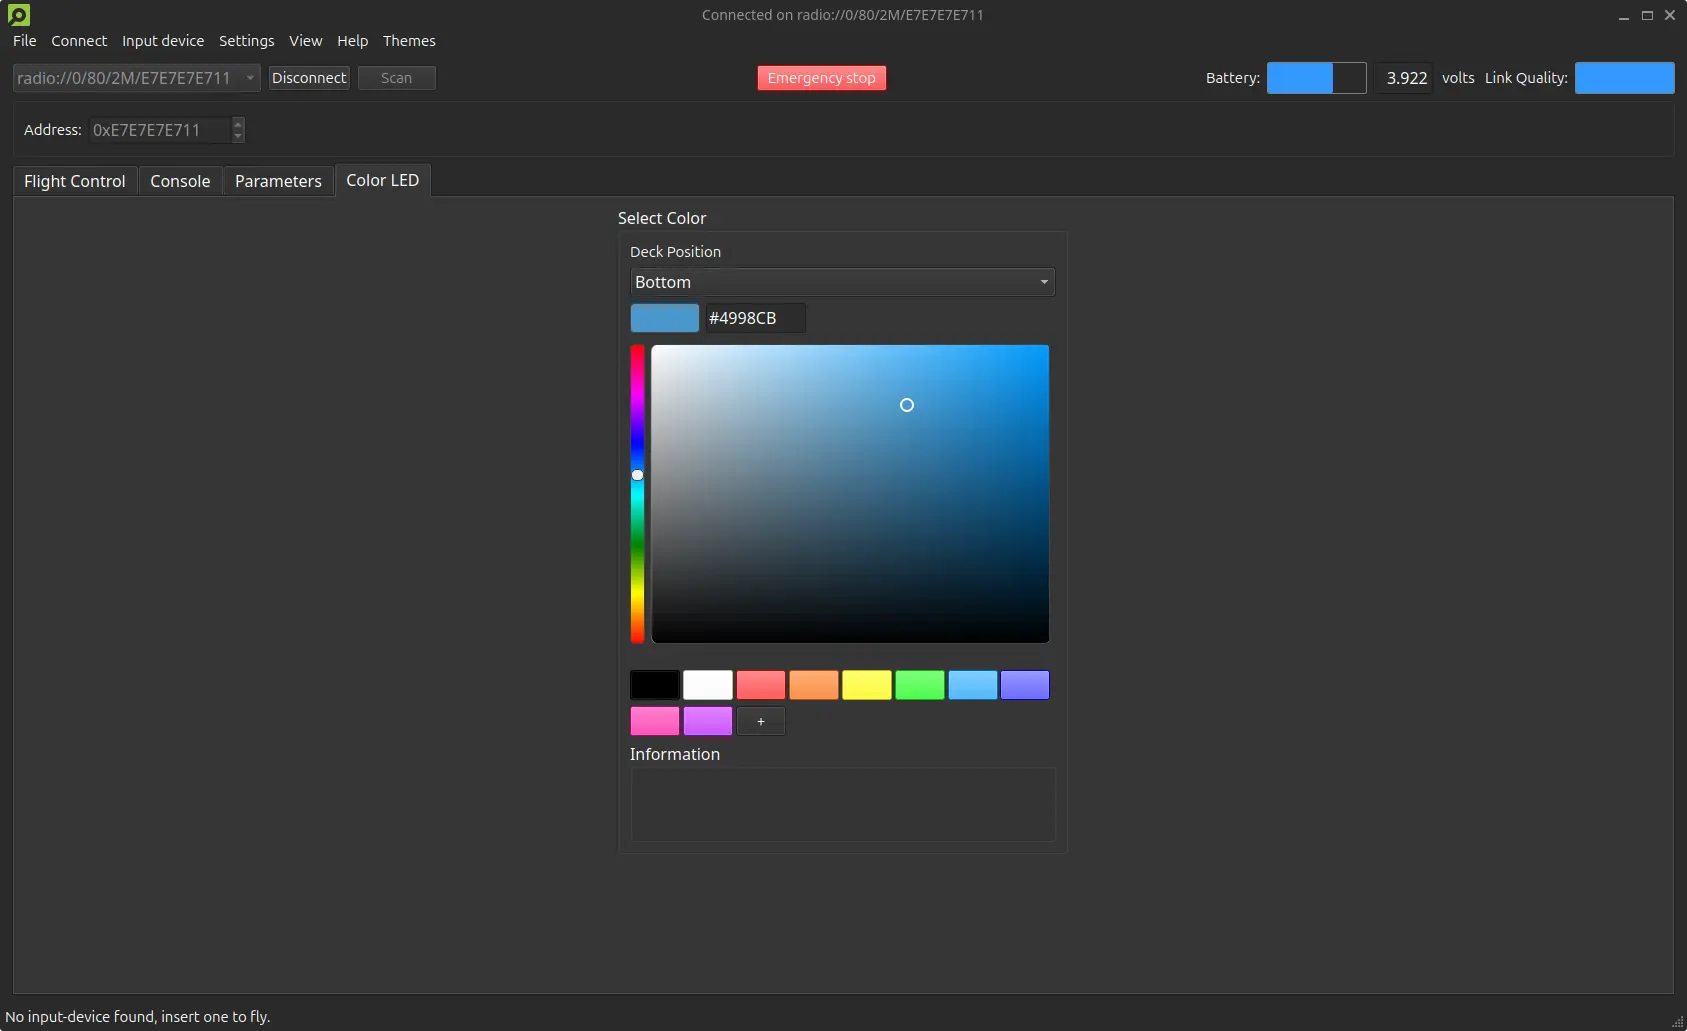
- Open the Color LED tab. The contents will be disabled if the Crazyflie is not yet connected.
- Test out the colors! You can do this by using the color field, the color buttons or entering a hex code. Learn more details about the Color LED tab in the client documentation.
Controlling Colors with Parameters
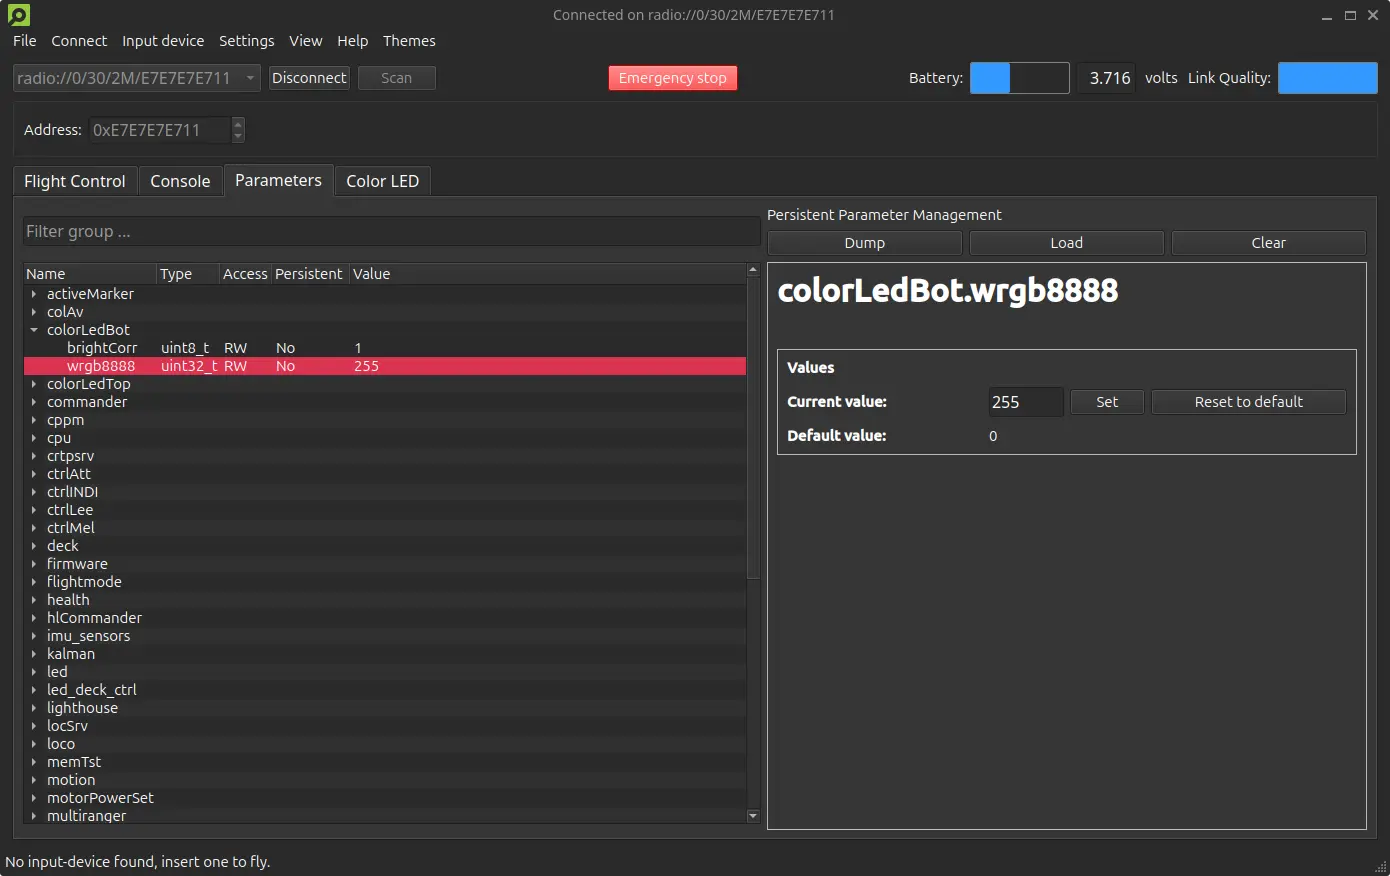
The colors of the LEDs in the Color LED deck can also be controlled by parameters. This can be done in different ways, for example through the client, firmware or Python lib. We will now look at how to do it from the client in the Parameter tab. Add the Parameter tab the same way that you added the Color LED tab. The Color LED deck has its parameter group depending on its version:
- colorLedBot controls the bottom version, and
- colorLedTop controls the top version.
The group consists of two parameters:
- brightCorr enables brightness correction (gamma and luminance normalization) for the Color LED deck. The value can be either 0 (off) or 1 (on).
- wrgb8888 controls the color via a color value between 0 and 255 in WRGB format (0xWWRRGGBB). For example: 255 = 0x000000FF = max blue.
The Color LED deck in action!
What's Next?
- Learn how to control a Crazyflie with scripting and the Crazyflie Pyton lib using our Software User Guides.
- Check out the Color LED examples using our Python lib.
- Try out the LED Color Cycle Example Firmware App to see an example of how to create an app in the firmware to run light patterns for the Color LED deck.