Add your own hardware
How it works
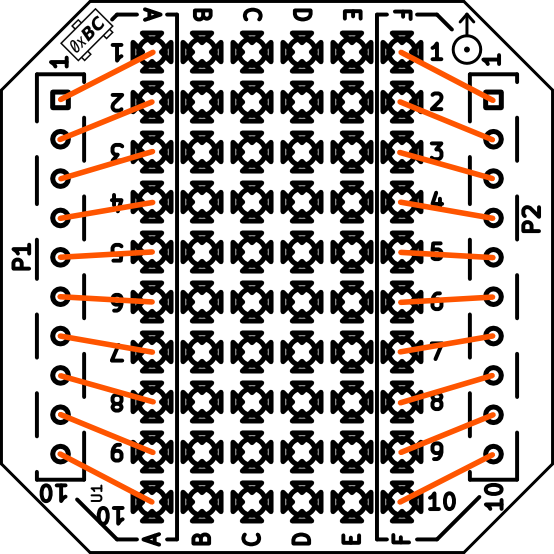
Add a prototyping area to your Crazyflie 2.x and lift your electronics into the air. Just solder directly on the expansion deck and plug it into the expansion port. Maybe try to add a few LEDs or a new sensor to detect properties of the world around the Crazyflie?
Specifications
Features
- Soldering pads support both though hole and SMD components
- Has SOT-23 footprint for 1-wire memory used for automatic detection (not mounted)
Mechanical specifications
- Weight: 1.5 g
- Size (BxHxW): 28x28x4mm
- Designed for mounting above or under the Crazyflie 2.X
Electrical specification
- Makes all 20 pins in the Crazyflie 2.X expansion port available
- 40 pads for prototyping (supporting both though hole and SMD components)
- Footprint for optional 1-wire memory (not mounted)
Usage
The Prototyping deck allows electronic circuits to be attached on Crazyflie 2.0.
Both through holes and SMD components can be soldered to the deck. The shape of the pads makes it possible to solder SMD capacitor and resistor which saves space and weight.
The two pad rows that are closest to the expansion connector are connected to the connectors.

Detection memory
If you want your prototype deck to be detected automatically by the Crazyflie, for example to activate your driver code when the deck is connected, you can solder a one-wire memory DS28E05 in the pads near P1 pin 10.
Development
The prototype deck is already a development oriented product, so check out the ‘Usage’ tab for more details!
Projects:
Resources
- Start here
- Development overview
- FAQ
- Getting help
- Expansion decks of the Crazyflie 2.x
- Datasheet
- Schematics
Tutorials
Getting started with expansion decks
If you have any further questions please contact support@bitcraze.io
