Crazyflie assembly
The Crazyflie is sold as a kit, it requires some assembly and soldering. There is a video describing the assembly steps:
Required hardware
Once assembled you will need a computer, a gamepad and the Crazyradio dongle to fly the Crazyflie.
Any gamepad with at least four axes will work. The following gamepads are supported out of the box:
- PS3 USB controller (Tricky for windows, works on Linux, Mac and the Bitcraze virtual machine).
- PS4 USB controller
- XBox 360 USB controller
Other gamepads can be configured in the Crazyflie client software.
The Crazyradio dongle shall also be connected to the computer. The documentation contains the Windows driver installation instructions. Mac and Linux does not require drivers but Linux requires some configuration.
Installing software
The Crazyflie is controlled using a software named Crazyflie PC client (cfclient in short). There are two possibilities to fly the Crazyflie: Either running the software directly on your machine or using our virtual machine.
- If you want to develop for the Crazyflie or if you do not want to install software and drivers directly on your computer the Bitcraze virtual machine is the way to go
- Otherwise installing it directly on the computer is lighter to download and use.
Windows
The windows installer can be downloaded from GitHub It installs the Crazyflie PC client. The Crazyradio USB dongle driver has to be installed independently.
Linux and Mac
Instruction for Linux and Mac can be found in the Crazyflie client readme file. The package for Linux and Mac can be downloaded from GitHub
Using the virtual machine
We provide a virtual machine running a Linux distribution pre-installed with all the software required to use the Crazyflie but also to develop with it. The virtual machine download link can be found on the virtual machine release download page.
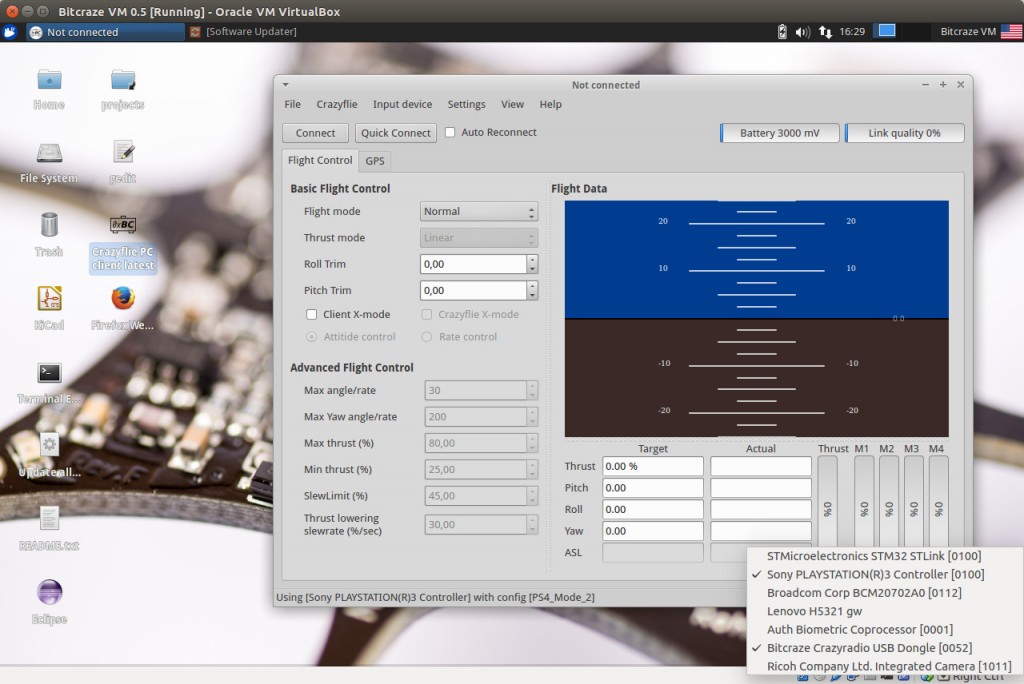
The virtual machine comes as a standard OVA file which means that it can run with many virtualization applications. However it has been setup and mostly tested on VirtualBox. You can donwnload VirtualBox for you computer, install it and then double-click on the Bitcraze virtual machine to start using it.
When the virtual machine is started, the Crazyradio and your gamepad should be connected to it:

Flying
Now you should have the client launched, the gamepad and the Crazyradio plugged in and working.
- In the “Input device” menu select the gamepad and the mapping. Check by moving the axes that the Thrust, Pitch, Roll and Yaw fields are showing meaningful values.
- You can verify in Help/About/Debug that the Crazyradio is recognized. It should show something like: “radio: Crazyradio version 0.52”
Switch the Crazyflie ON and put it on a stable surface (it needs to calibrate its sensors). In the client, click connect and select your Crazyflie in the list (should look like “radio://0/42/2M”) and finally click connect. The Crazyflie is now ready to fly!
More information
The main sources of information for the Crazyflie are the documentation and the discussions page. The documentation on the web is open to contribution, which is accessible with a github account. The discussions page is also accessible with a github account.