Introduction
This short guide shows how to run a very simple Crazyflie simulation using Webots. It’s not realistic, feature-rich, or actively maintained, but it might be fun to play around with or help spark ideas.
If you’re looking for more serious simulators, check out our overview of simulation options.
Prerequisites
All you need is the Webots simulator.
- Make sure your computer meets the Webots system requirements.
- Install the latest version by following Cyberbotics’ instructions.
Try Out the Crazyflie Example
Let’s get something running. Here’s how to open Webots, load the Crazyflie model, and test the keyboard controls.
Open Webots and Load the Sample World
- Launch Webots (
webotsin terminal or search for it on your system). - Go to ‘File’ > ‘Open Sample World…’.
- Navigate to:
robots > bitcraze > crazyflie > crazyflie.wbt.
A Quick Tour of Webots
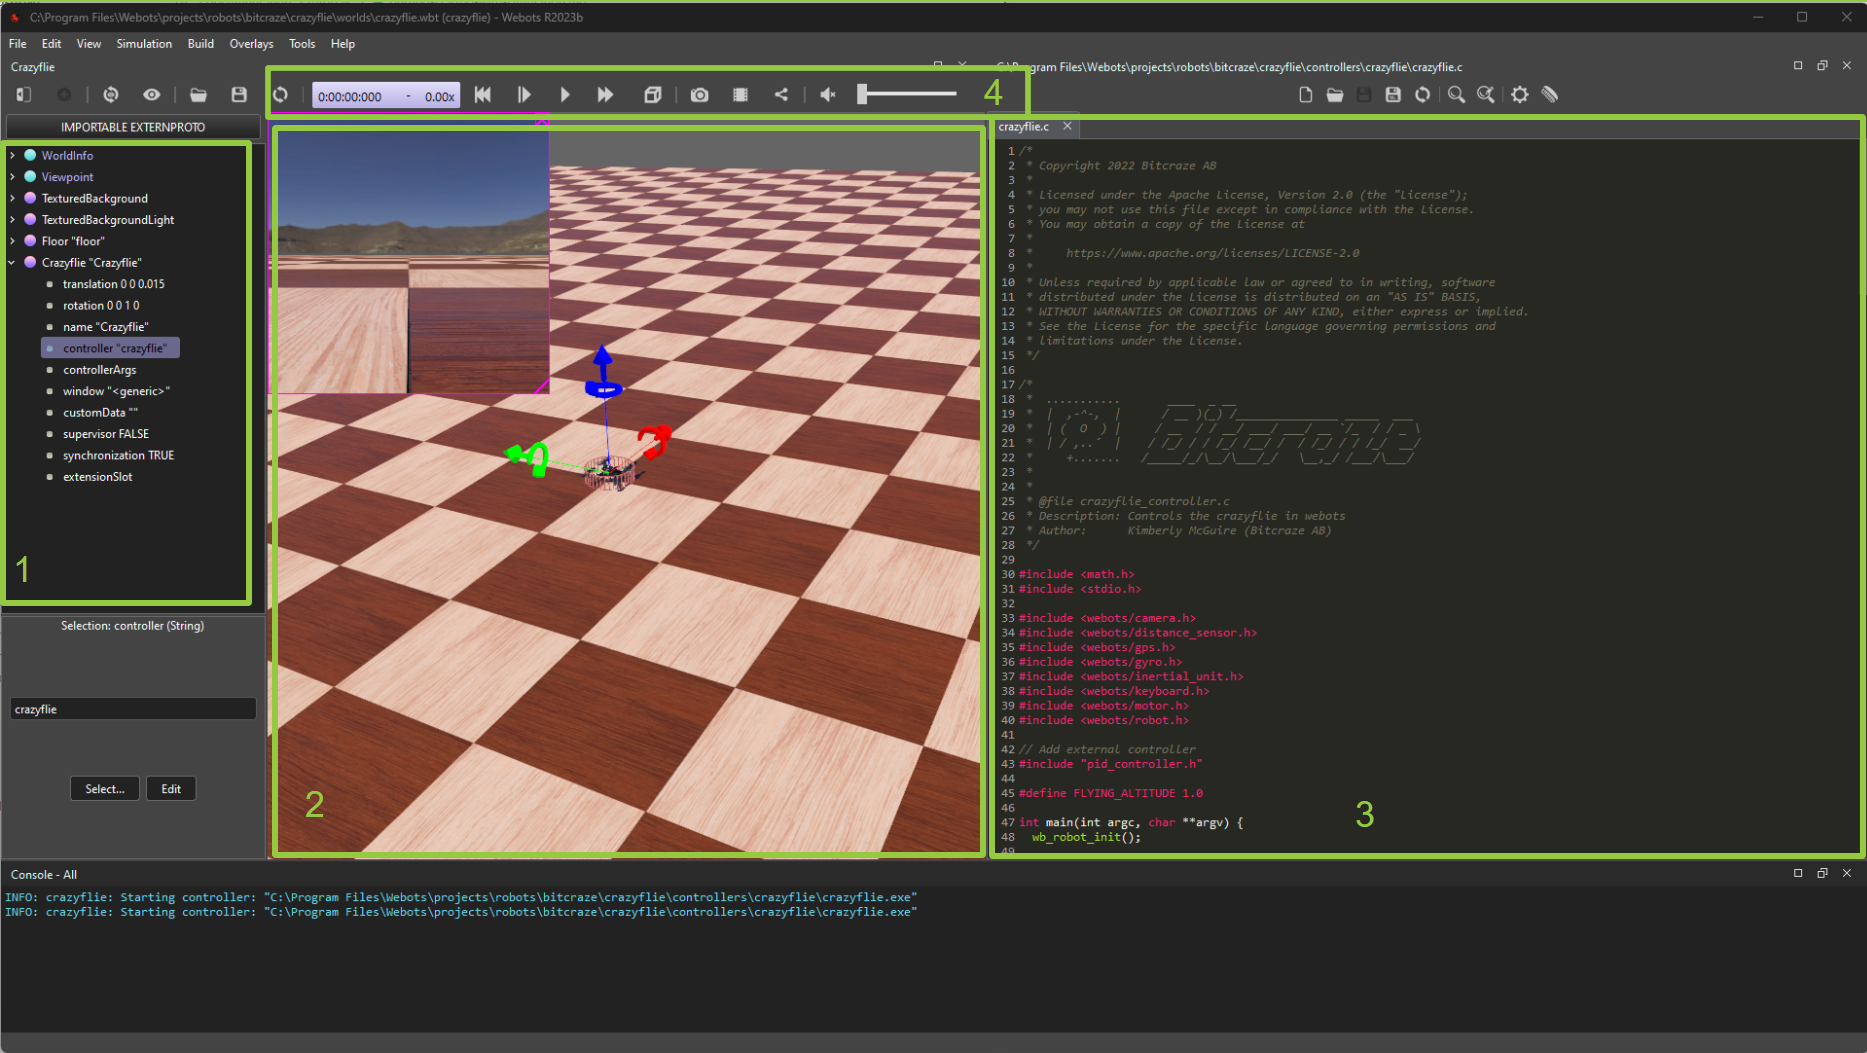
You should now see a simulation window with a Crazyflie model.

Here’s what’s what:
- Object tree — add robots and objects.
- Simulation window — visual output.
- Controller editor — view the controller code.
- Control panel — start, stop, or adjust the sim speed.
More detail is available in Webots’ user interface guide.
Try the Keyboard Controls
- Press “play” in the control panel.
- The Crazyflie should take off.
- Click the simulation window to focus it.
- Arrow keys: move in x/y.
- Q/E: yaw.
- W/S: altitude.
You can view the controller code in the editor. If it’s not visible, go to the object tree, find Crazyflie "Crazyflie", click controller, then edit.
At this stage, editing the code directly isn’t supported in-place. We’ll show how to do that next.
Test a Basic Autonomy Example
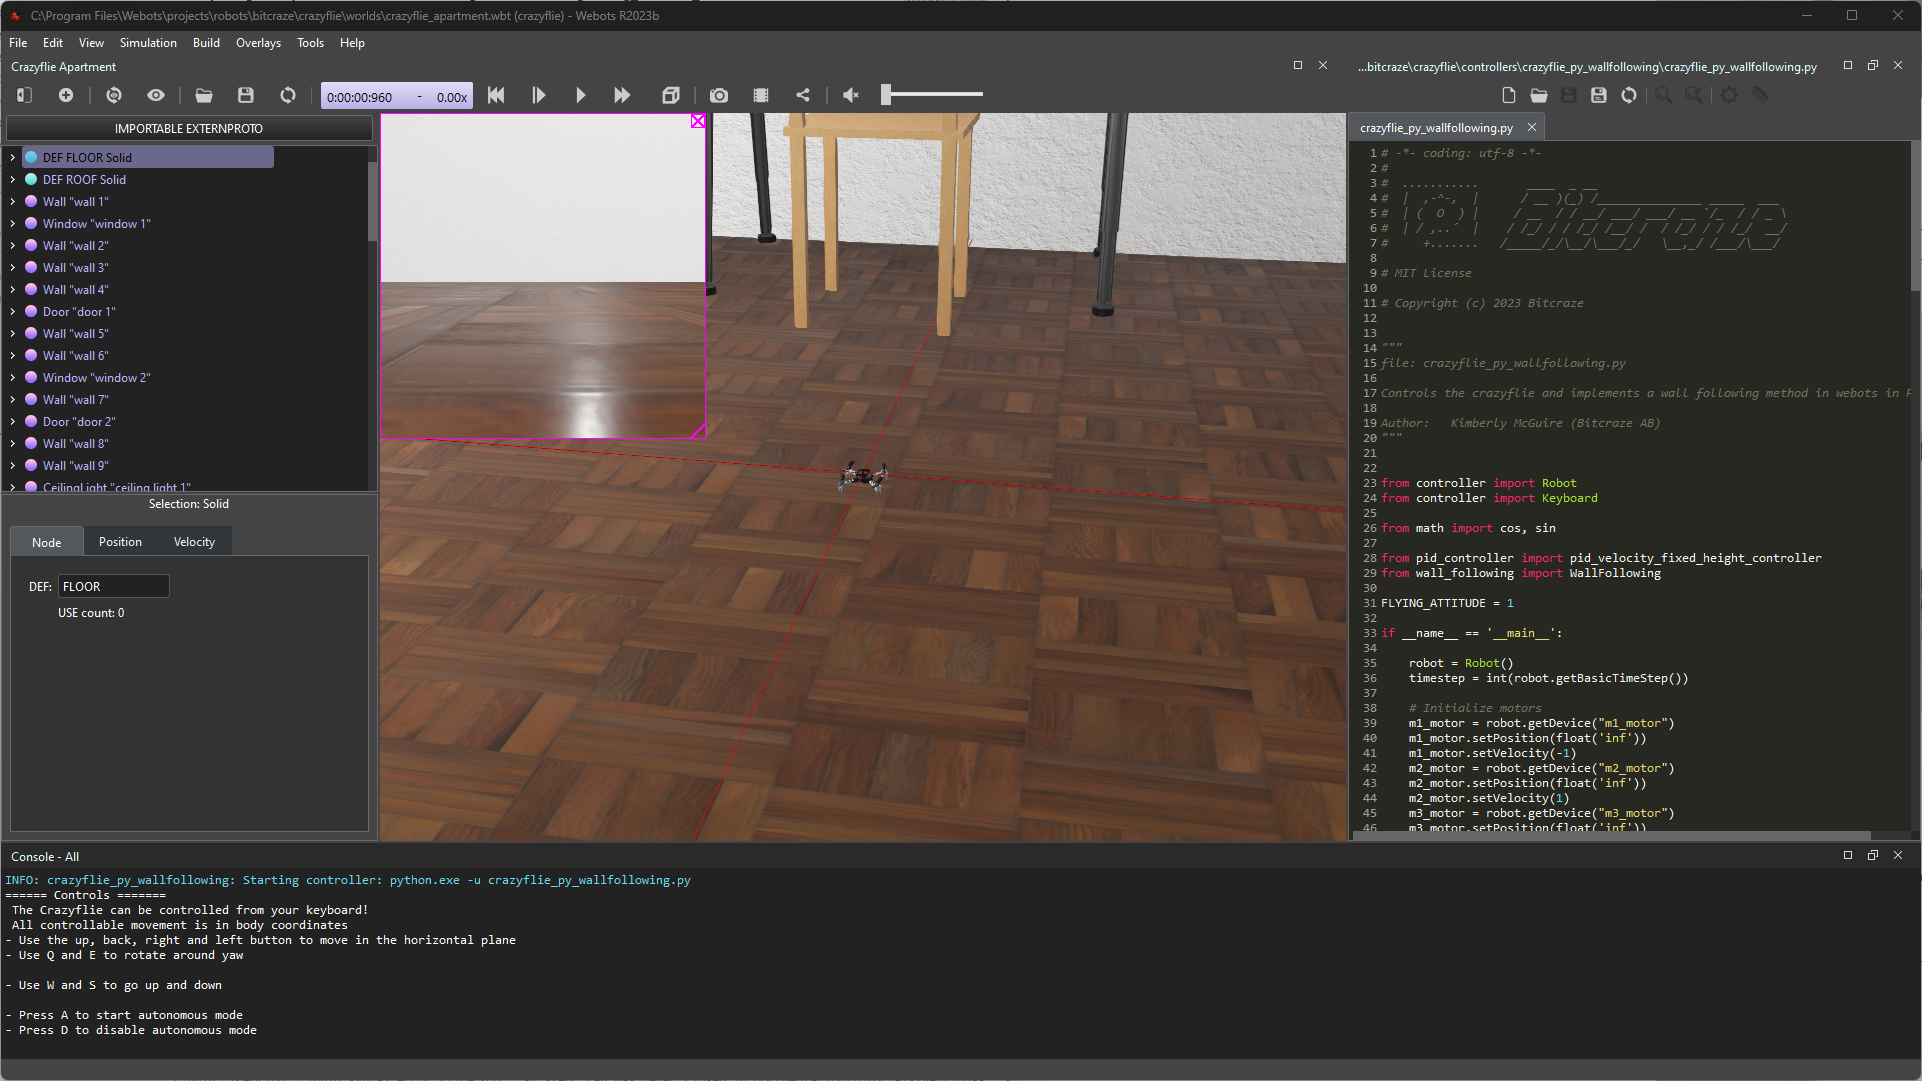
There’s a second example that does some crude wall following.

- Open
crazyflie_apartment.wbt. - You’ll see a small indoor environment, range sensors acting like the Multi-ranger deck , and a virtual camera.
- Press play. The Crazyflie takes off.
- Control the Crazyflie with the keyboard as before.
- Press
Ato start wall following. PressDto stop it.
If things break after restarting, try the simulation reload button ().
Editing the Controller
If you want to tinker with the code, you’ll need to save the project to a writable location.
Save the Project Elsewhere
- Reload the
crazyflie_apartment.wbtworld if needed. - Open the controller editor via the object tree.
-
Try changing:
# OLD direction = WallFollowing.WallFollowingDirection.LEFT range_side_value = range_right_value # NEW direction = WallFollowing.WallFollowingDirection.RIGHT range_side_value = range_left_value - When prompted, copy the world to a folder where you have write access.
- Save your changes and press play. After pressing
A, the Crazyflie should follow the wall in the opposite direction.
Next Steps
This setup is limited, but it may be a good starting point. If you want to dig into the code:
git clone https://github.com/bitcraze/crazyflie-simulation
You can find the example scenes and controller code in there. It’s also worth looking at more mature projects — see our simulation overview for recommendations.