The Buzzer deck
The Buzzer deck contains a low profile piezo buzzer and has a 1-wire memory which enables the Crazyflie to automatically detect the buzzer. The deck can be installed both on the top and the bottom of the Crazyflie. For more information about how to mount an expansion deck please see the Getting started with expansion decks tutorial.
To be able to use the Buzzer deck you need to update the Crazyflie to the latest firmware. For more information on how to update the firmware, see the update firmware in the Crazyflie section in our getting started with Crazyflie 2.x tutorial.
system sounds
When the Buzzer deck is installed, the Crazyflie 2.x will play sounds at various events, for instance when the battery is charged. The events are
- Start up
- Sensors calibrated
- Low battery
- Charging completed
- USB connected
- USB disconnected
play a sound from the client
To start out with the Buzzer deck the Crazyflie is pre-programmed with system sounds and some melodies. To play them you need to use the Python client and set up a connection with your Crazyflie. For more information about how to set up your Crazyflie and install the client go to Getting started with the Crazyflie 2.0 or Crazyflie 2.1(+).
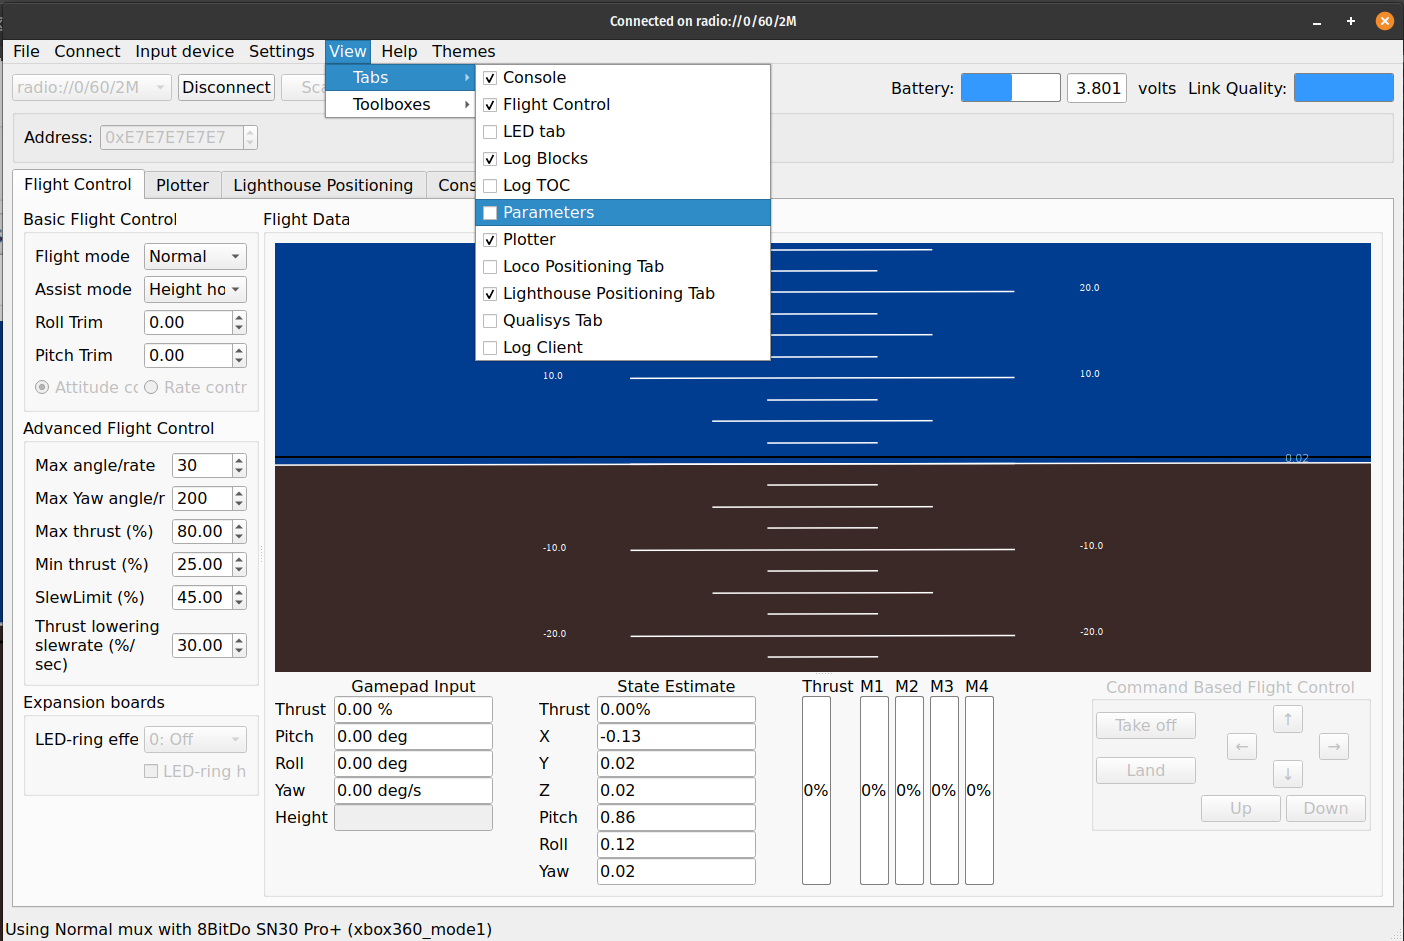
In the client, go to the view menu and choose tabs. Check “parameters” to enable the tab.

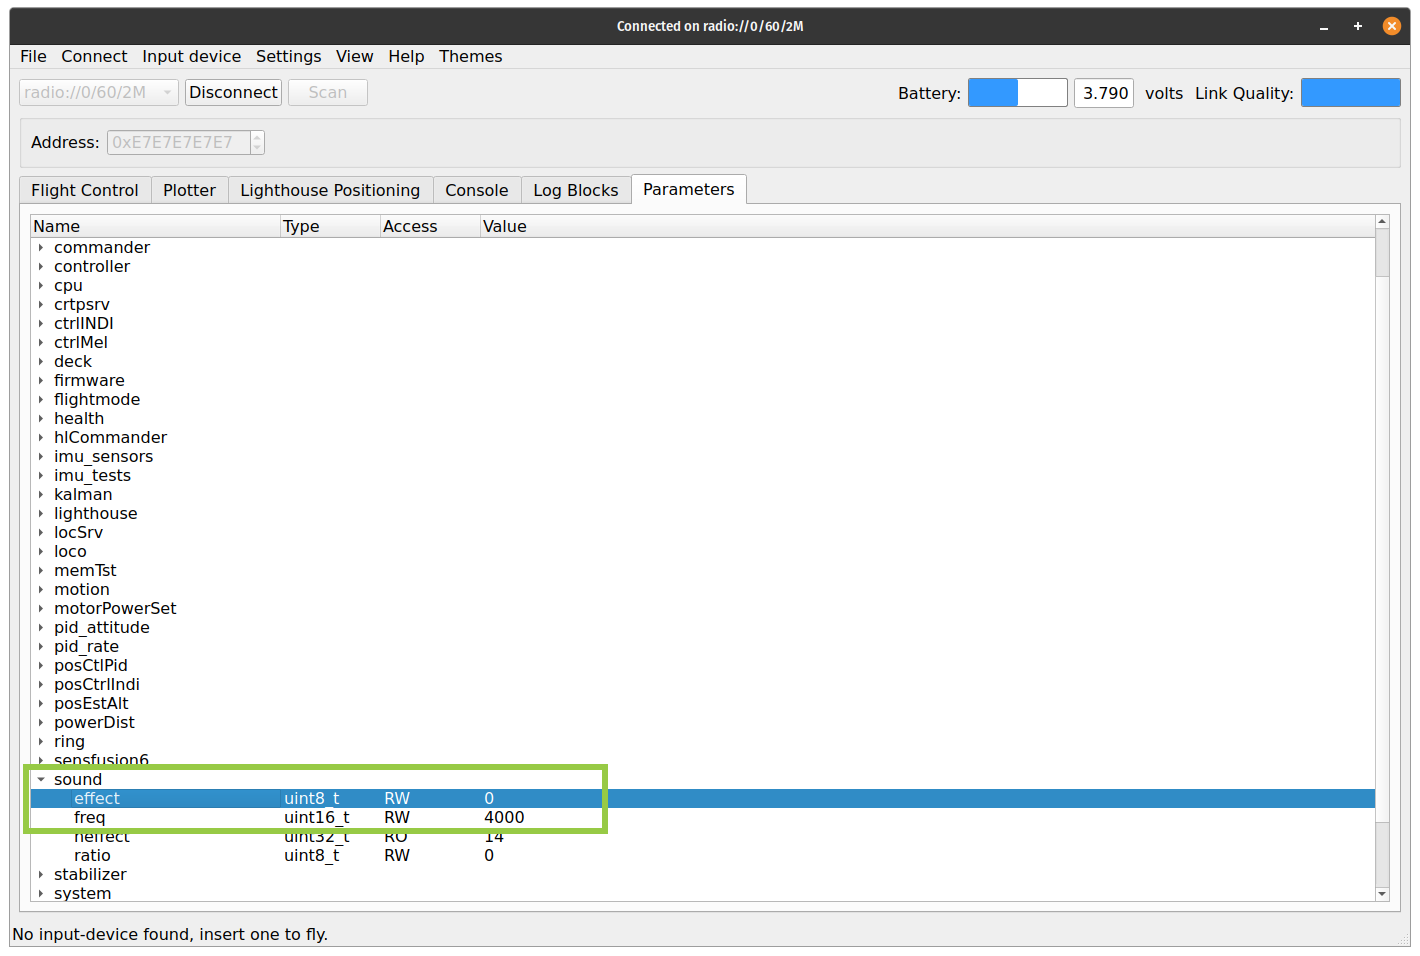
Click the parameters tab and scroll down to sounds. In the effects row double click the number in the value column and type the number of the sound you want to play. You can find the list of sounds below

list of sounds
Here is a list of the pre-programmed sounds you can choose from:
| Number | Name | Function |
|---|---|---|
| 0 | Silent | |
| 1 | Factory test | |
| 2 | USB connected | |
| 3 | USB disconnected | |
| 4 | Charging done | |
| 5 | Low battery | |
| 6 | Start up | |
| 7 | Calibrated | |
| 8 | Range slow | |
| 9 | Range fast | |
| 10 | Star Wars | Who doesn’t love Star Wars! |
| 11 | Valkyries | |
| 12 | Bypass | Change sound pitch by changing the value in the freq row |
| 13 | Siren | |
| 14 | Tilt | Tilt the Crazyflie to play the sound |
Also check out the automated documentation of the parameters