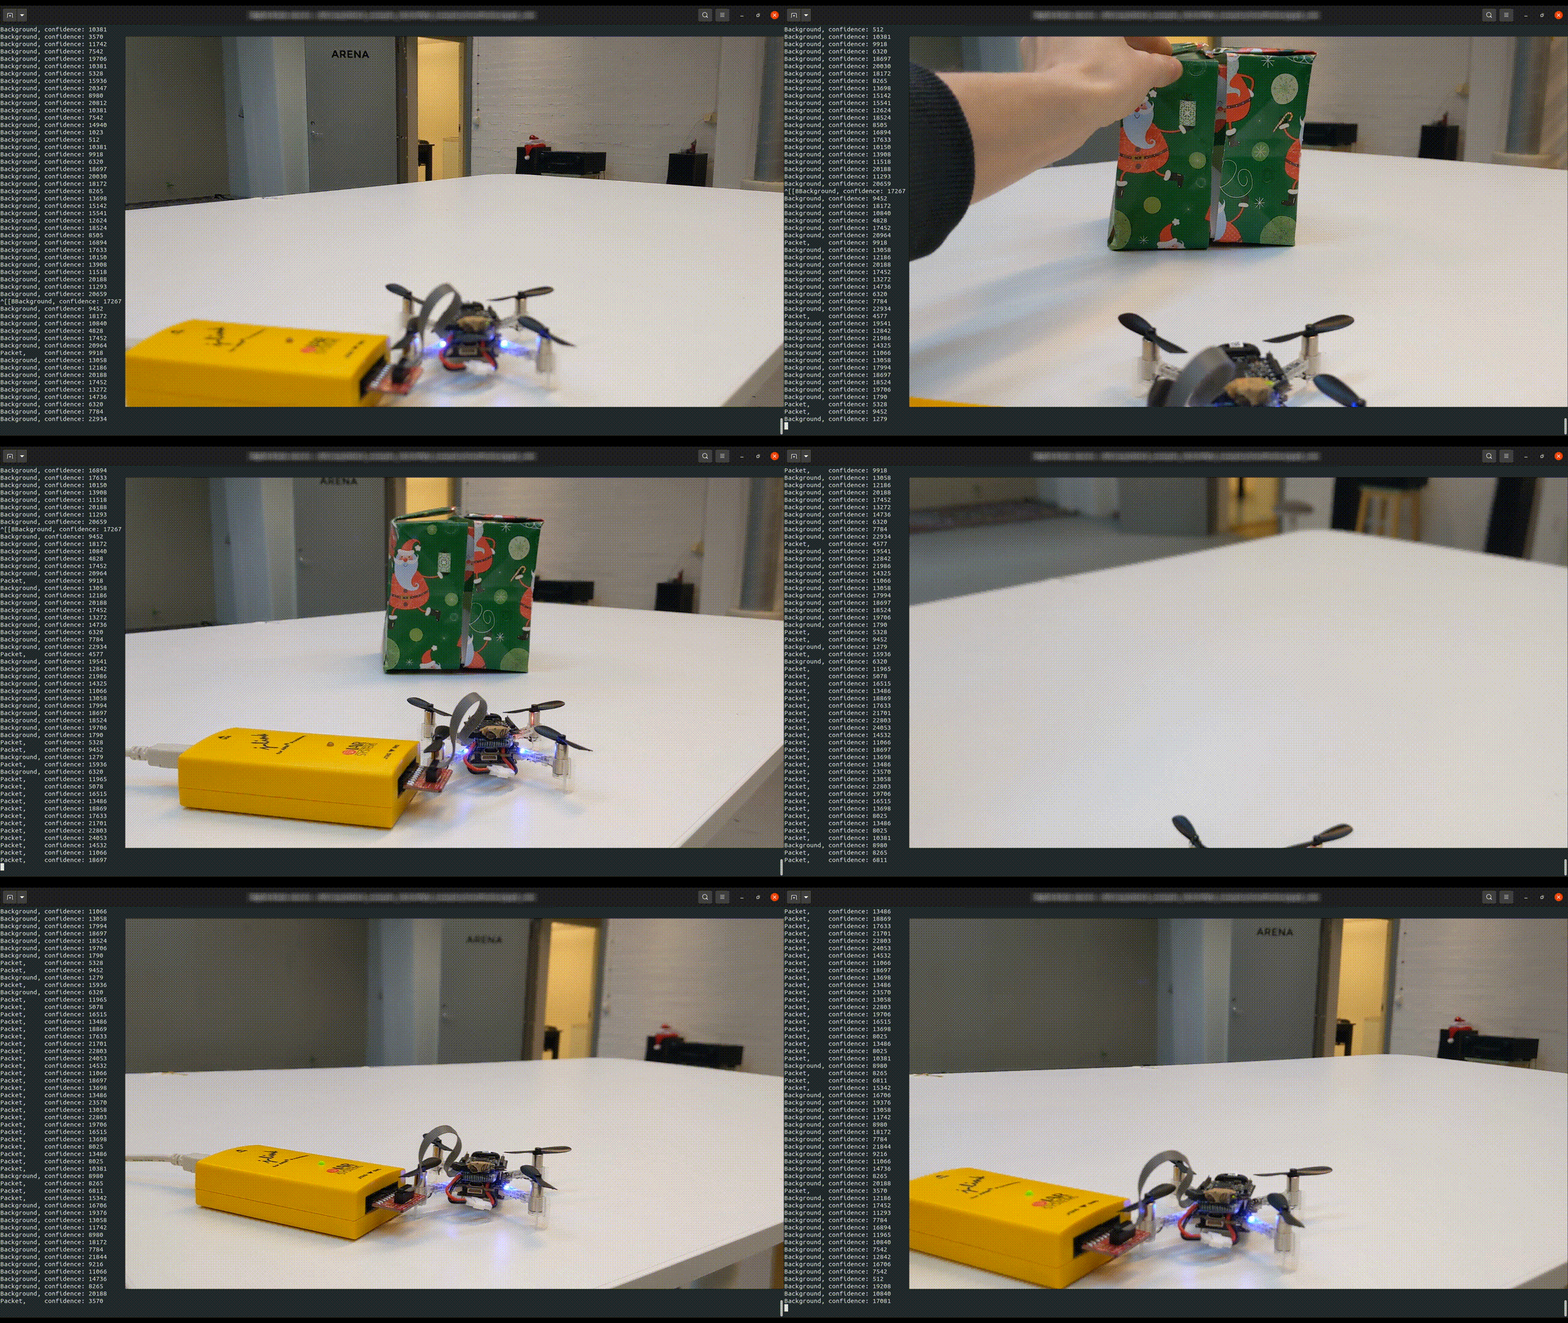
In this example, a binary classification CNN (object or background) is trained and executed on the AI-deck. The models included in the example are trained on data from a very particular domain (a table in the Bitcraze arena, with a particular Christmas package) with limited data augmentation, resulting in poor generalization and low robustness. For good results on your own domain, the example can be trained on a custom dataset captured by the AI-deck camera, and fitted to detect multiple custom classes of your choosing. The training can currently only be done on a native installation. Execution on / flashing the AI-deck can be done with a native installation or with the GAP8 docker.

The used CNN is a pre-trained MobileNetV2 (alpha = 0.35, image input size=96x96x3) with a custom classification head and prepended convolutional layers to accept the grayscale/Bayer camera stream of the AI-deck and resize this to MobileNet’s expected input shape. The example was tested on an AI-deck v1.1 with a Bayer color camera equipped.
CNN fine-tuning demo based on TensorFlow “retrain classification” demo.
For more information on good deep learning practices, we recommend reviewing Deep Learning by Goodfellow, Bengio and Courville, available online for free.
File structure
root(classification) contains everything required to (re)train a custom MobileNetV2, and export to a TensorFlow Lite model. It also contains the project to deploy the generated TensorFlow Lite model on the AI-deck.
model/ contains the generated TensorFlow Lite models, and nntool scripts.
training_data/ should contain all training/validation images, the TensorFlow training pipeline expects a file structure as included, with separate folders for each class in both a train and validation directory.
samples/ should contains sample images used by nntool to quantize the imported models (optional, only required if MODEL_PREQUANTIZED = false in Makefile). These can be taken from the dataset.
Prerequisites
Build Environments
Tensor Flow
- A seperate Python environment with Python requirements installed. We recommend using a virtual environment manager such as Miniconda or Penv. Use python version 3.10 and install requirements using pip:
pip install -r requirements.txt
GAP8
There are two approaches for this:
- Install gap_sdk natively on your machine (>= 4.22.0)
- Build inside Docker container with gap_sdk >= 4.22.0
This document uses the Docker container to compile the example.
Select your model
Option 1: Fine-tune model with your custom dataset (recommended)
Collect data
Collect images from the AI-deck using the WiFi streamer example with the opencv-viewer script (use the –save flag). Place them in the training_data folder, according to the instructions inside. The captured data must be split into a train and validation set by hand (a good starting point is a 75% train - 25 % validation split). The existing classes can be renamed as desired. For more than two classes, increase the number of units in the final (dense) layer of the model.
This is the folder structure you should follow: Put here the training and validation images like this:
/train/class_1/*.jpeg
/train/class_2/*.jpeg
/validation/class_1/*.jpeg
/validation/class_2/*.jpeg
Fine-tune the network with your custom dataset
From aideck-gap8-examples/examples/ai/classification/ run python train_classifier.py [--args].
For possible arguments, review the parse_args() function in main.py.
Automatically generates quantized and non-quantized TensorFlow Lite models and puts them in the model/ directory.
Option 2: Use our pre-trained model
To use our pre-trained models, trained on the Bitcraze flight arena + a Christmas package, extract classification.tflite and classification_q.tflite from classification_tflite_files.zip into the model/ directory.
Deploy on the AI-deck
Option 1: Flash the image classification CNN to the AI-deck (recommended)
After successfully completing all previous steps, you can now run the classification CNN on the AI-deck. From a terminal with the docker container, or gap_sdk dev environment, in the aideck-gap8-examples/ folder, execute:
$ docker run --rm -v ${PWD}:/module aideck-with-autotiler tools/build/make-example examples/ai/classification clean model build image
Then from another terminal (outside of the container), use the cfloader to flash the example if you have the gap8 bootloader flashed AIdeck. Change the [CRAZYFLIE URI] with your crazyflie URI like radio://0/40/2M/E7E7E7E703
cfloader flash examples/ai/classification/BUILD/GAP8_V2/GCC_RISCV_FREERTOS/target.board.devices.flash.img deck-bcAI:gap8-fw -w [CRAZYFLIE URI]
When the example is flashing, you should see the GAP8 LED blink fast, which is the bootloader. The example itself can be noticed by a slow blinking LED. You should also receive the classification output in the cfclient console.
Option 2: Run the image classification CNN on the AI-deck over JTAG
After successfully completing all previous steps, you can now run the classification CNN on the AI-deck. However, as you want to run it with the debugger connected, you need to adapt the following parts of the code:
- this will overwrite the bootloader, adopt the Makefile accordingly by removing
-DFS_PARTITIONTABLE_OFFSET - if you want the output in the terminal and not over UART, uncomment io=host and comment io=uart in the Makefile
- instead of via CPX you want to write with printf, which will then be forwarded either to the terminal or UART (e.g. in cpxPrintToConsole add printf(fmt);)
- note that you might not be able to properly communicate with the NINA module if you don’t restart it as well
From a terminal with the docker container, or gap_sdk dev environment, in the aideck-gap8-examples/ folder, execute:
docker run --rm -v ${PWD}:/module aideck-with-autotiler tools/build/make-example examples/ai/classification clean model build image
Then you need to write the weights and run the CNN:
docker run --rm -v ${PWD}:/module --privileged aideck-with-autotiler tools/build/make-example examples/ai/classification all run
You should now see the same output as in the gif in the beginning.