There are two different ways to flash firmware on the GAP8, via JTAG or via cfloader (Crazyflie PA). If you only want to know how to flash your own code to the Crazyflie, just skip ahead to the cfloader section. If you are interested in more details about how the two ways for flashing work, just read on, the System Architecture paragraph will explain it to you.
System Architecture
GAP8 always executes code from L2 (second-level RAM), as it has no internal flash. However, it can load code into L2 over a HyperBus interface from external flash memory on startup (which it does if a fuse is blown, however this is already done on your AIdeck and out of scope here). As GAP8 has only volatile memory, it must always load code from exactly the same flash address. To make it possible to update applications easily, we implemented a bootloader, a minimal program which is the first thing to run on startup. The bootloader can either update the application code in flash or copy it into L2, and, if the code is valid, run it. Why is this easier? First, you don’t need to connect a programmer, as the bootloader can read data over other peripherals (in our case SPI from the NINA module). Second, it is safer - if the update fails (and you, for some reason, end up with random code where your application should be) the firmware code will not be valid (the hash computation will fail) and GAP8 will not jump to the corrupt application code but instead safely stay in the bootloader.
As the chain for the over-the-air update with the bootloader is rather complex, we illustrate the ways to flash GAP8 in the image below.
- the blue path illustrates how you can program over JTAG - you can either write code directly into L2 to run it (this is volatile memory, the code will dissapear if you power cycle) or you can write it into flash (over GAP8), such that it is loaded on startup (if you overwrite the bootloader, not recommended) or with the bootloader.
- the red path is using the cfloader. Meaning it sends your code over the Crazyradio to the nRF, then further to the STM32, from there to the ESP32 (the NINA WiFi module) and from there to the GAP8. This path uses CPX messages; you can read more about it in the CPX documentation.

cfloader
If you want over-the-air firmware updates, you can use the cfloader by running the following command.
$ cfloader flash [binary] deck-bcAI:gap8-fw -w [CRAZYFLIE_URI]
You find the binary (after you built your code) under BUILD/GAP8_V2/GCC_RISCV_FREERTOS/target.board.devices.flash.img. An example for the CRAZYFLIE_URI is radio://0/80/2M/E7E7E7E7E7.
Note, this requires the GAP8 bootloader to be flashed on the GAP8 (which is the case for all AIdecks equal or newer than version 1.1 Rev D). For a detailed step-by-step guide on how to flash the bootloader have a look at the getting started with the AI deck tutorial.
JTAG
See the JTAG programmer documentation for programmer details. You can e.g. flash the example with an Olimex ARM-USB-TINY-H JTAG using the following command (replacing example-directory with the example you want to flash):
docker run --rm -v ${PWD}:/module --device /dev/ttyUSB0 --privileged -P bitcraze/aideck tools/build/make-example [example-directory] flash
Note: This will overwrite the bootloader! Remove the partition table offset (-DFS_PARTITIONTABLE_OFFSET) if used in the application
Note: USB in docker is only supported on Linux
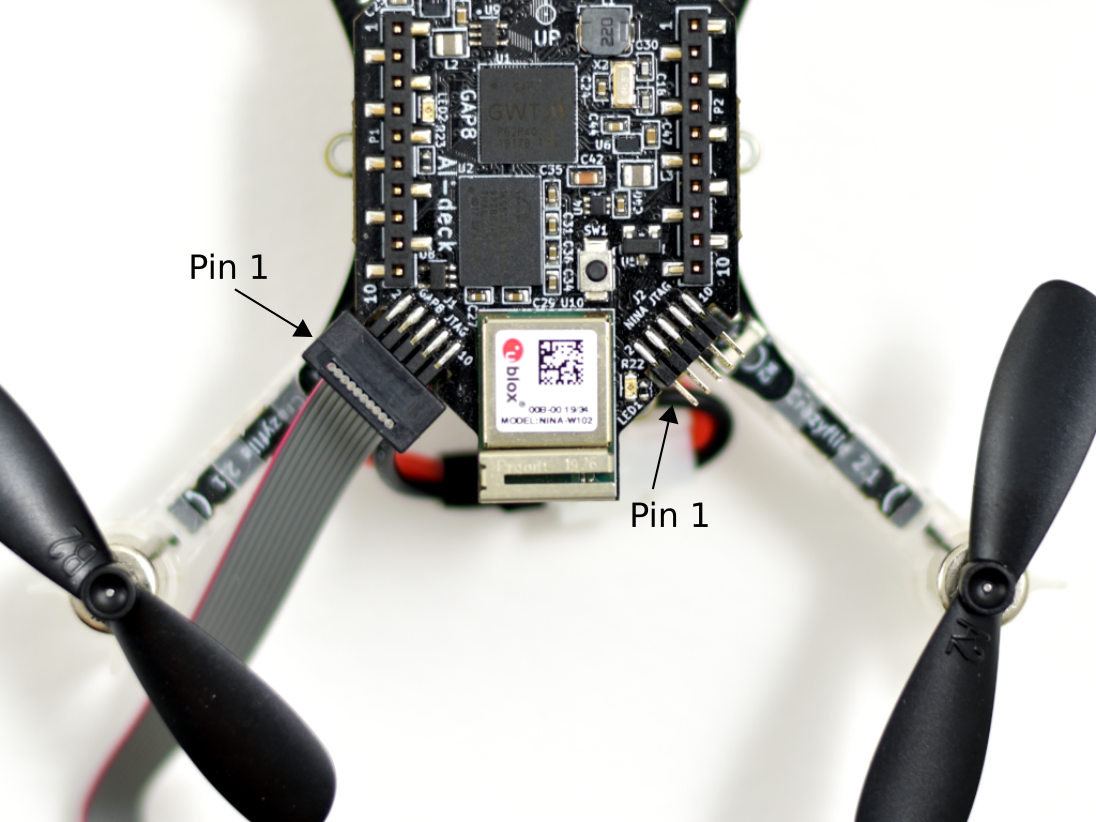
JTAG link cable connection