This example streams JPEG or raw images from the GAP8 to the host where they are displayed and colorized.
Prerequisites
- Completed the Getting started with the AI deck tutorial
Setup the WiFi via the Crazyflie firmware
The WiFi on the aideck can be set up in a number of ways, but to keep things simple for this tutorial we will be setting it up via the Crazyflie firmware as an access point, which means you will be connecting to the AI deck’s WiFi to run the examples.
First see the crazyflie-firmware repository documentation for more details on how to build and flash and checkout how to setup kbuild’s menuconfig.
Clone the crazyflie firmware via these instructions.
Then configure the Crazyflie firmware with the kbuild instructions.
In the kbuild menu, go to Expansion deck configuration and make sure Support AI deck is enabled. In the Support AI deck sub menu select WiFi setup at startup and the option Act as Access Point. Now go to the Credentials for access-point menu and set the SSID and KEY as you wish.
Now it’s time to flash the firmware. Use the following instructions to flash the configured firmware to the crazyflie.
Configuration Wifi example
To select which mode (RAW or JPEG) change the code below in the wifi-img-streamer.c file.
typedef enum
{
  RAW_ENCODING = 0,
  JPEG_ENCODING = 1
} __attribute__((packed)) StreamerMode_t;

static StreamerMode_t streamerMode = RAW_ENCODING;
Building and flashing the example
To build and flash the example run the following:
$ cd aideck-gap8-examples
$ docker run --rm -v ${PWD}:/module aideck-with-autotiler tools/build/make-example examples/other/wifi-img-streamer image
$ cfloader flash examples/other/wifi-img-streamer/BUILD/GAP8_V2/GCC_RISCV_FREERTOS/target.board.devices.flash.img deck-bcAI:gap8-fw -w radio://0/80/2M
Note: if you get Unable to find image 'aideck-with-autotiler:latest' locally, make sure that you have done the getting started guide of the ‘Setting up development environment’ properly. Or replace it with the autotiler-less docker image bitcraze/aideck.
Starting the viewer
In order to start the viewer, you will need the python package of opencv. Do check this issue if you also use the cfclient.
Install opencv python:
$ pip install opencv-python
In order to view the images from the GAP8 connect to the WiFi access point on the deck and run the following:
$ cd aideck-gap8-examples/examples/other/wifi-img-streamer
$ python opencv-viewer.py
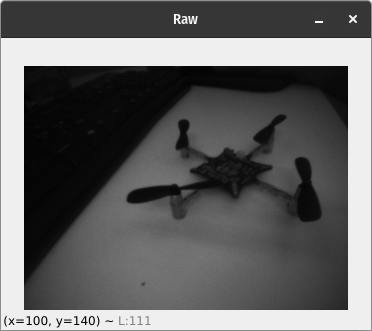
Then you should be able to see the raw/color or jpeg image in the viewer like this:
Note: If you like to save the images, you can run the opencv-viewer.py with the --save flag.
Note: If you enabled your aideck to connect to a wifi point, you would need to check the console tab of the cfclient to retrieve the ipaddress of the aideck. Then you will need to use the -n with the ip address with the viewer script.