A couple of weeks ago we played with recording and retracing trajectory directly from the Crazyflie using Loco Positioning System. The result was quite nice and resulted, a first for us, in a fully autonomous Crazyflie, no computer or controller required:
We decided to expand on this experiment for our demo at ICRA. We have modified the retracing code to accepts multiple modes, including running pre-programmed sequence. The plan for the demo is to have Crazyflies that can:
- Record and retrace a manual trajectory
- Record and replay in a loop a manual trajectory
- Play a pre-defined trajectory in a loop
- Land automatically when the battery level is low
With this we should be able to demonstrate quite well the capabilities of both the Crazyflie and the Loco Positioning system, and since we do not require a computer in the loop it simplifies a lot running the demo. Of course we keep the possibility to connect the Crazyflie with the Crazyflie client and with ROS while the crazyflie is flying.
Having a completly autonomous Crazyflie is also new to us and it brings its share of problems: how to we choose the working mode and how to we stop the flight if something happens (things tends to happen …).
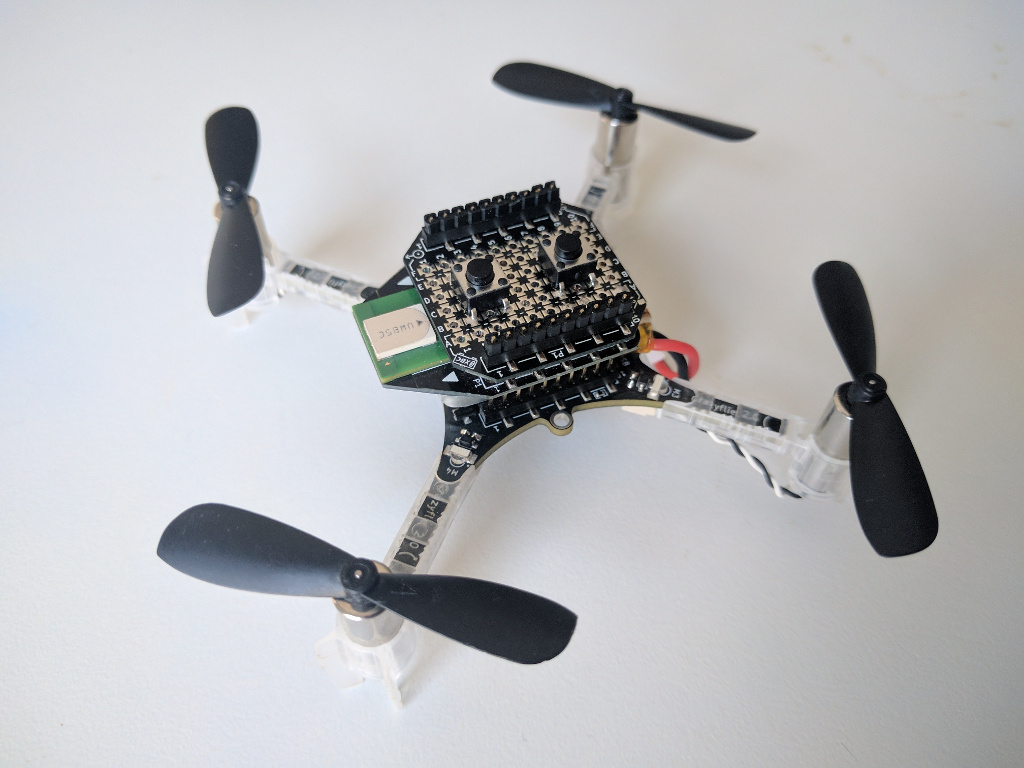
To solve the former we have made a button deck that adds 2 push-button to the Crazyflie. One means “Start autonomous sequence”. The second means “Record trajectory”. If the recorded trajectory is a loop (if the end point is close to the start point) then the loop is played back as soon as the crazyflie is dropped, otherwise Crazyflie retraces the trajectory and stop.
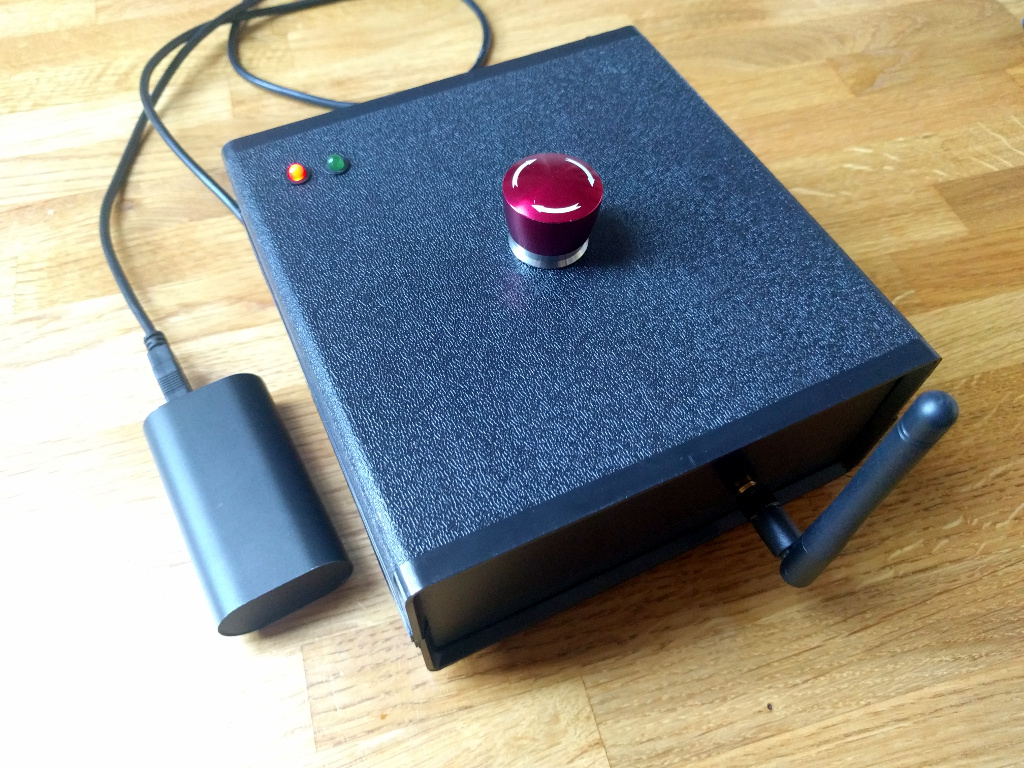
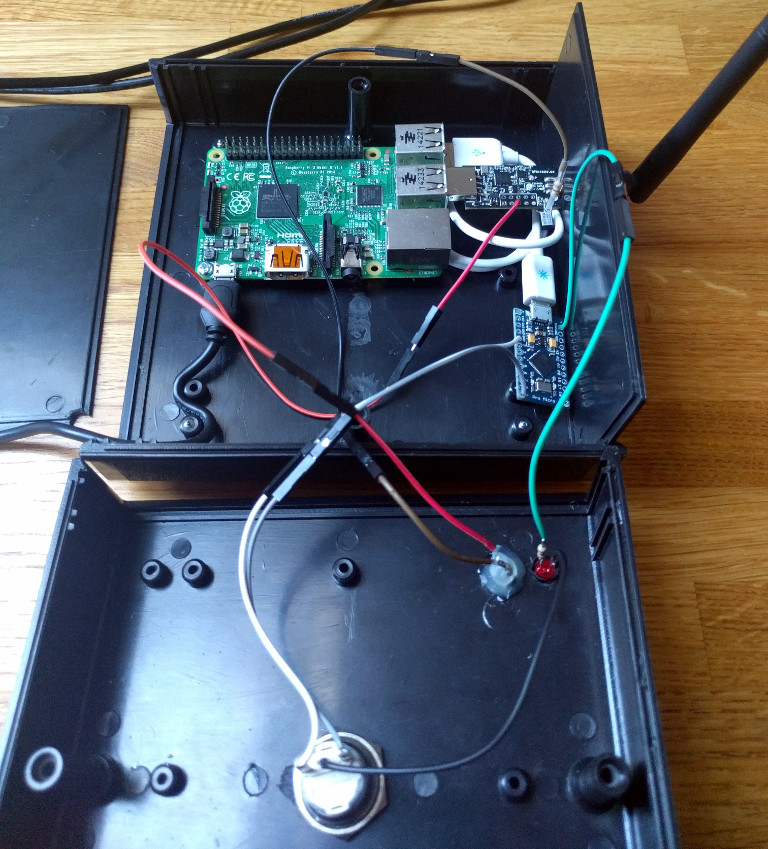
We solved the later problem by making an autonomous emergency stop button that sends a radio watchdog signal. If the signal stops to be sent or if an emergency stop signal is sent (ie. by pressing the button), the Crazyflie will stop all motors and drop. The button is implemented using a Raspberry pi, a Crazyradio and an Arduino to interface the button:
If you are curious about code, we have created a github repos where we push all code we are making for this demo. As usual, this conference is an opportunity for us to hack new functionalities, though not everything can be done in the master branch. Later some things can be merged, others (like the retrace trajectory recorder/player that looks more like a user app.) will need much more though if we want to merge it in the Crazyflie firmware.