Category: Testing

It’s not often a blog post happens on the 25th of December, so this time, you’re having a treat with some new Bitcraze prototypes as a present from us! If you have time to get away from the Christmas table, there’s something we’d love you to watch:

Now let’s try to see if you noticed all the new stuff you see in this video!

Our new flight lab

We teased it, but in the beginning of December, we got our extended flight lab! We added 110 m2 to our flight space. It was a rush to have everything ready for the video – we cleaned everything, painted the walls and the green logo, set up the positioning system without our truss… But now we’re happy to show you how big the space is! Even if it’s hard to convey the real size on camera.

The Crazyflie 2.1 brushless

We already talked about it in this blog post, but the brushless has made significant progress and we feel confident that you will get your hands on it in 2024. Here, we use the extra power for a fast and agile flight. It also was very stable and didn’t crash once during the shooting!

The Lighthouse V2

Yes, you counted right! The Brushless flew with 16 base stations! We’ve worked really hard this past three months to create a new Lighthouse deck – the Lighthouse deck 2.0. It could get its position from 16 base stations. That’s 4 times more than what was previously possible! It behaved consistently well during the different tries, and we are really happy with the result. Right now, it’s just a prototype, but we’re hoping to get it to the next step in the coming months.

The contact charging station

Marcus created a power charger for the Brushless that doesn’t need any extra deck to allow for charging. It connects with the brushless feet. It has also the cool feature of changing LEDs indicating the status (idle, charging or charged). It is also a prototype, and we don’t know if this will end up being a product

The high-power LED

This is trickier to see, but it’s not our usual LED ring that the brushless carries. It’s a new, powerful LED underneath. It is so powerful that it nearly blinded us when we tried it for the first time. We put a diffuser on it, and it allowed the Crazyflie to be visible at such a high pace! This is a prototype too of course and we’re not sure if we will release it, but it’s fun to use for this kind of project.

Other announcements

During this week, our office is closed- we take this week to celebrate and rest a little before 2024. This means that shipping and support will be greatly reduced.

But we’re back the week after- at a somewhat reduced pace though. The developer meeting on the 3rd of January is maintained but without any presentation. We’ll take this time to answer any questions you have and talk a little! The details are here.

Bitcraze got their presents this year: a handful of working prototypes! We hope we got your wishes too, merry Christmas to you!

Today, Suryansh Sharma from TU Delft presents the open-source Gimbal they devised. Enjoy!

Crazyflies (and other drones in this weight class) are extremely fun to fly and prototype with! But if you are also a scientist or tinkerer and not a well-skilled drone pilot then you might struggle with flying these platforms especially when testing new control loops or experimental code. While crashing also teaches a lot about the behavior of the system, sometimes we are interested in seeing the system dynamics without breaking the drone.

Currently, doing this for such small drones is not easy. We need something lightweight and still accessible. To solve this, we made Open Gimbal: a specially designed 3 degrees of freedom (DoF) platform that caters to the unique requirements of these tiny drones. We make two versions, (a) Tripod version which can be mounted on a camera / light tripod with a screw thread of sizes 1/4-20 UNC or 3/8-16 UNC (b) Desktop version which can be placed on a table top.

Our approach focuses on simplicity and accessibility. We developed an open-source, 3-D printable electro-mechanical design that has minimal size and low complexity. This design facilitates easy replication and customization, making it widely accessible to researchers and developers. The platform allows for unrestricted and free rotational motion, enabling comprehensive experimentation and evaluation. You can see the movement from the CAD version below:

Degrees of Rotational freedom that Open Gimbal provides

You can also check out the interactive CAD model and see how the gimbal moves here. All of the 3D model files as well as the BOM and instructions for assembly can be found in our repository here.

In our publication, we also address the challenges of sensing flight dynamics at a small scale. To do so, we have devised an integrated wireless batteryless sensor subsystem. Our innovative solution eliminates the need for complex wiring and instead uses wireless power transfer for sensor data reception. You can read all about how we do this in our paper here.

If you do end up using the platform for research then you can cite us using the details below:

@ARTICLE{10225720, author={Sharma, Suryansh and Dijkstra, Tristan and Prasad, Ranga Venkatesha}, journal={IEEE Sensors Letters}, title={Open Gimbal: A 3 Degrees of Freedom Open Source Sensing and Testing Platform for Nano- and Micro-UAVs}, year={2023}, volume={7}, number={9}, pages={1-4}, doi={10.1109/LSENS.2023.3307121}}

I hope that you find the Open Gimbal useful! Feel free to reach out to me at Suryansh.Sharma@tudelft.nl if you have any ideas/questions or if you end up making an Open Gimbal yourself!

This year, the traditional Christmas video was overtaken by a big project that we had at the end of November: creating a test show with the help of CollMot.

First, a little context: CollMot is a show company based in Hungary that we’ve partnered with on a regular basis, having brainstorms about show drones and discussing possibilities for indoor drones shows in general. They developed Skybrush, an open- source software for controlling swarms. We have wanted to work with them for a long time.

So, when the opportunity came to rent an old train hall that we visit often (because it’s right next to our office and hosts good street food), we jumped on it. The place itself is huge, with massive pillars, pits for train maintenance, high ceiling with metal beams and a really funky industrial look. The idea was to do a technology test and try out if we could scale up the Loco positioning system to a larger space. This was also the perfect time to invite the guys at CollMot for some exploring and hacking.

The train hall

The Loco system

We added the TDoA3 Long Range mode recently and we had done experiments in our test-lab that indicate that the Loco Positioning systems should work in a bigger space with up to 20 anchors, but we had not actually tested it in a larger space.

The maximum radio range between anchors is probably up to around 40 meters in the Long Range mode, but we decided to set up a system that was only around 25×25 meters, with 9 anchors in the ceiling and 9 anchors on the floor placed in 3 by 3 matrices. The reason we did not go bigger is that the height of the space is around 7-8 meters and we did not want to end up with a system that is too wide in relation to the height, this would reduce Z accuracy. This setup gave us 4 cells of 12x12x7 meters which should be OK.

Finding a solution to get the anchors up to the 8 meters ceiling – and getting them down easily was also a headscratcher, but with some ingenuity (and meat hooks!) we managed to create a system. We only had the hall for 2 days before filming at night, and setting up the anchors on the ceiling took a big chunk out of the first day.

Drone hardware

We used 20 Crazyflie 2.1 equipped with the Loco deck, LED-rings, thrust upgrade kit and tattu 350 mAh batteries. We soldered the pin-headers to the Loco decks for better rigidity but also because it adds a bit more “height-adjust-ability” for the 350 mAh battery which is a bit thicker then the stock battery. To make the LED-ring more visible from the sides we created a diffuser that we 3D-printed in white PLA. The full assembly weighed in at 41 grams. With the LED-ring lit up almost all of the time we concluded that the show-flight should not be longer than 3-4 minutes (with some flight time margin).

The show

CollMot, on their end, designed the whole show using Skyscript and Skybrush Studio. The aim was to have relatively simple and easily changeable formations to be able to test a lot of different things, like the large area, speed, or synchronicity. They joined us on the second day to implement the choreography, and share their knowledge about drone shows.

We got some time afterwards to discuss a lot of things, and enjoy some nice beers and dinner after a job well done. We even had time on the third day, before dismantling everything, to experiment a lot more in this huge space and got some interesting data.

What did we learn?

Initially we had problems with positioning, we got outliers and lost tracking sometimes. Finally we managed to trace the problems to the outlier filter. The filter was written a long time ago and the current implementation was optimized for 8 anchors in a smaller space, which did not really work in this setup. After some tweaking the problem was solved, but we need to improve the filter for generic support of different system setups in the future.

Another problem that was observed is that the Z-estimate tends to get an offset that “sticks” and it is not corrected over time. We do not really understand this and will require more investigations.

The outlier filer was the only major problem that we had to solve, otherwise the Loco system mainly performed as expected and we are very happy with the result! The changes in the firmware is available in this, slightly hackish branch.

We also spent some time testing maximum velocities. For the horizontal velocities the Crazyflies started loosing positioning over 3 m/s. They could probably go much faster but the outlier filter started having problems at higher speeds. Also the overshoot became larger the faster we flew which most likely could be solved with better controller tuning. For the vertical velocity 3 m/s was also the maximum, limited by the deceleration when coming downwards. Some improvements can be made here.

Conclusion is that many things works really well but there are still some optimizations and improvements that could be made to make it even more robust and accurate.

The video

But, enough talking, here is the never-seen-before New Year’s Eve video

And if you’re curious to see behind the scenes

Thanks to CollMot for their presence and valuable expertise, and InDiscourse for arranging the video!

And with the final blogpost of 2022 and this amazing video, it’s time to wish you a nice New Year’s Eve and a happy beginning of 2023!

You might, or might not have heard about a tool called Wireshark, it is quite popular in the software development world.

The wireshark official logo


Wireshark is a free and open-source packet analyzer. It is used for network troubleshooting, analysis, communications protocol development and education. It makes analyzing what is going on with packet based protocols easier.

Most often Wireshark is used for network based protocols like TCP and UDP, to try to figure out what is happening with your networking code. But! Wireshark also allows you to write your own packet dissector plugin, this means that you can register some code to make Wireshark handle your custom packet based protocol.

For the latest release of the Crazyflie Python Library we added support for generating a log of the Crazy Real Time Protocol (CRTP) packets the library sends and receives. This is the (packet based) protocol that we use to communicate with the Crazyflie via radio and USB.

We generate this log in the special PCAP format that Wireshark expects. And we also created an initial version of a dissector plugin, written in the programming language LUA.

When we put this two things together it turns into a pretty cool way of debugging what goes on between your computer and the Crazyflie!

What does it look like?

Wireshark gives you a graphical interface where you can view all the packets in a PCAP file. You will see the timestamps of when they arrived. Selecting a packet will give you the information that the dissector has managed to deduce as well as how the packet looked on the wire.

On top of that you get powerful filtering tools. In the below image we have set a filter to view only packets that are received or sent on the CRTP port 8, which is the port for the High level commander. This means that from a log file that contain 44393 packets we now only display 9. Which makes following what goes on with high level commands a bit easier.

Wireshark view of filtering out packets on CRTP port 8

The dissector knows about the different types of CRTP ports and channels and knows how to dissect an high level set-point, as seen by the image above.

What can this be used for?

This functionality is, we think, most useful for when developing new functionality in the Crazyflie firmware, or in the library. You can easily inspect what the library receives or sends and make sure it matches what your code indented.

But it can also be useful when doing client type work! We recently located the source of a bug in the Crazyflie client with the use of this Wireshark plugin.

It was when updating the Parameter tab of the client to handle persistent parameters, and to use a sidebar for extra documentation and value control. As I was testing the code I noticed that every time I changed the value of ring.effect to a valid integer and then disconnected and reconnected, the value was set to 0. Regardless of the value I had set.

I recorded a session using the PCAP log functionality:

$ CRTP_PCAP_LOG=ring.pcap cfclient

And the I fired up wireshark:

$ wireshark ring.pcap

It was now possible for me to track what the library and firmware thought was going on with the ring.effect parameter, by tracking the crtp.parameter_varid field using Wireshark. Filtering down from from 3282 packets to 12 packets.

I had earlier figured out that the varid of the ring.effect variable was 183. This is a quasi-internal representation of a parameter that we do not expose in a good way. In the future we will try to make this Wireshark tracking work with the parameter name as well.

Looking at the write parameter packet from USB #3 to the Crazyflie I could see where I set the value of the parameter to 5, so far so good.

Wireshark view of checking my setting of the ring.effect parameter to 5

The surprising part however was seeing a write further down setting the parameter to 0! This mean that something in the client was actually setting this to zero!

Wireshark view of something setting the ring.effect parameter to 0

After seeing this, locating the actual issue was trivial. I noticed that the Flight Control tab was setting the ring.effect parameter to the current index of the combo box in the UI. And when no LED-ring deck was attached, this amounted to always setting the value to zero.

But having confirmation that this was something happening on the client side, and not some kind of bug with the new persistent parameters was very helpful!

How do you use this?

We have added documentation to the repository documentation for the library on how to generate the PCAP log and how install the Wireshark plugin.

But the quick-start guide is this:

  • Copy the tools/crtp-dissector.lua script to the default Wireshark plugin folder
    • Windows: %APPDATA%\Wireshark\plugin or WIRESHARK\plugins
    • Linux: ~/.local/lib/wireshark/plugins
  • Restart Wireshark or hit CTRL+SHIFT+L
  • Set the environmental variable CRTP_PCAP_LOG to the filename of the PCAP log you want to generate
  • Run Wireshark with the filename as an argument

And please report any issues you find!

Happy hacking!

We like to describe the Crazyflie as a versatile open source flying development platform. It is something that enables you to do cool stuff. It is not a finished, polished end product in its own.

The platform offers hardware extensions in form of decks, that you make your self or buy from Bitcraze. And the platform offers software extension, either by altering the firmware on the device or by writing programs that communicate with the platform.

This approach makes determining the expectations and requirements for the platform and the surrounding ecosystem a bit tricky. It is dependent on what you as a user plan to create using our products. And since the ecosystem is growing we need a, scalable, way to handle these fuzzy expectations during development and maintenance.

We think testing is big part of solving this, testing in a systematic, scalable and reproducible way. This is the reason for setting up our first physical test lab, aimed at providing stability while moving forward with new products and features.

Testing today

Continuous integration

On each change proposal to our software we run tests. For the firmware in the device we build multiple different configuration and run unit-tests. For the Crazyflie client and the Python library we make sure we can build for Linux and Windows and that the code passes our style guidelines. If any test fail we go back and update the proposed changed and re-run the tests. This is our first level of defense against defects.

Release testing

For each release we follow a checklist of procedures and tests to make sure that quality does not degrade. We make sure all the examples in the Python library are working and that the Crazyflie can fly around as expected in our flight arena, using various positioning systems.

Limitations

The way we test today makes it very difficult to determine if we regress in, for example, flight capability or in radio communication quality. We either test different software packages in isolation, without hardware in the loop, or we test by having a human trying to estimate if any degradation has happened since the last release.

We run into scalability issues as our ecosystem grows, it is near impossible to test all the different combinations of products. And it is very hard for us to detect stability or quality regressions without having a more systematic approach to testing the software on relevant hardware.

Introducing the test lab

What we have done so far are two things:

  1. Created an infrastructure for setting up a site for testing our software on real devices
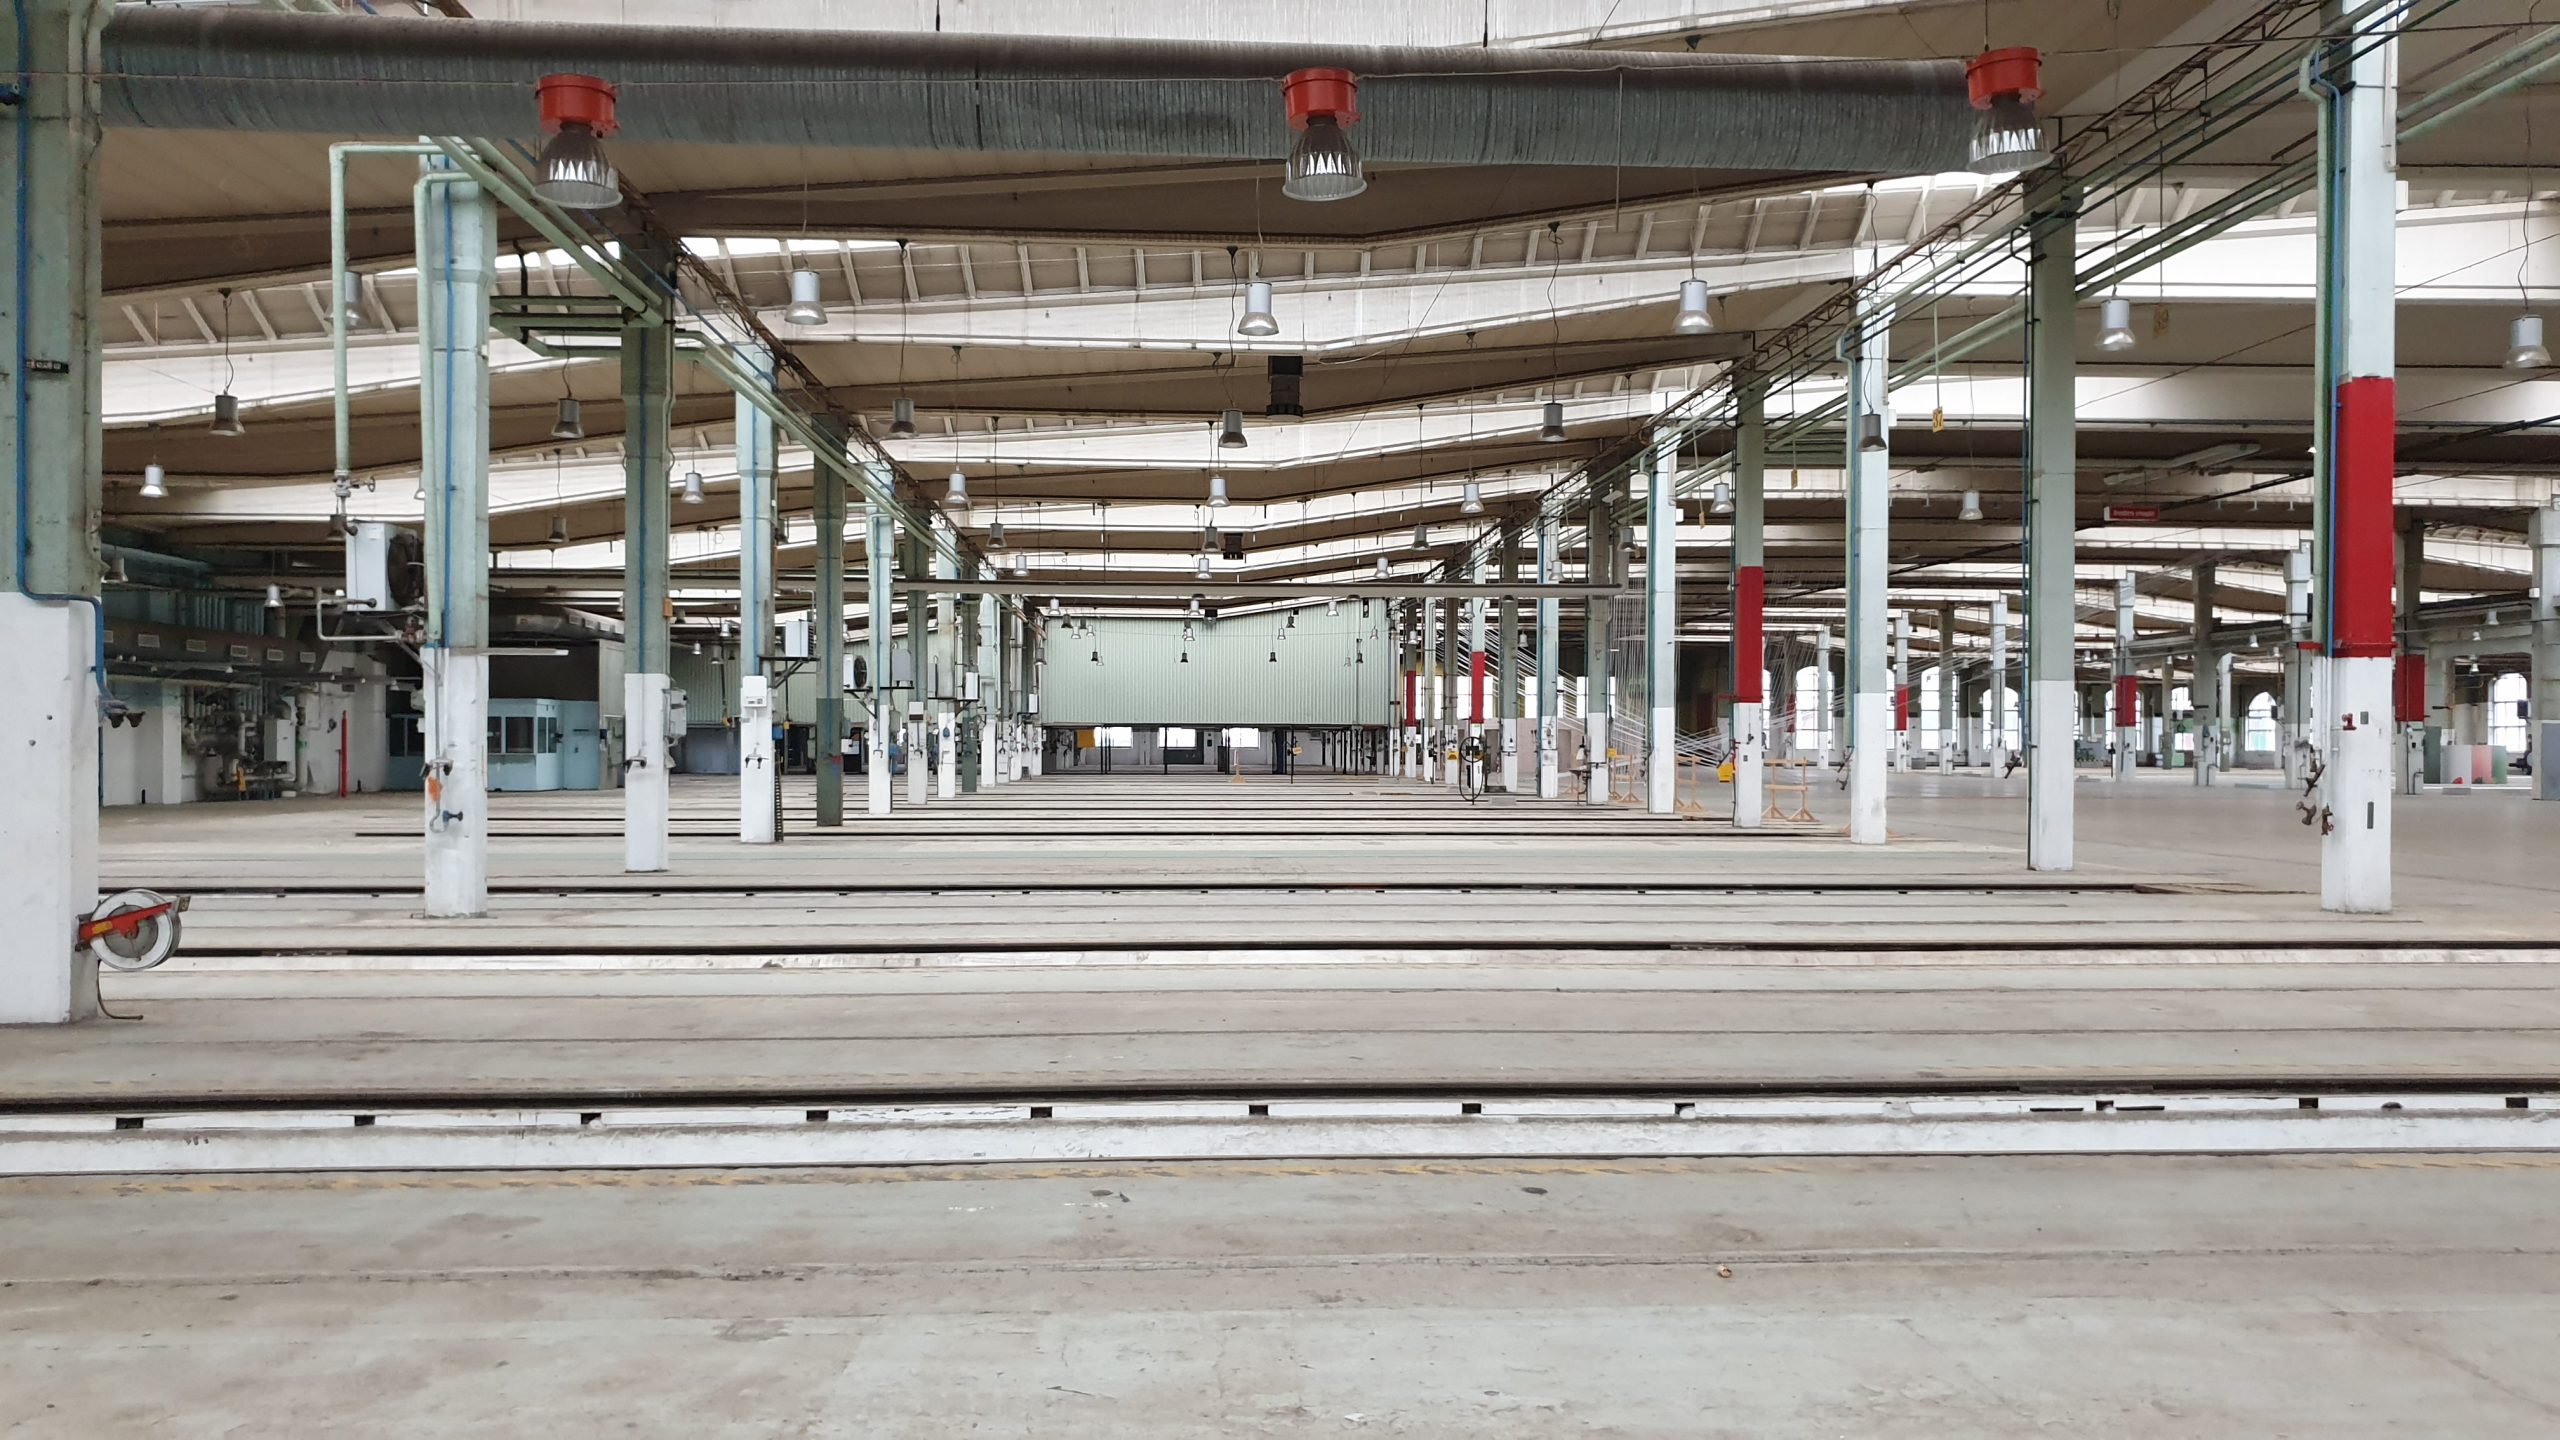
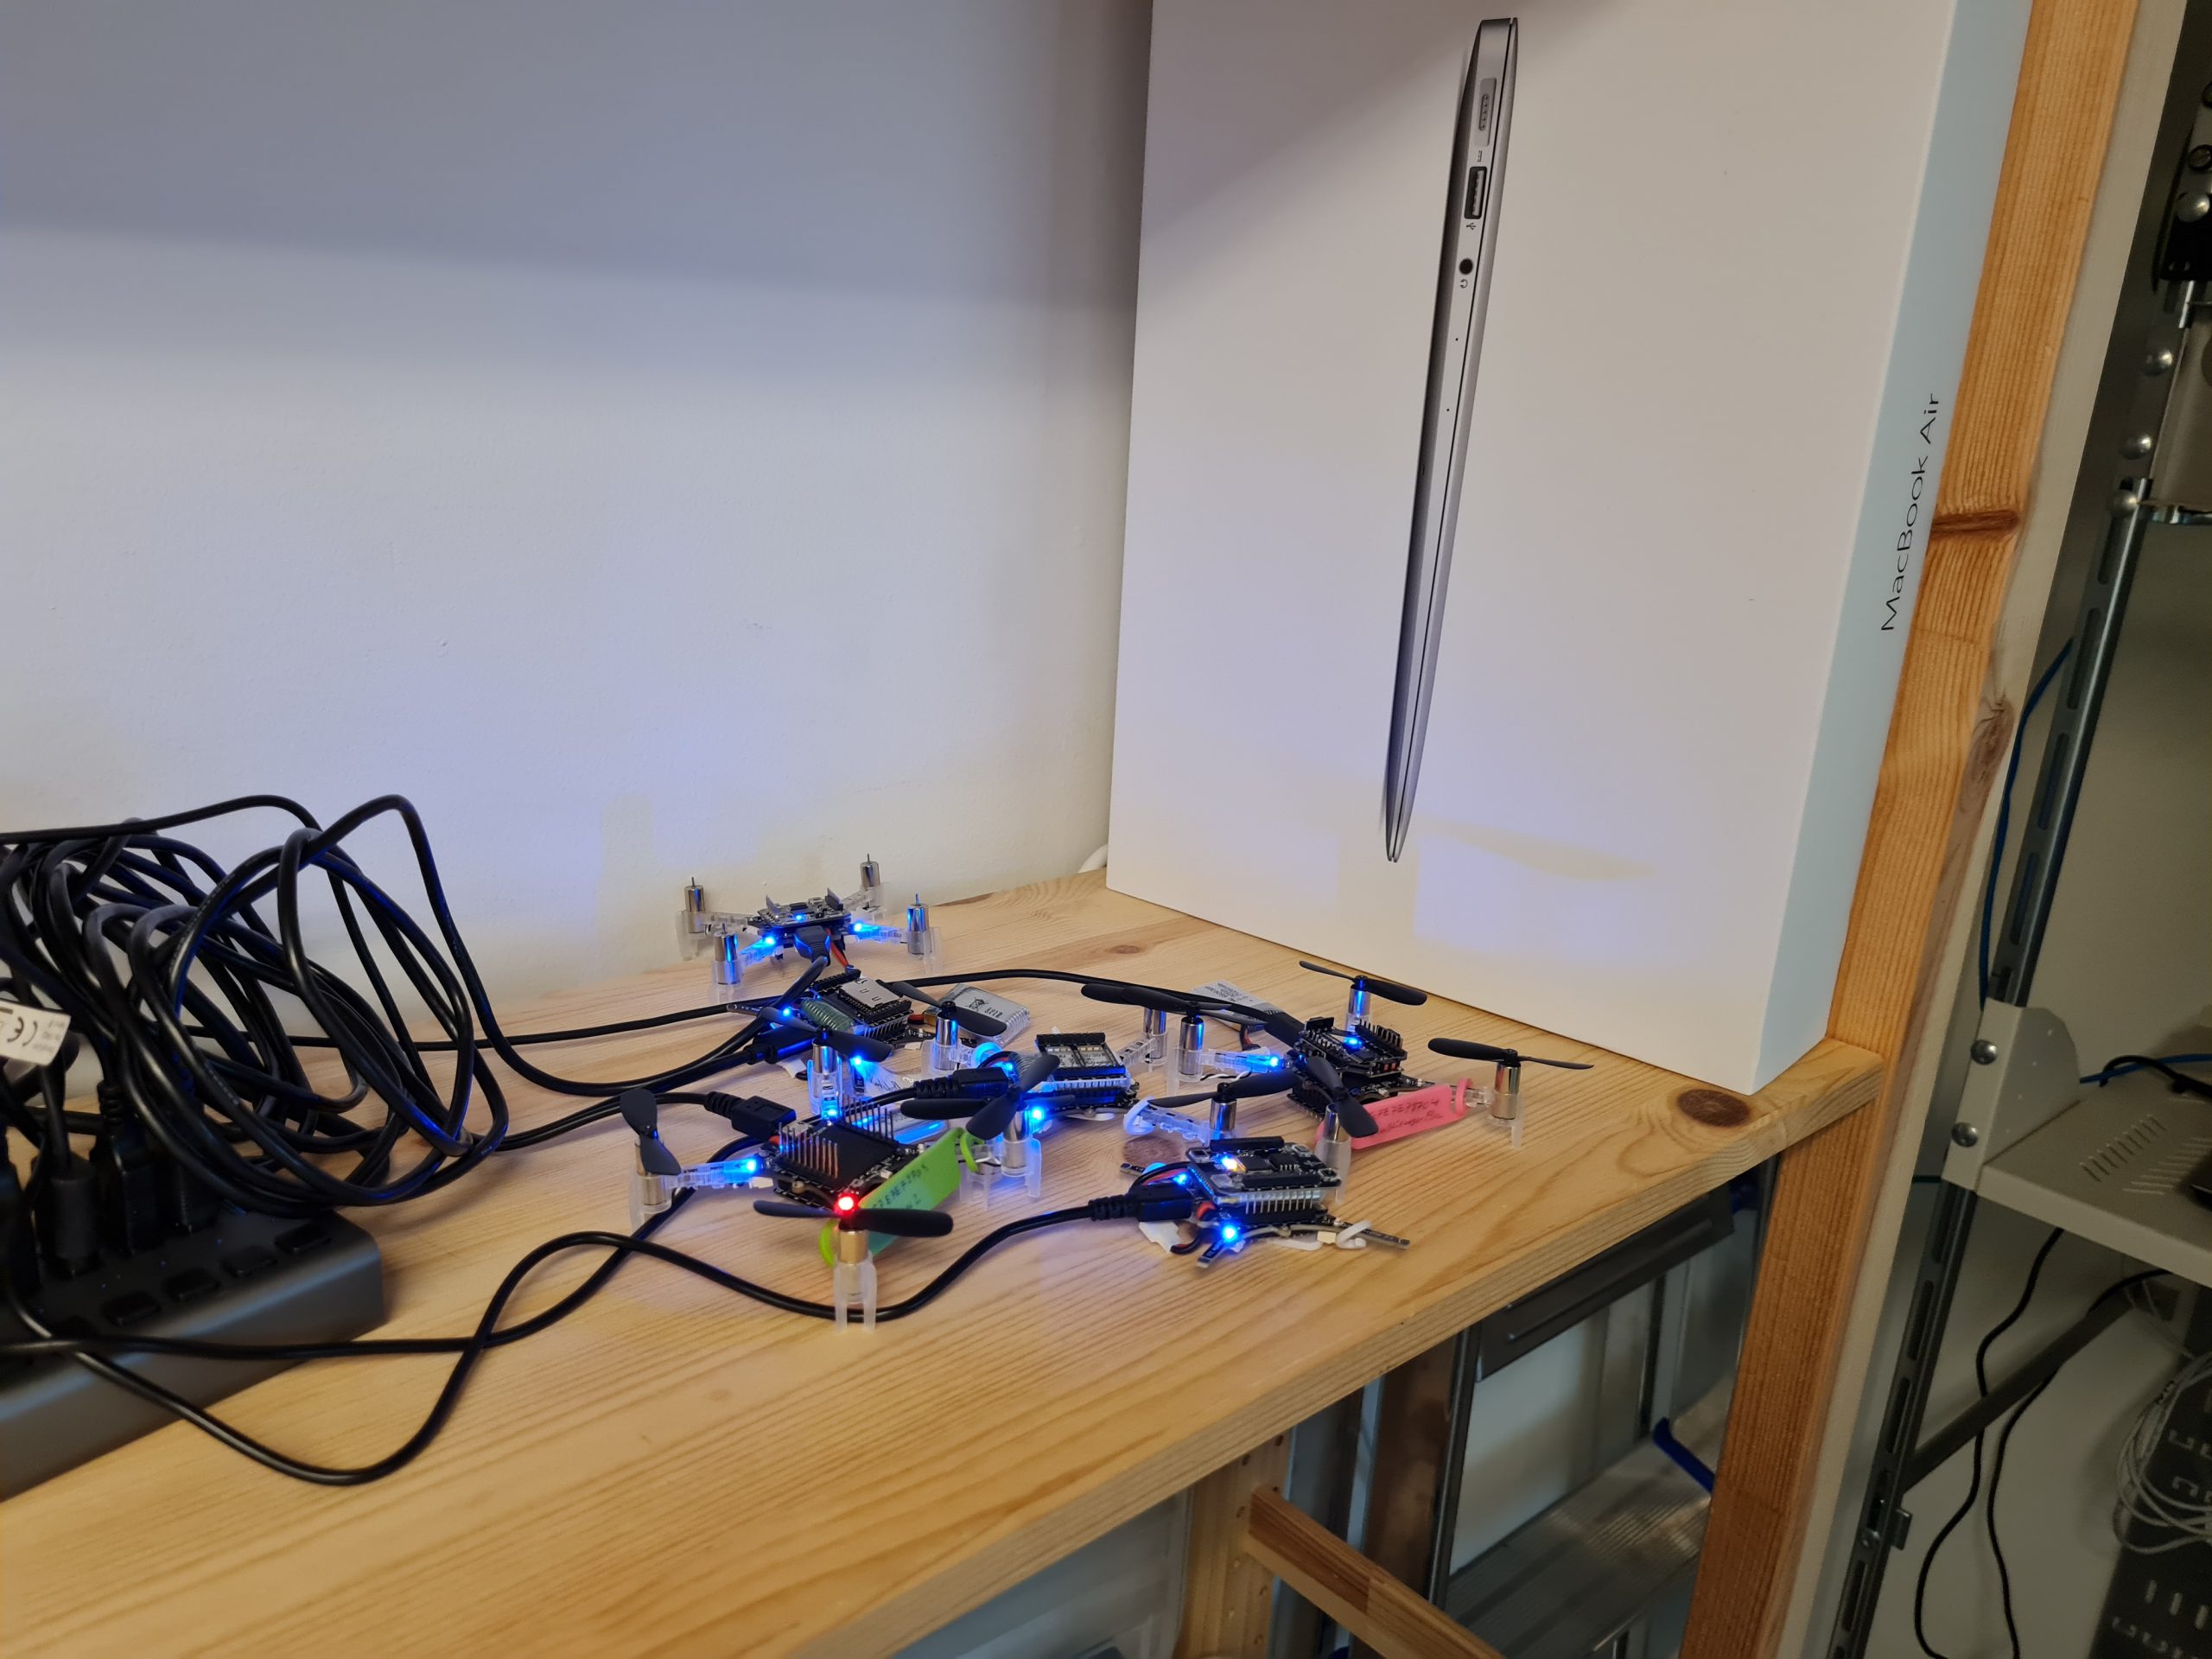
  2. Prepared a test lab in our printer room at our office in Malmö

Infrastructure: crazyflie-testing

This new Git repository contains the building blocks we need to setup our new test lab. You can check out the repository README.md file for information on how to run it.

It contains a beginning of an automated QA test suite and along with that a start of a set of requirements for those tests. The requirements are specified in TOML files which are parsed and accessed from the tests. They are also rendered to markdown, to be easier for human consumption.

The repository contains a way to specify a test site, which is a collection of devices to run the test suite against. You specify your site in a TOML file which contain information about each device, such as which decks are connected and the radio:// URI. This site specification is then used by the test framework when running the tests, making sure each test is run against all devices compatible with that test.

The infrastructure also has management scripts to perform tasks like flashing all devices in a site, or recovering them if they go into boot loader mode by accident. All aimed at being able to handle testing with the least amount of human intervention possible.

The most recent addition to the infrastructure is the ability to test swarms using the Crazyswarm project!
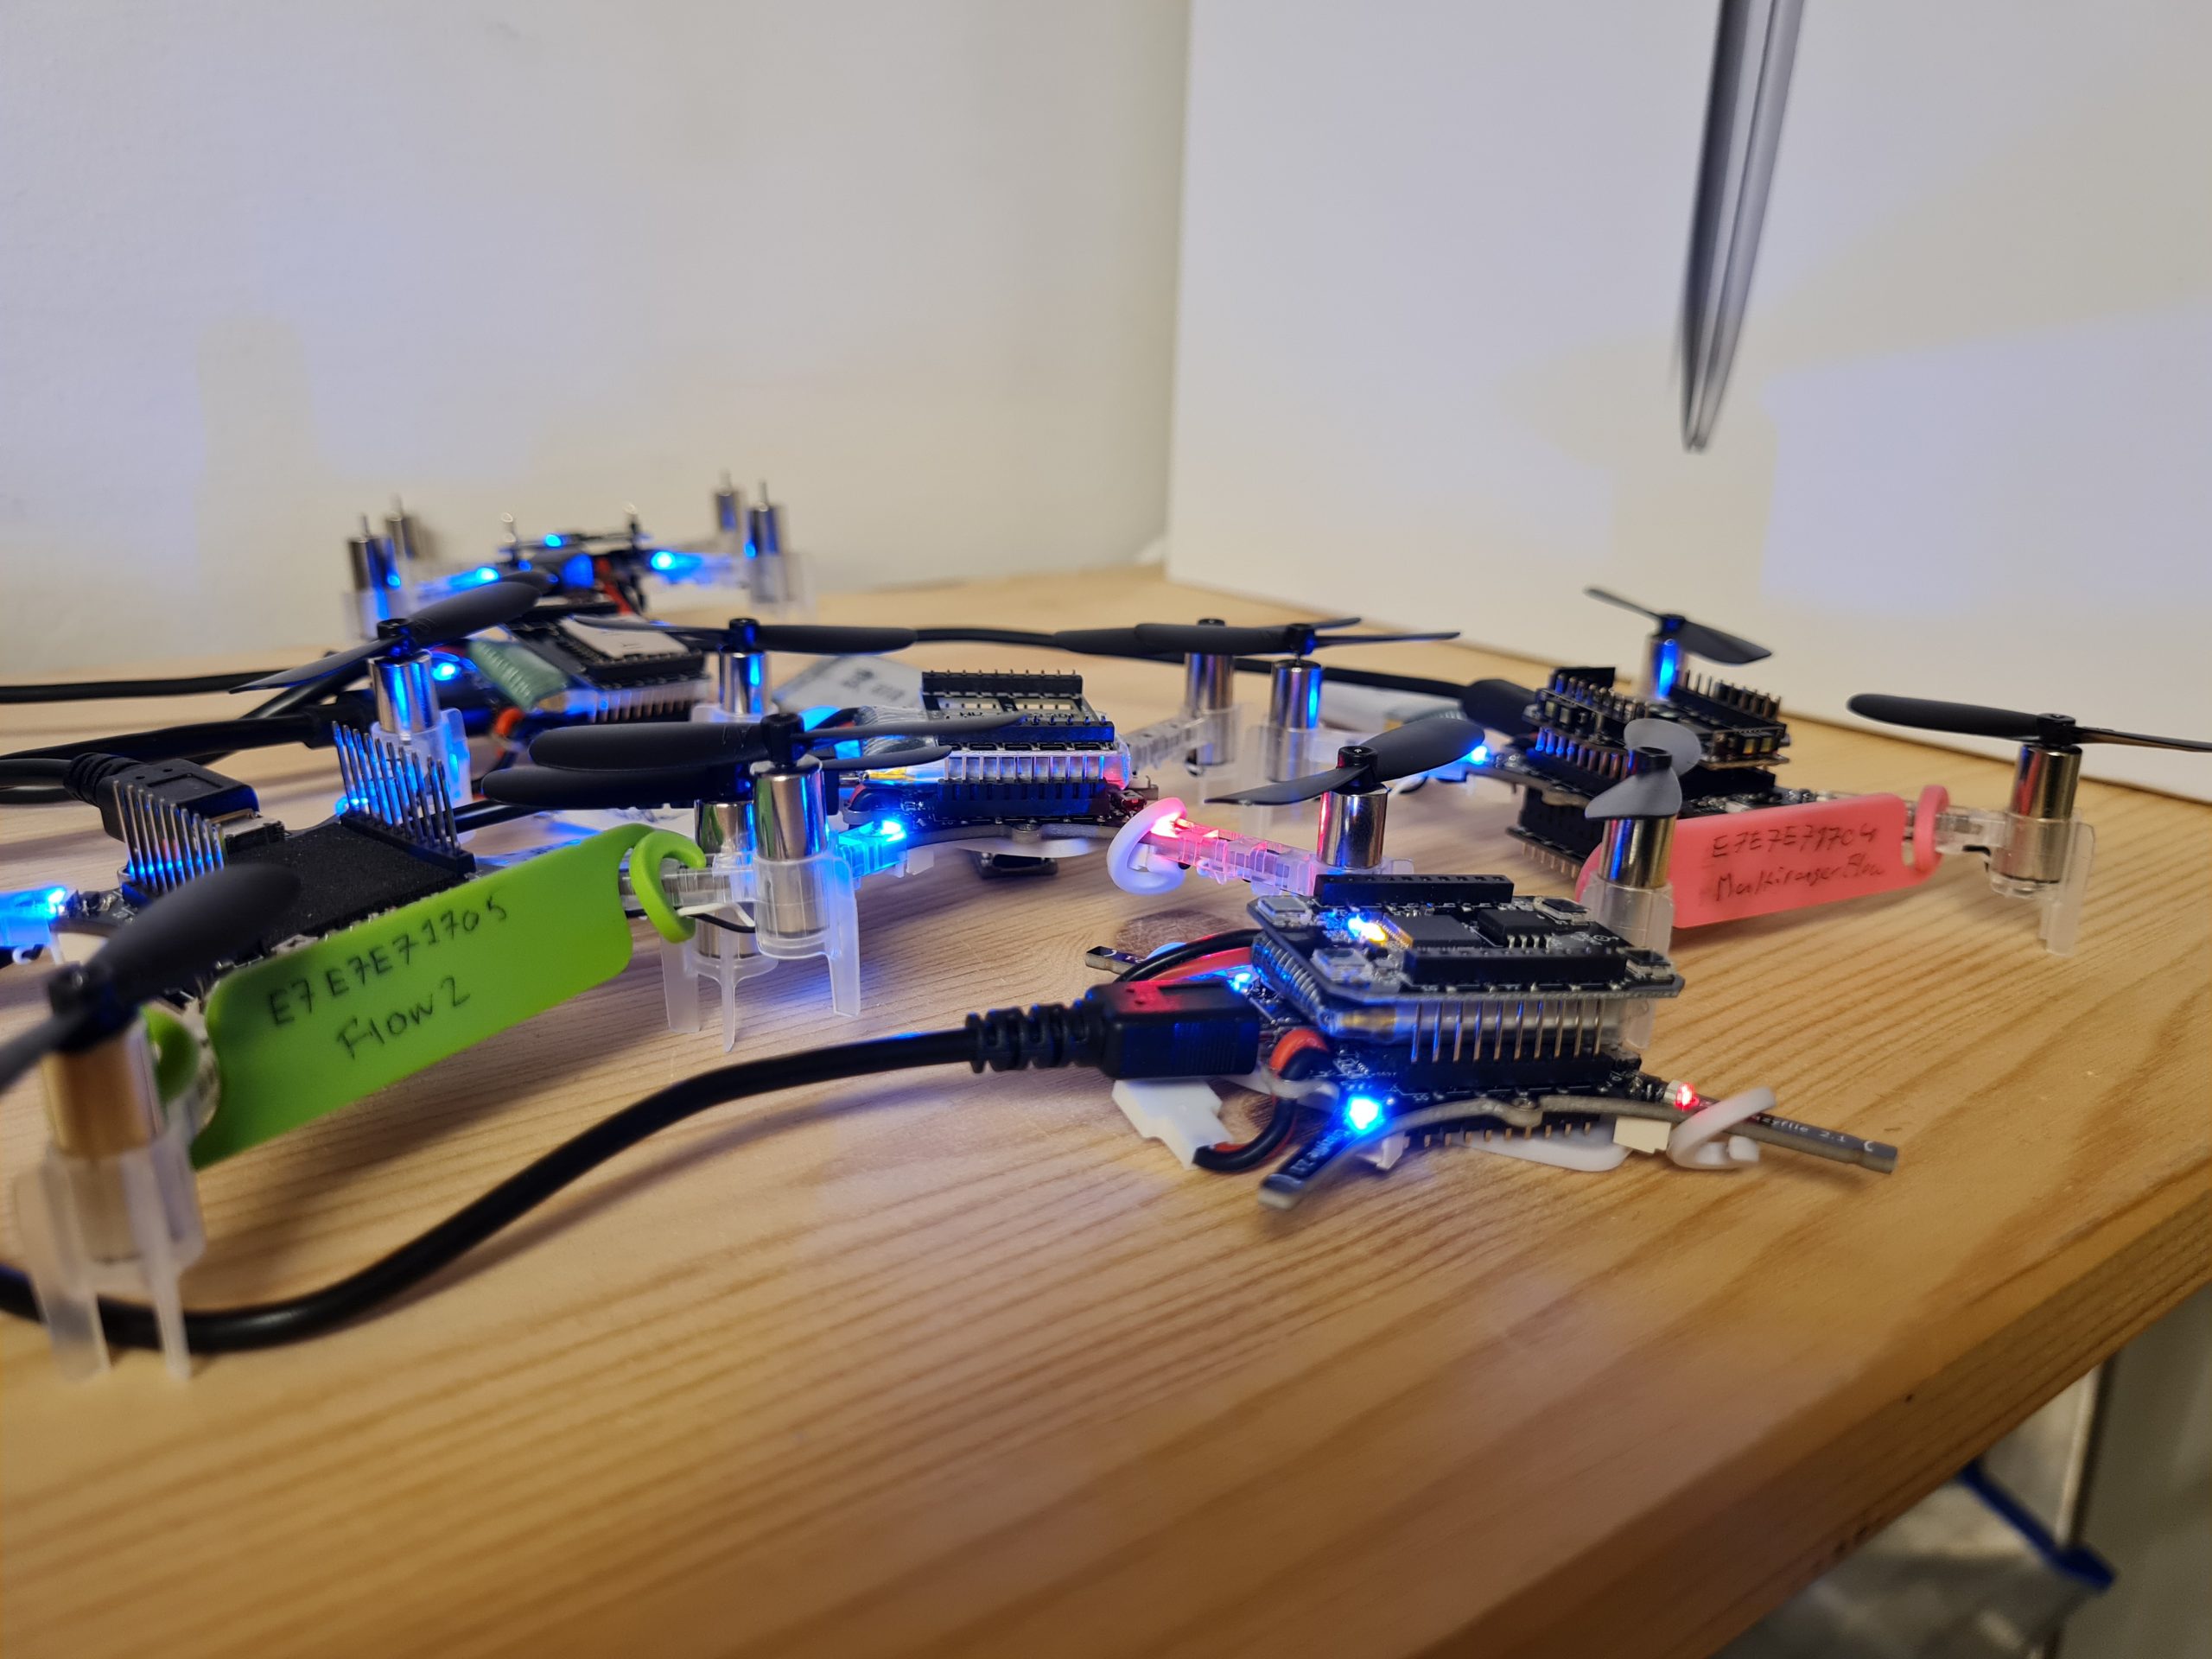
Crazylab Malmö

We define the site crazylab-malmö.toml which is the test lab we have setup in our printer room in Malmö, Sweden, it is currently defined as:

version = 1

[device.cf2_flow2_lighthouse]
radio = "radio://0/50/2M/E7E7E71706"
decks = ["bcFlow2", "bcLighthouse4"]
bootloader_radio = "radio://0/0/2M/B19CF77F05?safelink=0"

[device.cf2_flow2]
radio = "radio://0/50/2M/E7E7E71705"
decks = ["bcFlow2"]
bootloader_radio = "radio://0/0/2M/B16298A8A3?safelink=0"

[device.cf2_flow2_multiranger]
radio = "radio://0/50/2M/E7E7E71704"
decks = ["bcFlow2", "bcMultiranger"]
bootloader_radio = "radio://0/0/2M/B1CEE678C5?safelink=0"

[device.cf2_usddeck]
radio = "radio://0/50/2M/E7E7E71703"
decks = ["bcUSD"]
bootloader_radio = "radio://0/0/2M/B164C8AC96?safelink=0"

[device.cf2_lighthouse]
radio = "radio://0/50/2M/E7E7E71702"
bootloader_radio = "radio://0/0/2M/B1F519F77B?safelink=0"
decks = ["bcLighthouse4"]

[device.cf2_stock]
radio = "radio://0/50/2M/E7E7E71701"
bootloader_radio = "radio://0/0/2M/B177790F3A?safelink=0"Code language: JavaScript (javascript)

There are, for now, six devices with different combination of decks attached. Each night, after midnight, different GitHub actions starts working for us. One job builds the latest versions of the firmwares for the devices another job will upgrade all the devices in the lab and run the test suite, and a selection of the Python library examples. We will be notified if any of these jobs fail.

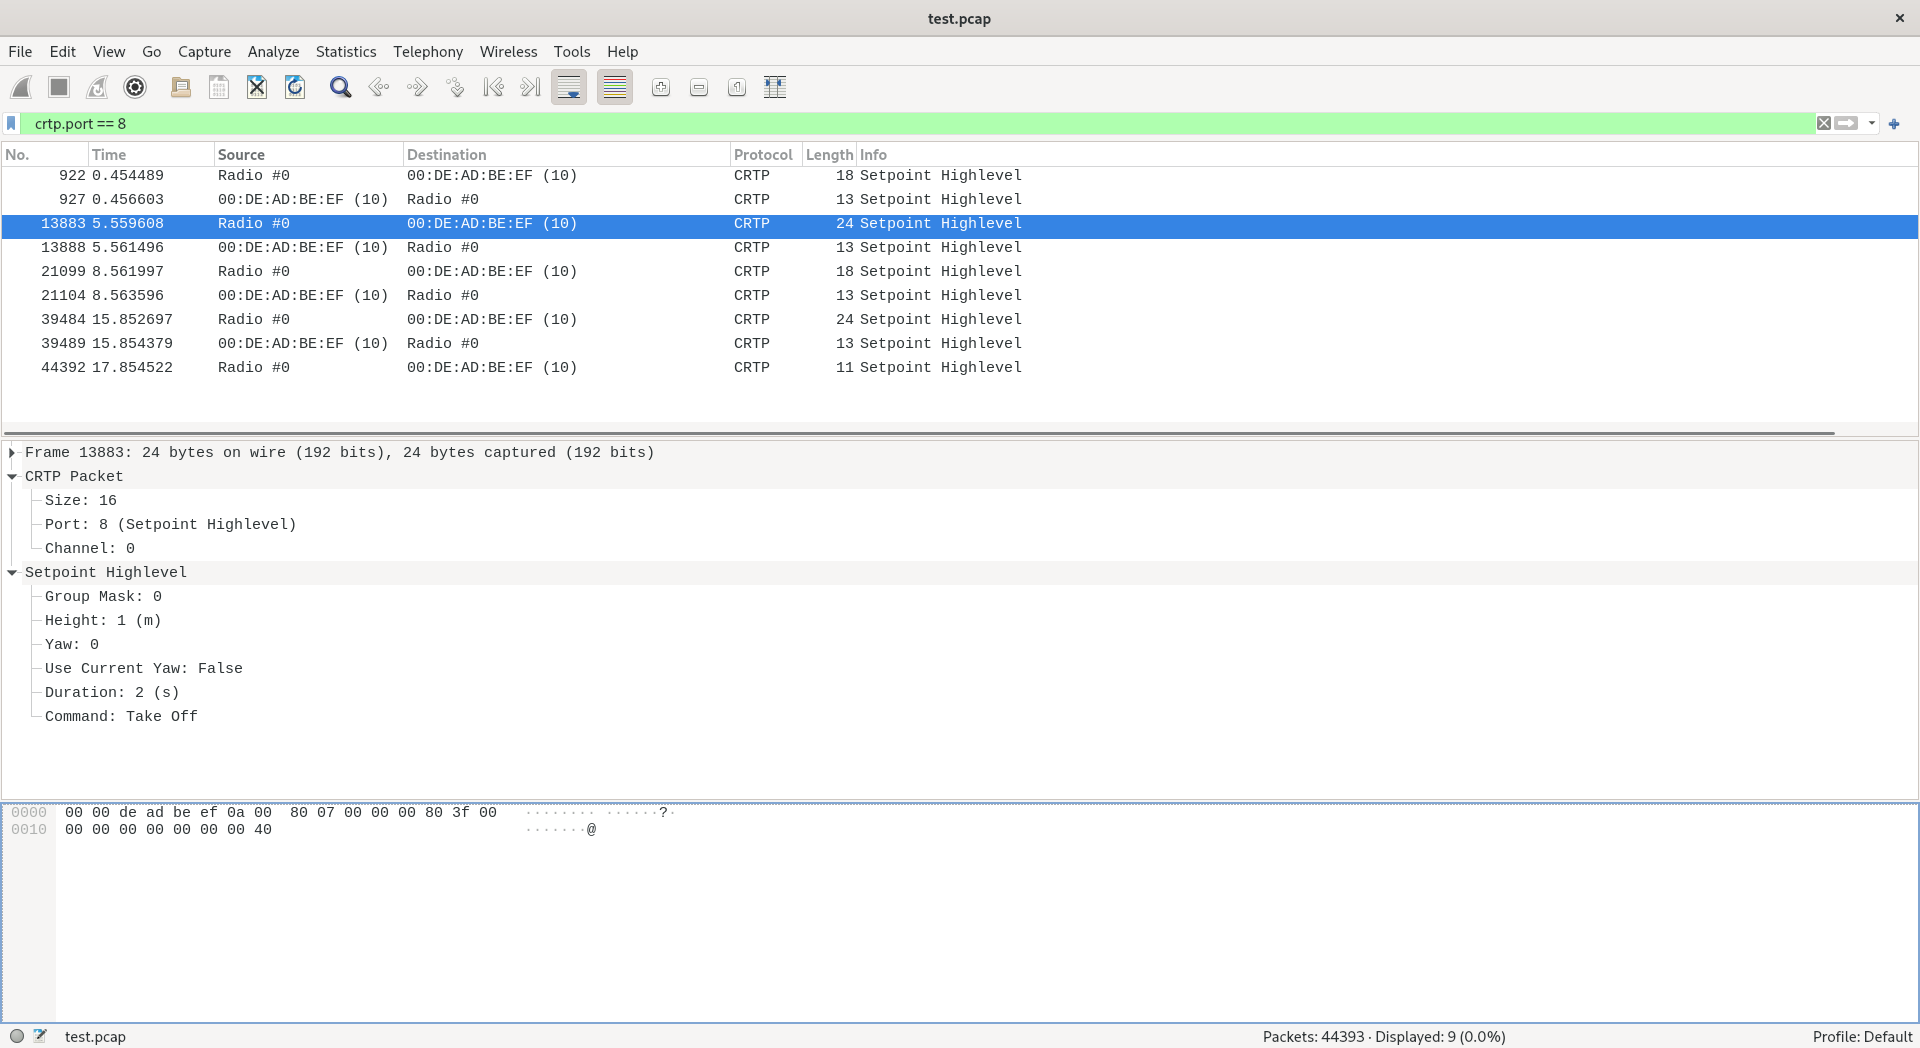
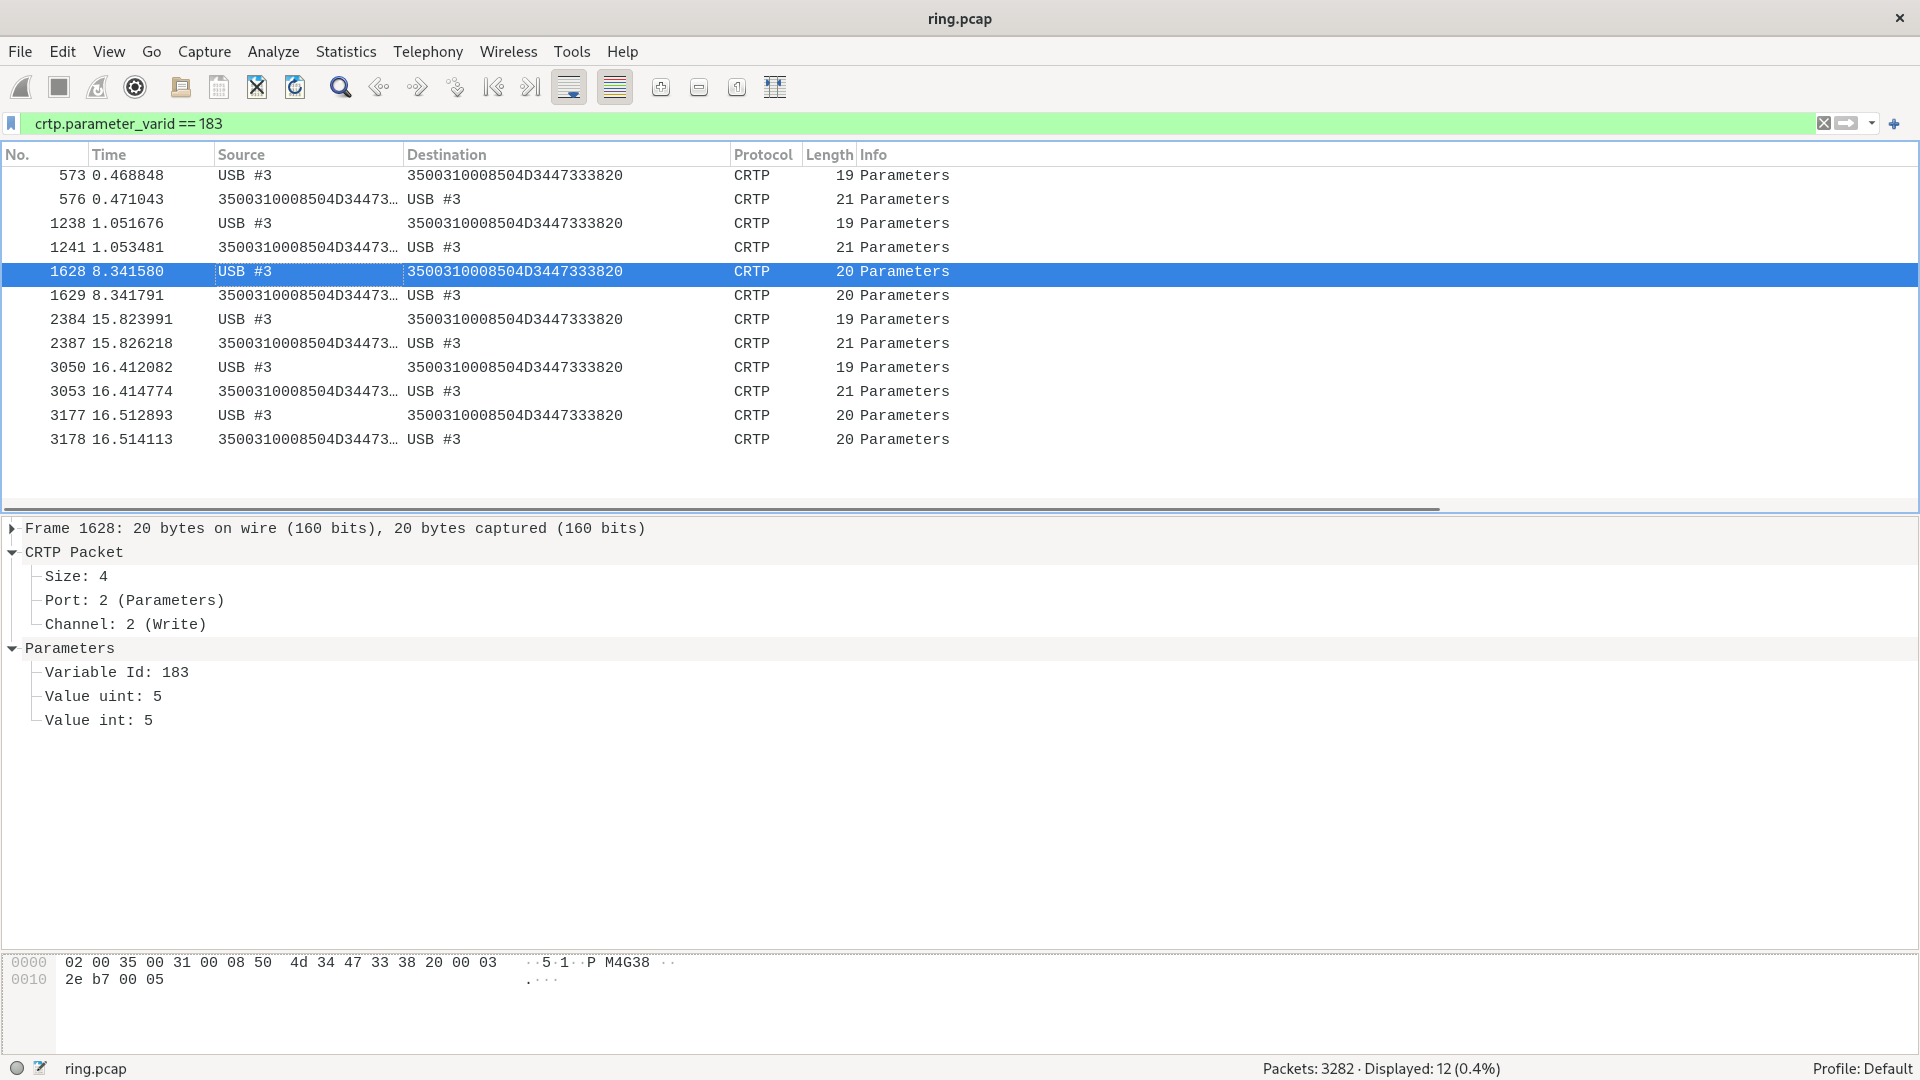
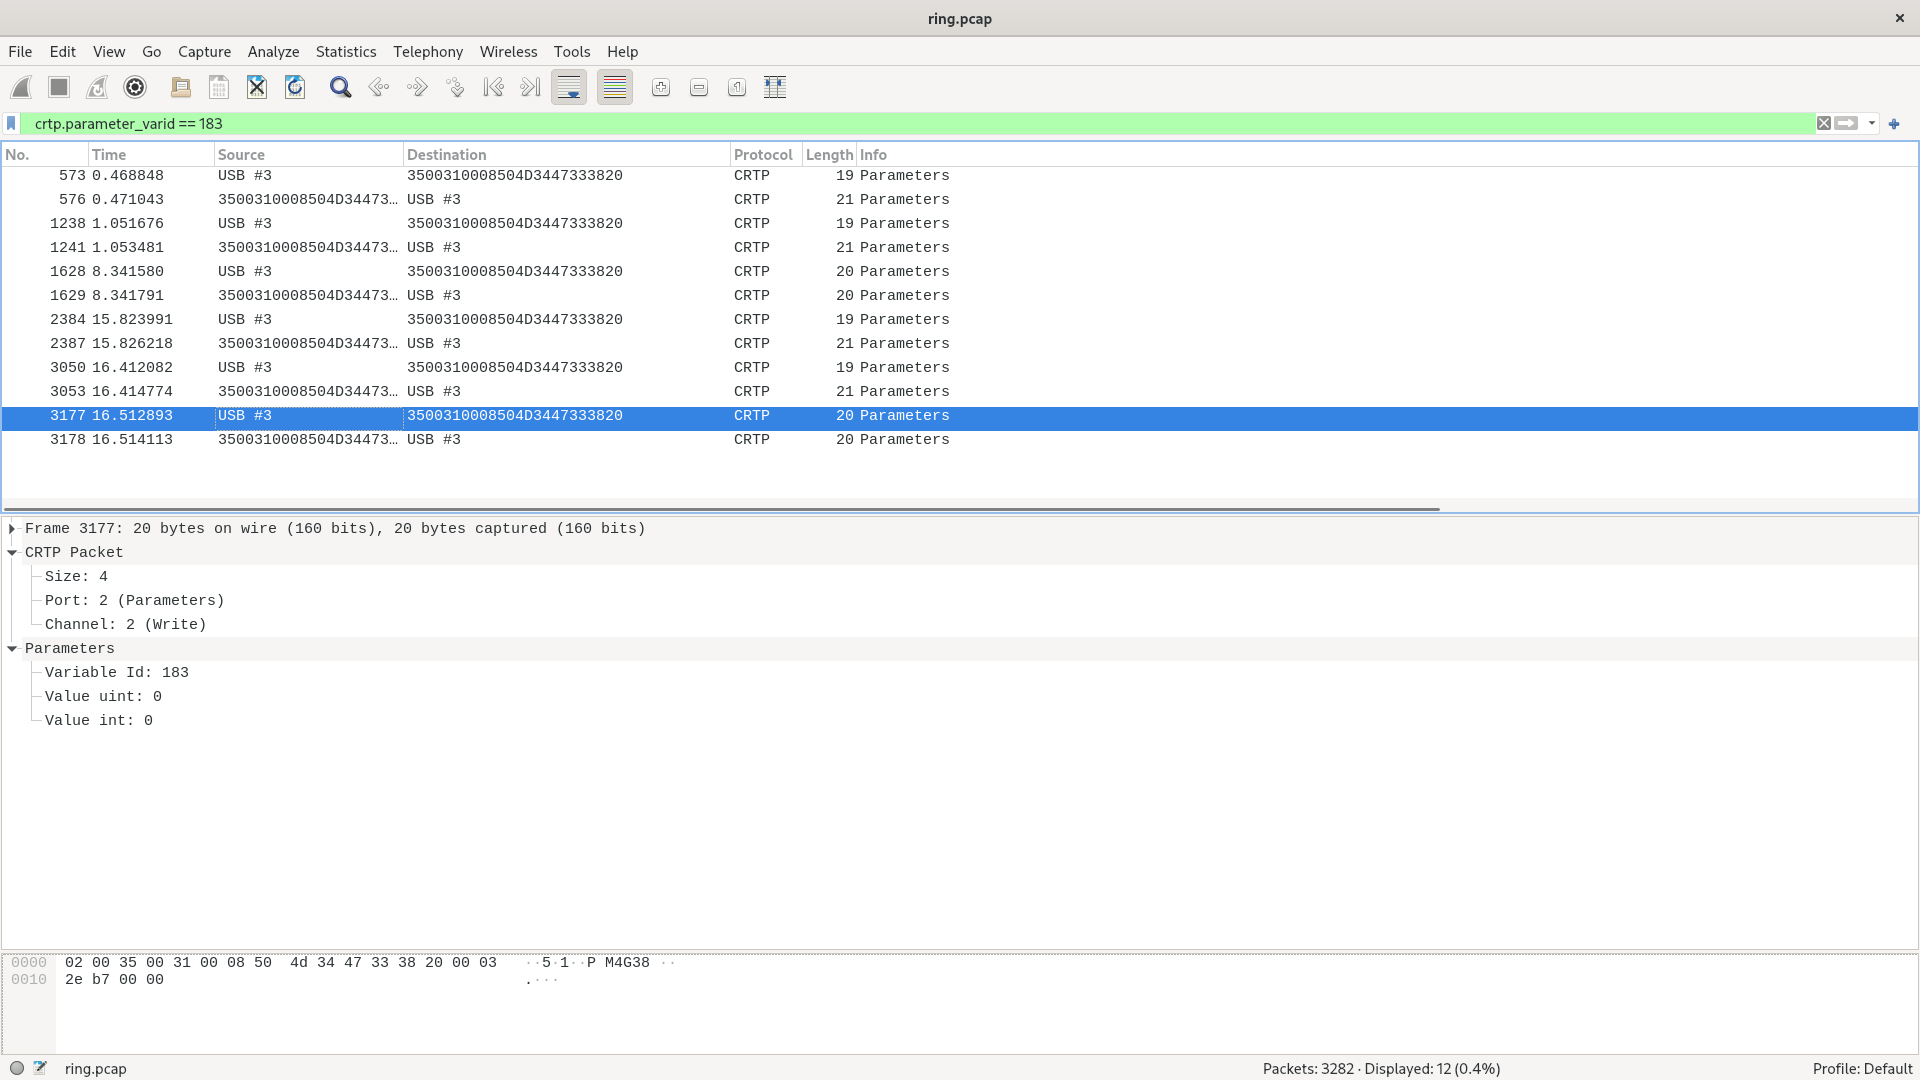
This acts as a safety net for us. We will quickly know if the communication performance degrades, or if we have messed up with our parameter or logging frameworks. And we can catch silly firmware bugs as early as possible.

Future

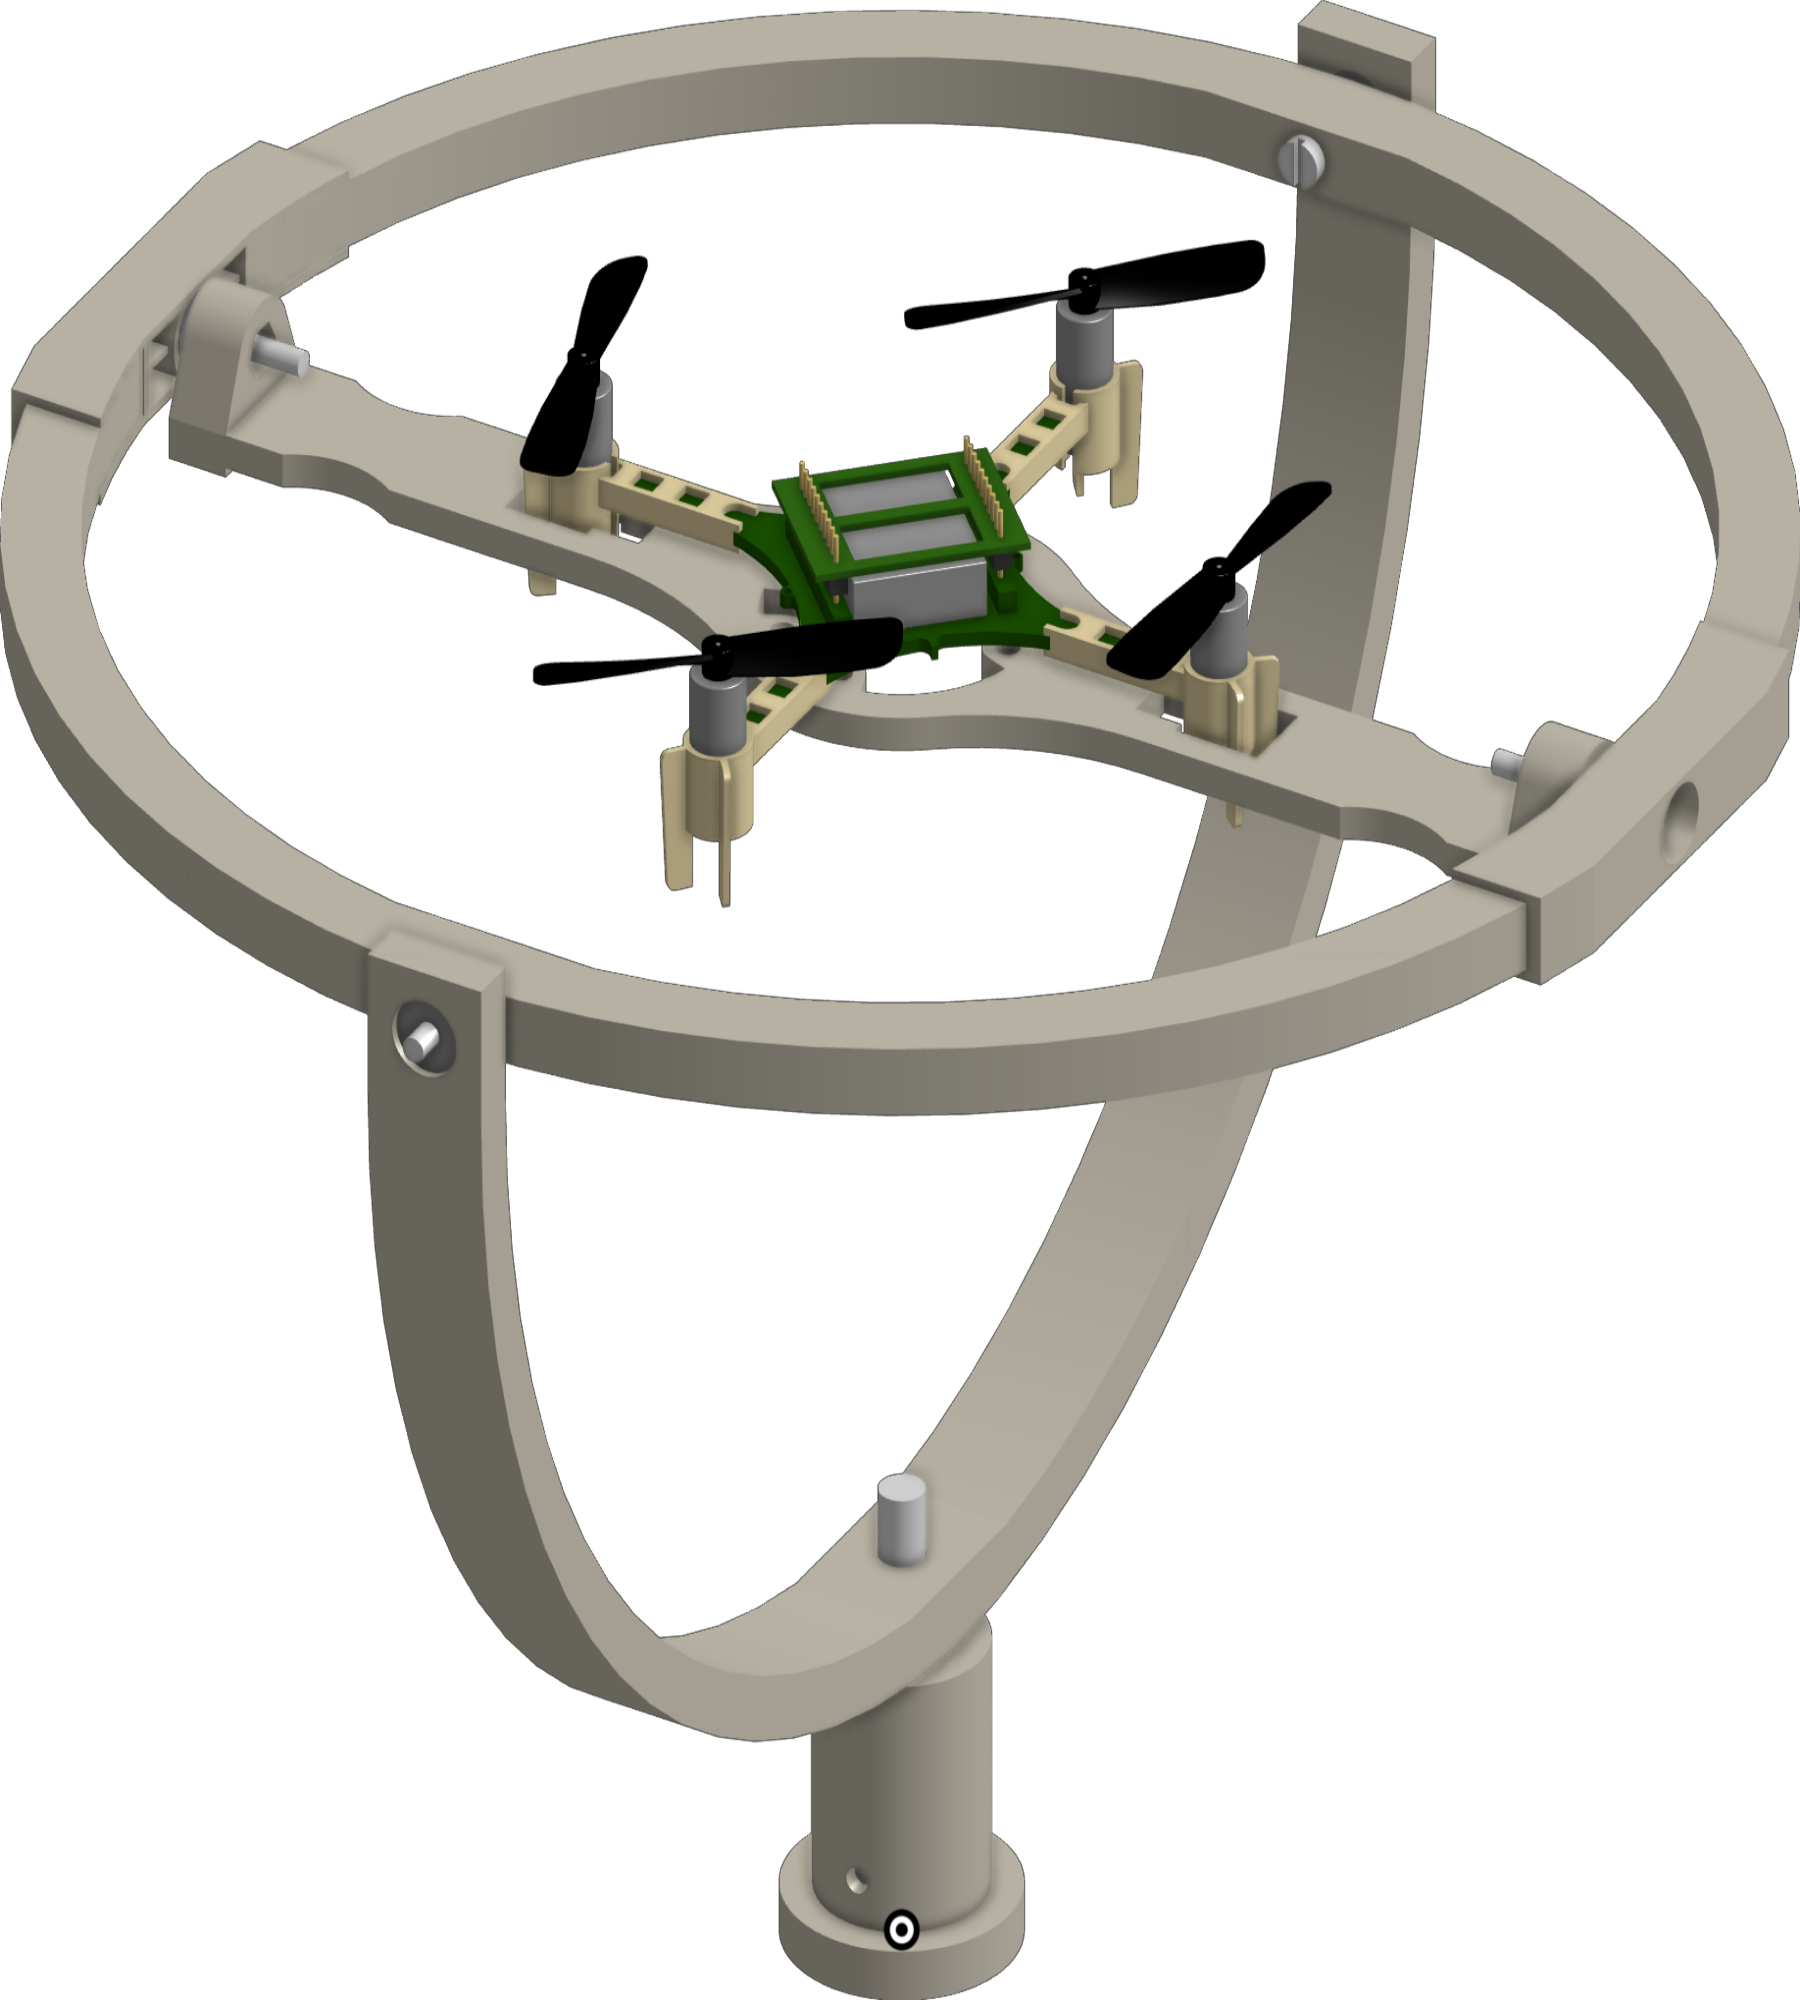
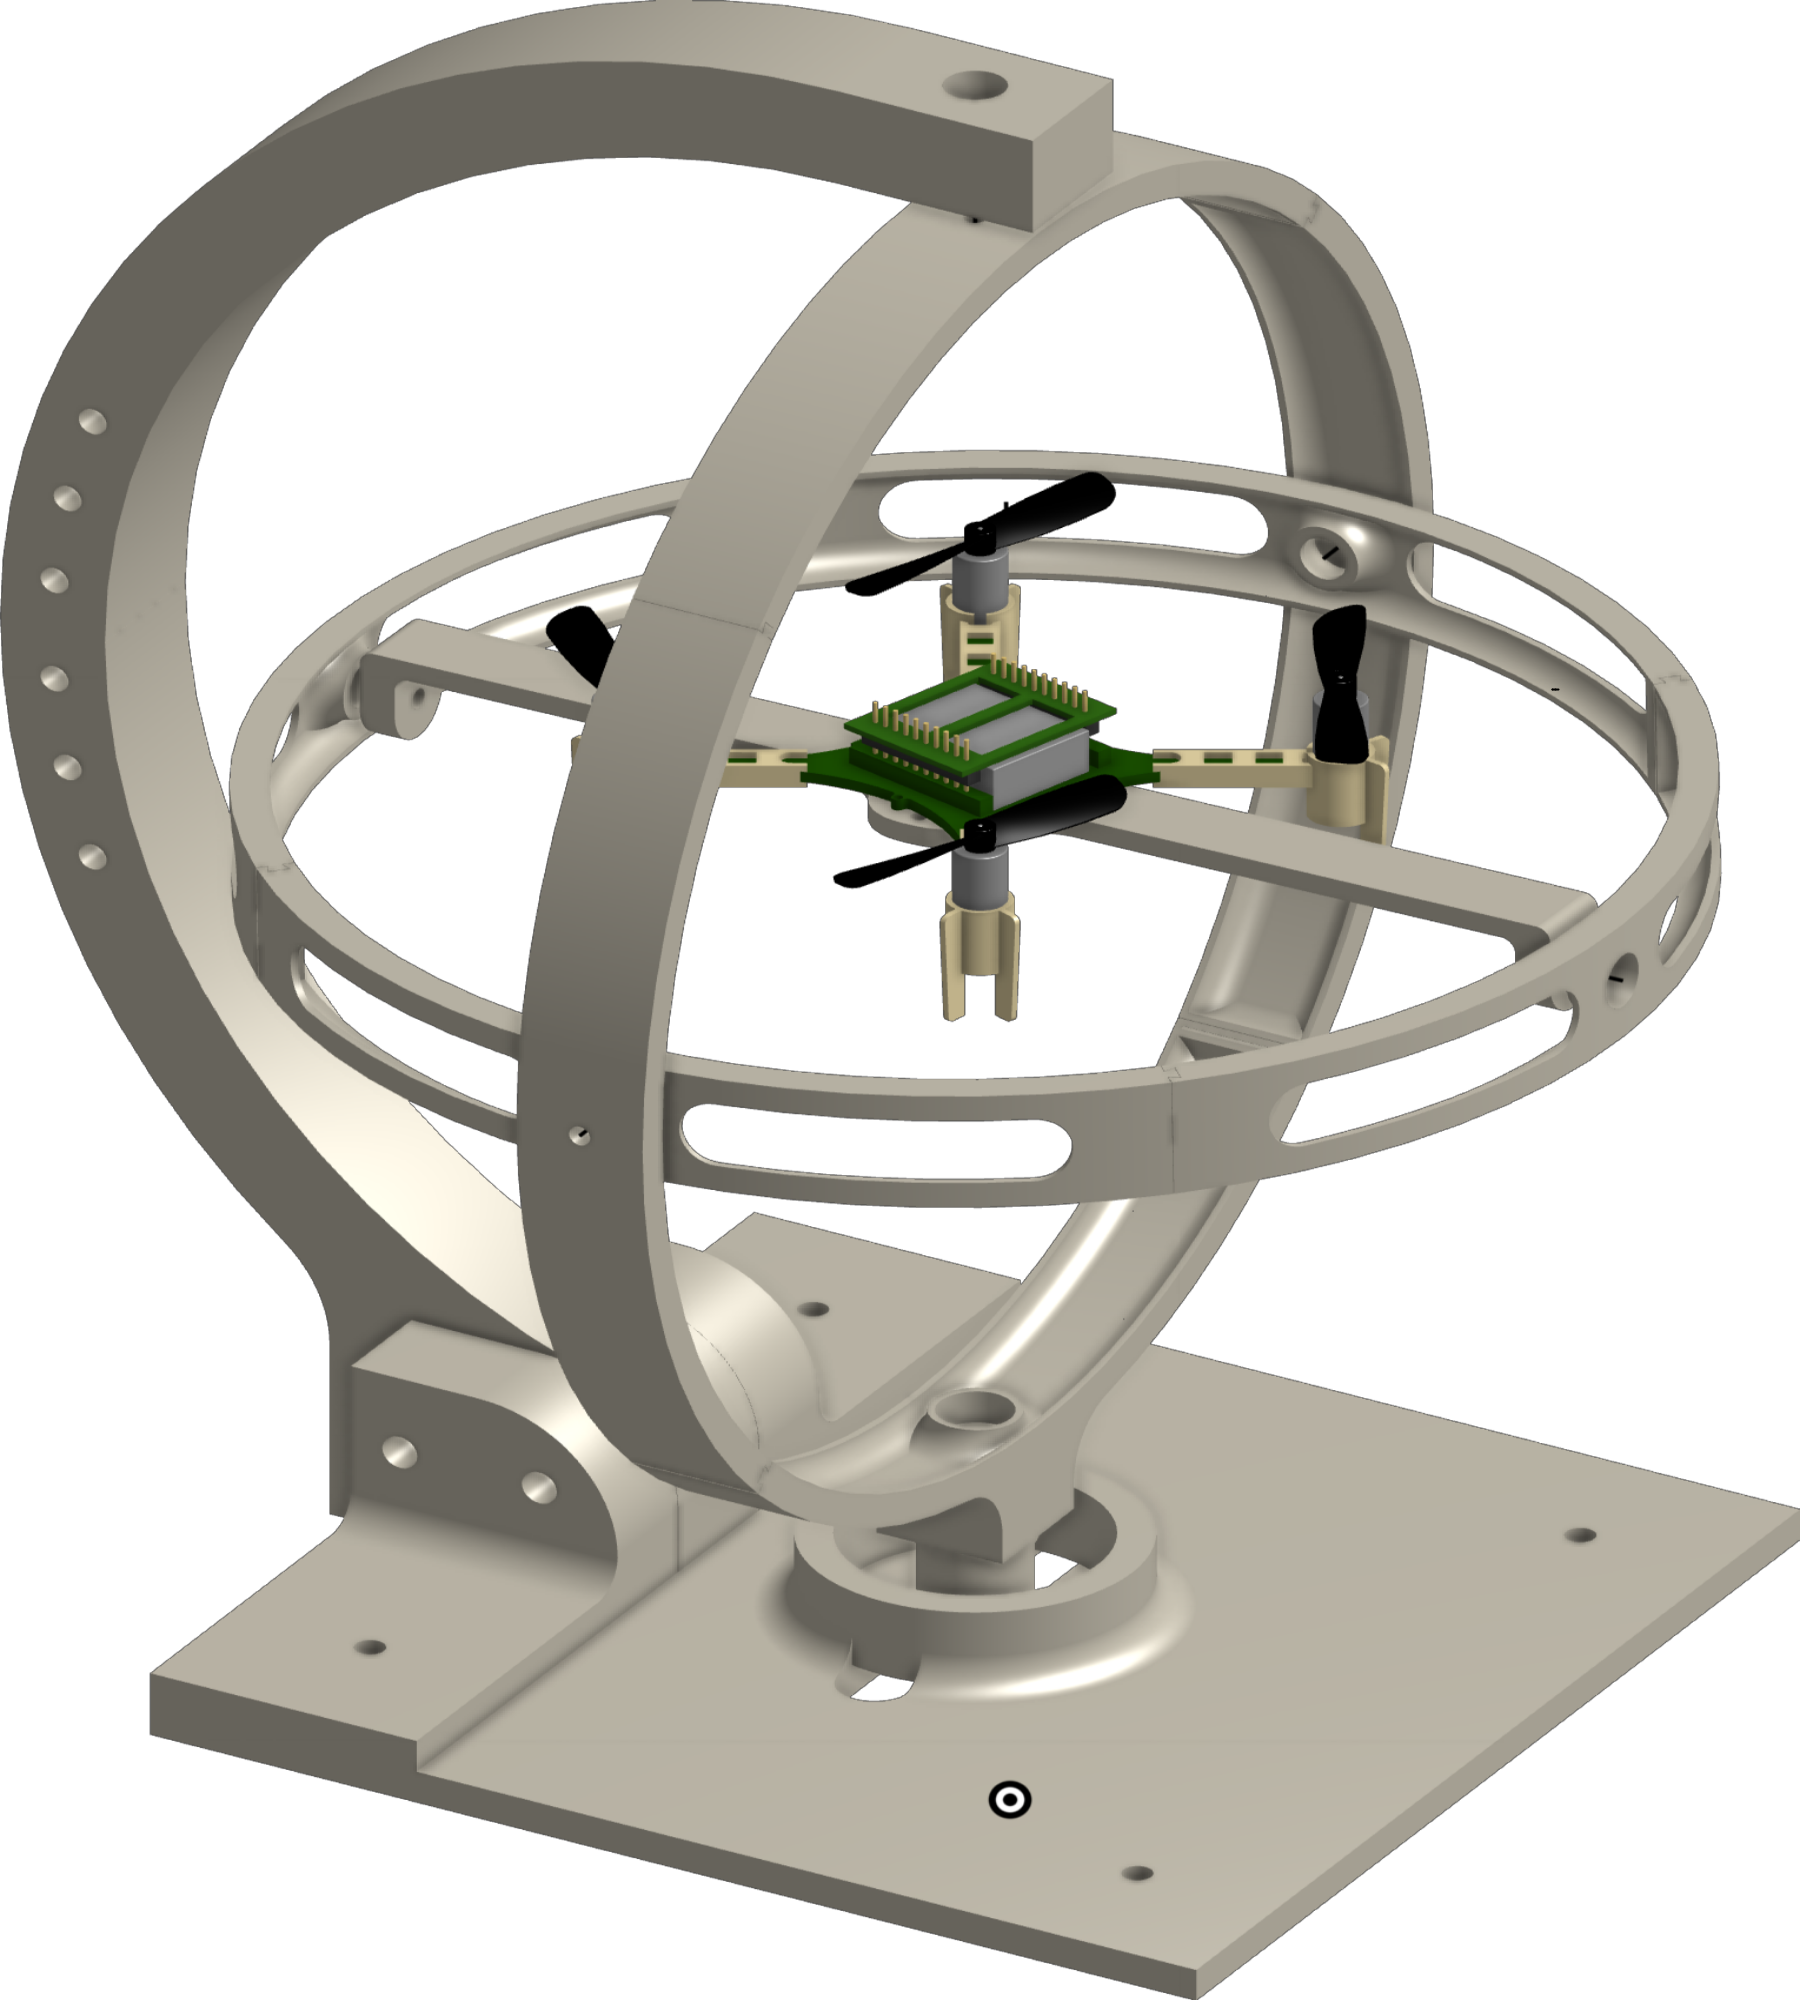
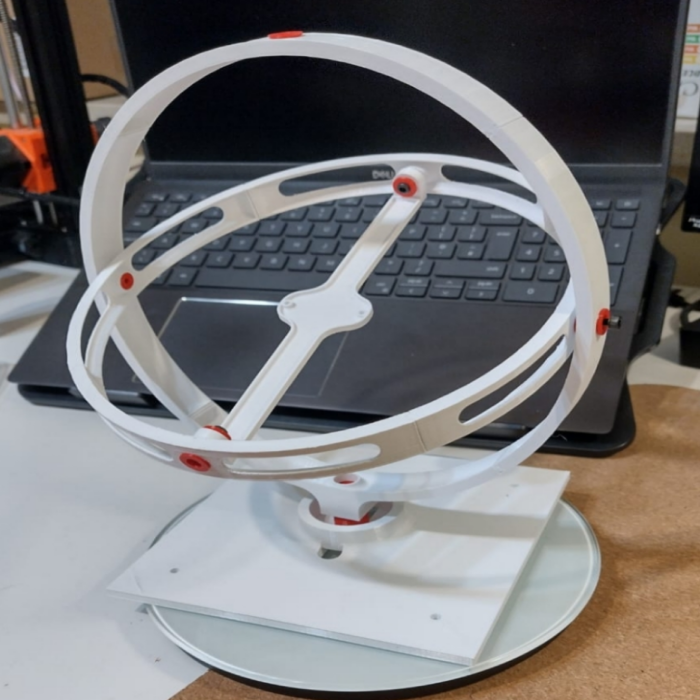
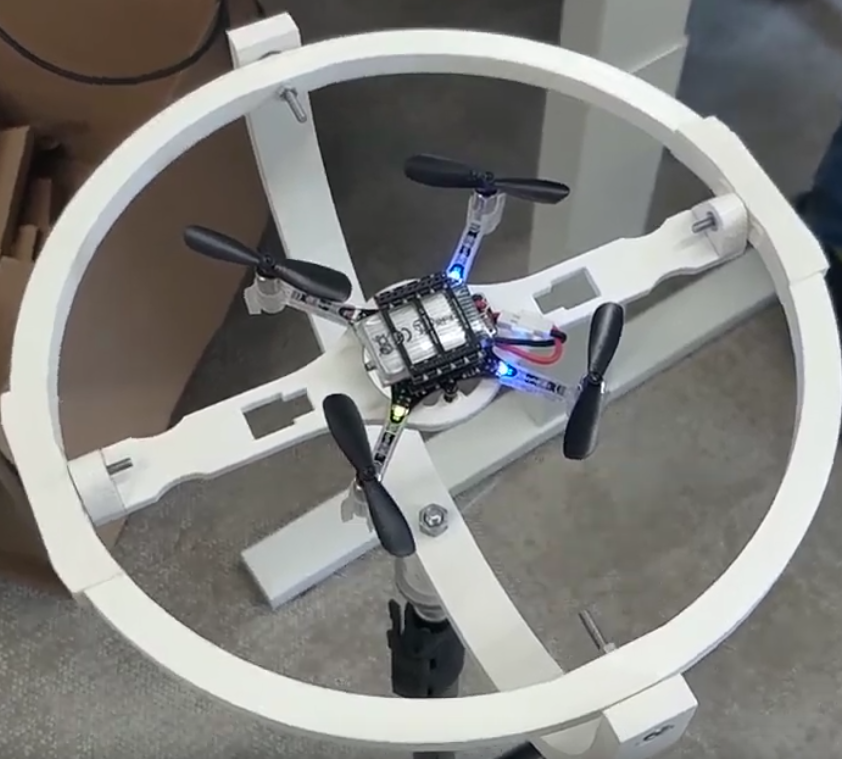
We want to keep adding test cases and other infrastructure to our testing framework. Going forward it would be really nice to be able to test positioning systems in some way. And of course, some type of test of flight, be it free flying tests or using some kind of harness.

It might be interesting to look into adding simulations (hardware in loop or not) to our testing setup. It is all a question of bandwidth, there are a lot of cool things to work on, and a limit on time and bodies.

You can help! You might even be able to help yourself while helping us! If you contribute tests that correspond to your use-case, then you can relax knowing that those tests will run each night, and that Bitcraze engineers will be notified the minute they fail.

Or you can define your own site and run the test-suite against all your devices to make sure nothing strange is going on.

Hopefully this infrastructure and lab will help all of us to do more cool stuff using the Bitcraze ecosystem!