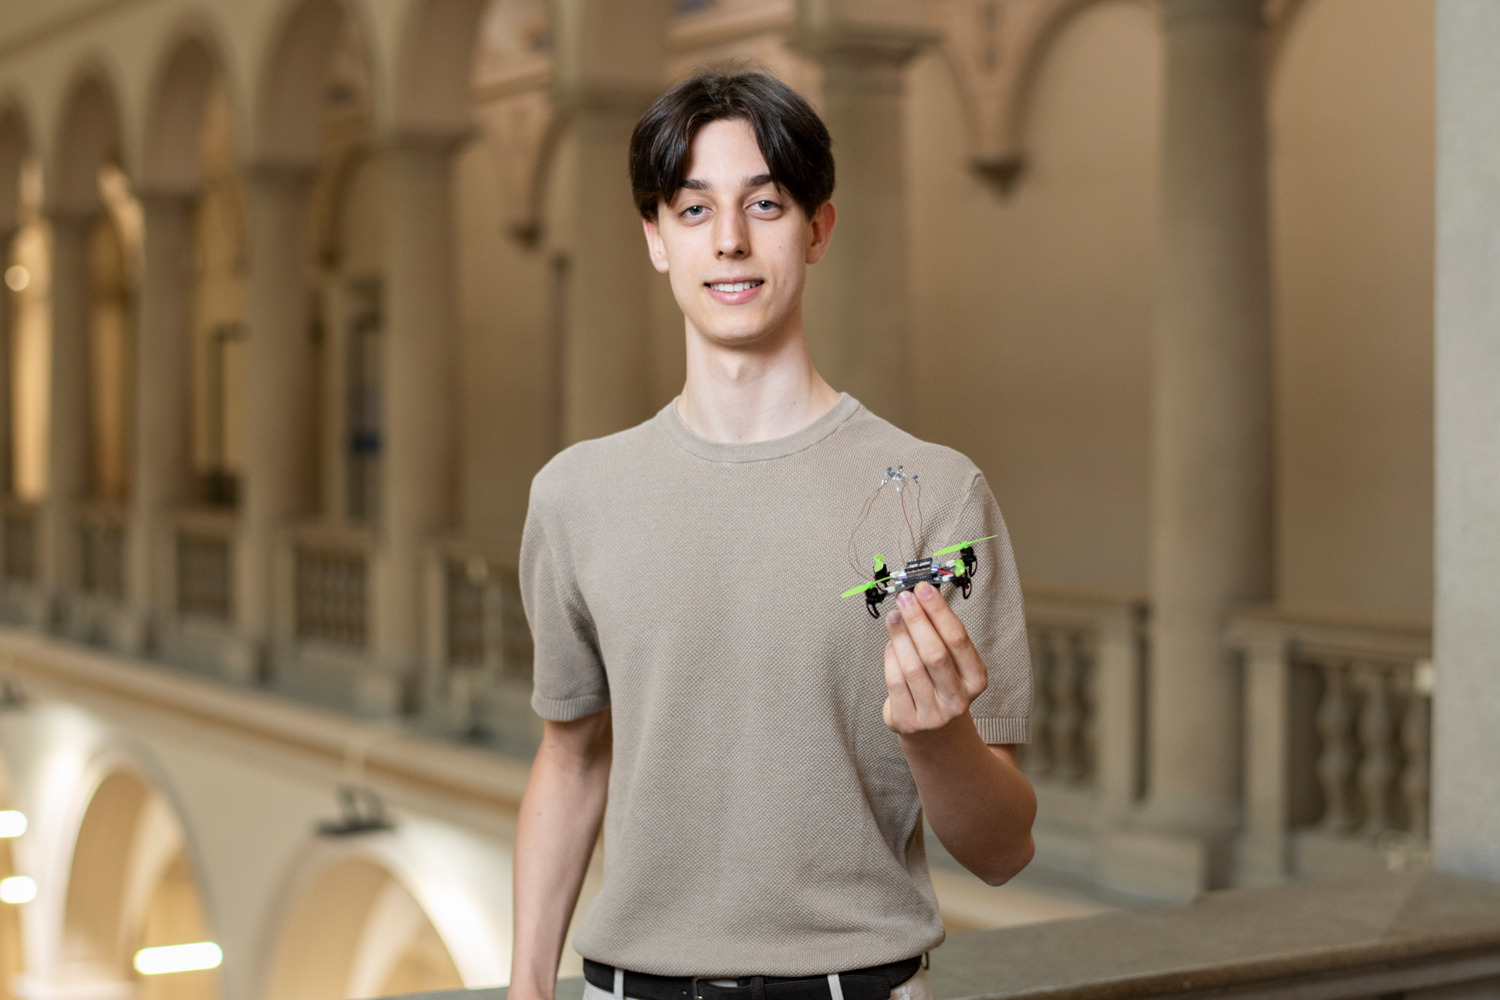
Today, we welcome our first blog post by Maurice Zemp. Stay tuned for more of his adventures later!
When I started working on my Matura thesis (a mandatory project in Swiss High School), I wanted to create something that went beyond a purely theoretical project. I was fascinated by the idea of combining cutting-edge technology with a very tangible and exciting challenge: making a small drone fly through a racing course, composed by small gates, completely on its own and as fast as possible. Inspired by the work under Prof. Davide Scaramuzza, I set off for a challenge to find some new alternatives or improvements, while developping my approach from scratch.
What may sound simple at first quickly turns into a highly complex task. A drone needs to perceive its environment, process information in real time, and decide on precise actions within fractions of a second, all without human intervention. Professional drone racing pilots train for years to master this level of control. My goal was to see whether artificial intelligence could achieve something similar, using reinforcement learning as the core technique.
But there was another challenge: I wanted to design a system that wasn’t only powerful, but also affordable and reproducible. Many research institutions use equipment worth tens of thousands of francs for projects like these. I asked myself: Could I build something comparable with a fraction of the budget, and still push the boundaries of what’s possible?
That question became the driving force behind my project, which later brought me all the way to the finals of Schweizer Jugend forscht (short SJf) and saved me a place as the main prize to represent Switzerland at the world’s biggest Youth Science Competition, ISEF 2026. Over the following sections, I’ll share how I built my system step by step, what it was like to present it at the competition, and how it felt when all the effort finally paid off.
Motivation and Objectives
The project I presented at Schweizer Jugend forscht was the result of my Matura thesis, in which I set out to combine my interests in drones, programming, and artificial intelligence. My goal was to develop a complete system for autonomous drone racing, based on Reinforcement Learning (RL), that would not only work in simulation but could also be transferred to real-world conditions.
To achieve this, I focused on three key aspects:
- Building a highly efficient simulation environment for training a reinforcement learning agent.
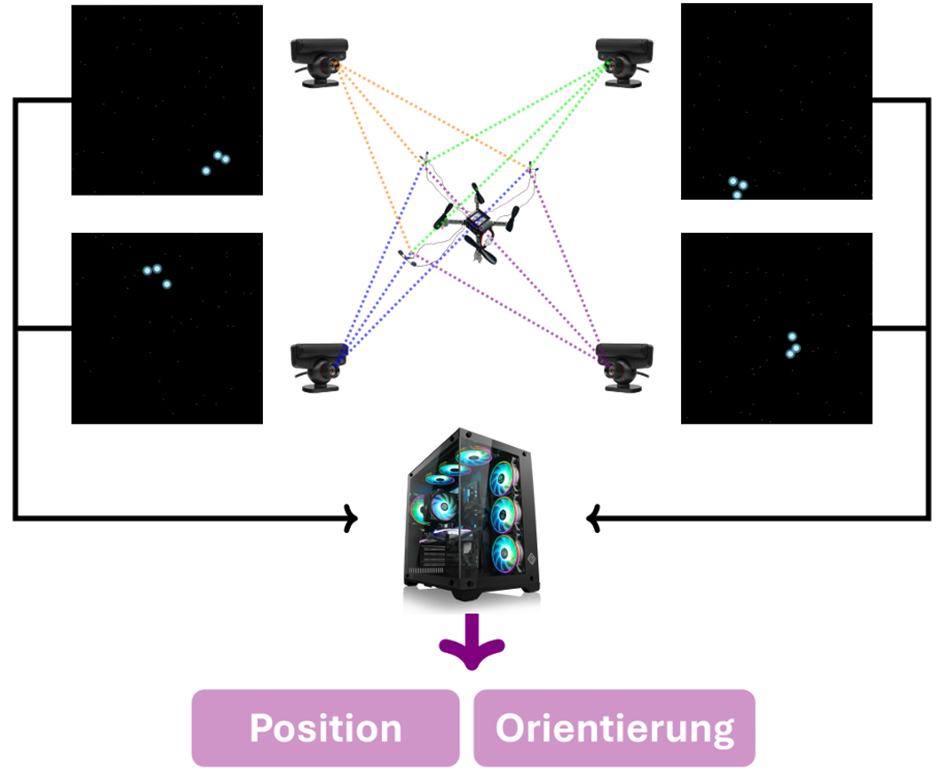
- Developing a cost-effective motion-capture system (MoCap) capable of tracking a drone’s position and orientation in real time with high precision.
- Integrating both systems in a way that would allow seamless transfer from simulation to real-world experiments with minimal latency.
This combination made the project unique: instead of relying on expensive commercial hardware, I set out to create a solution that would be precise and affordable but still continue the state-of-the-art development in Drone Racing.
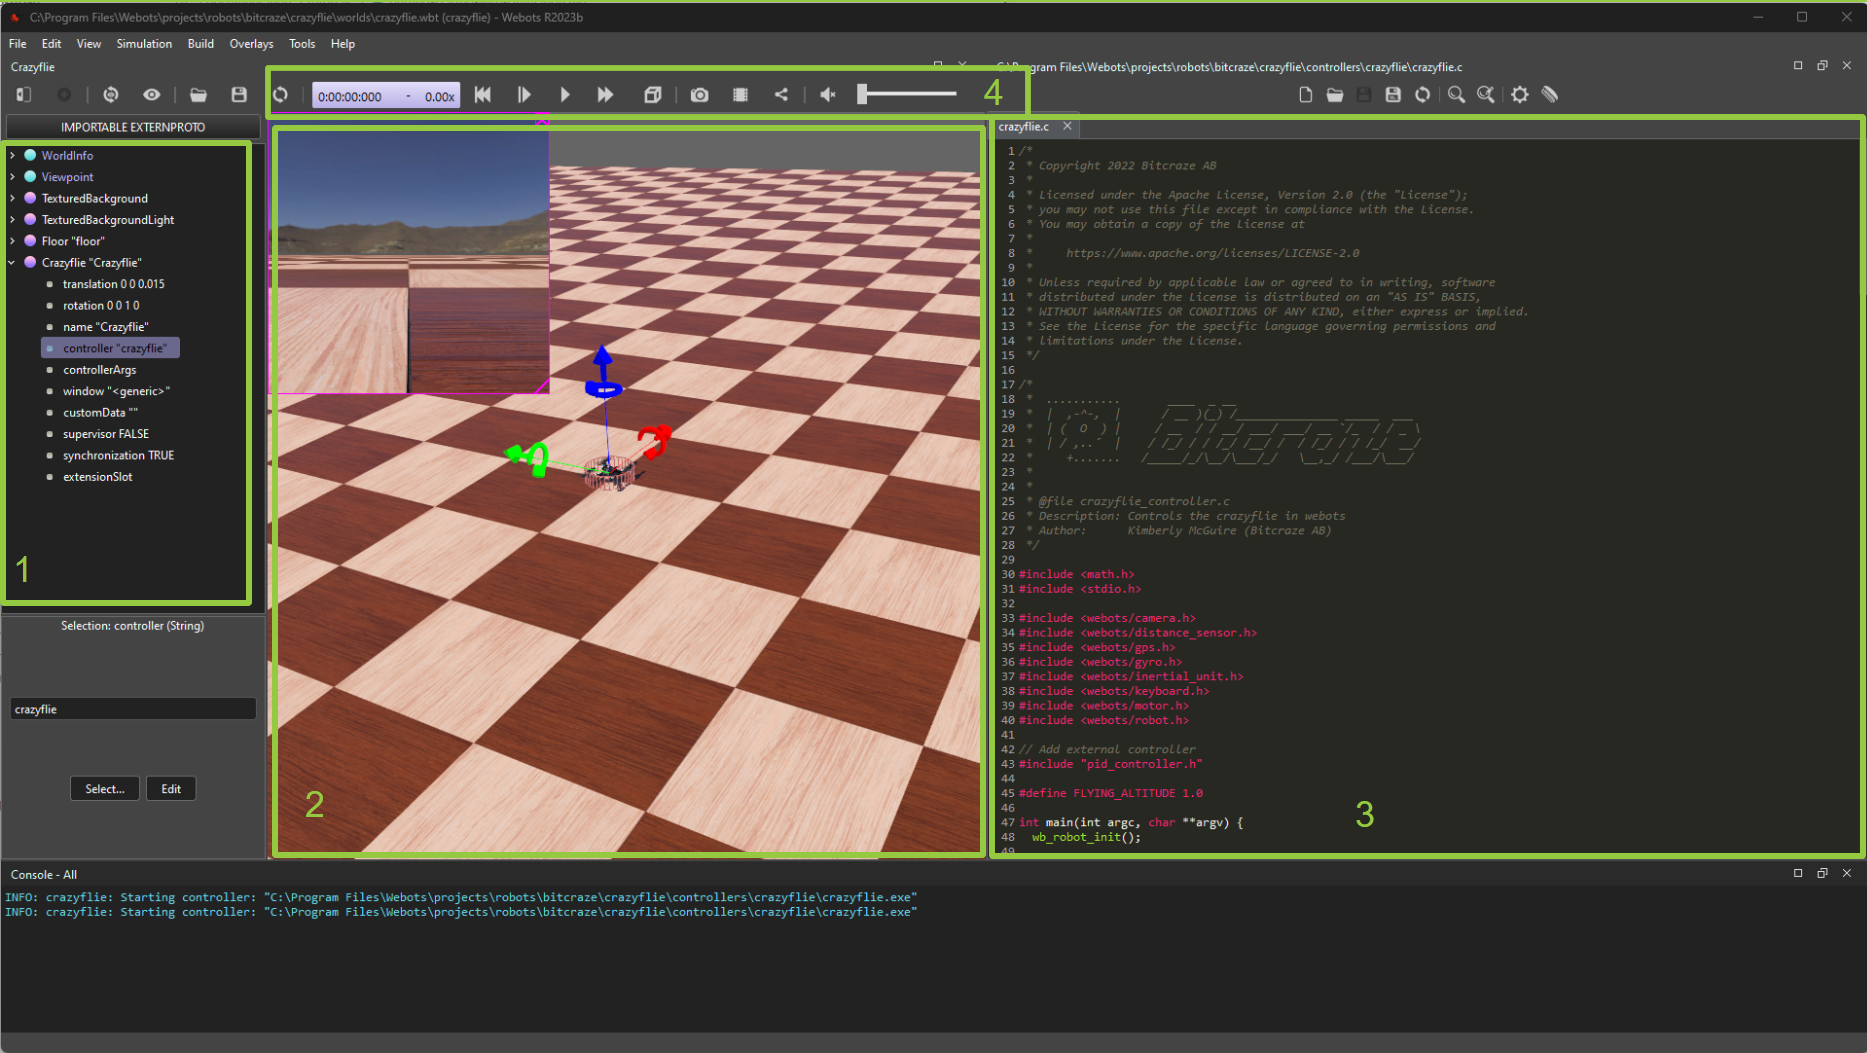
Simulation Environment
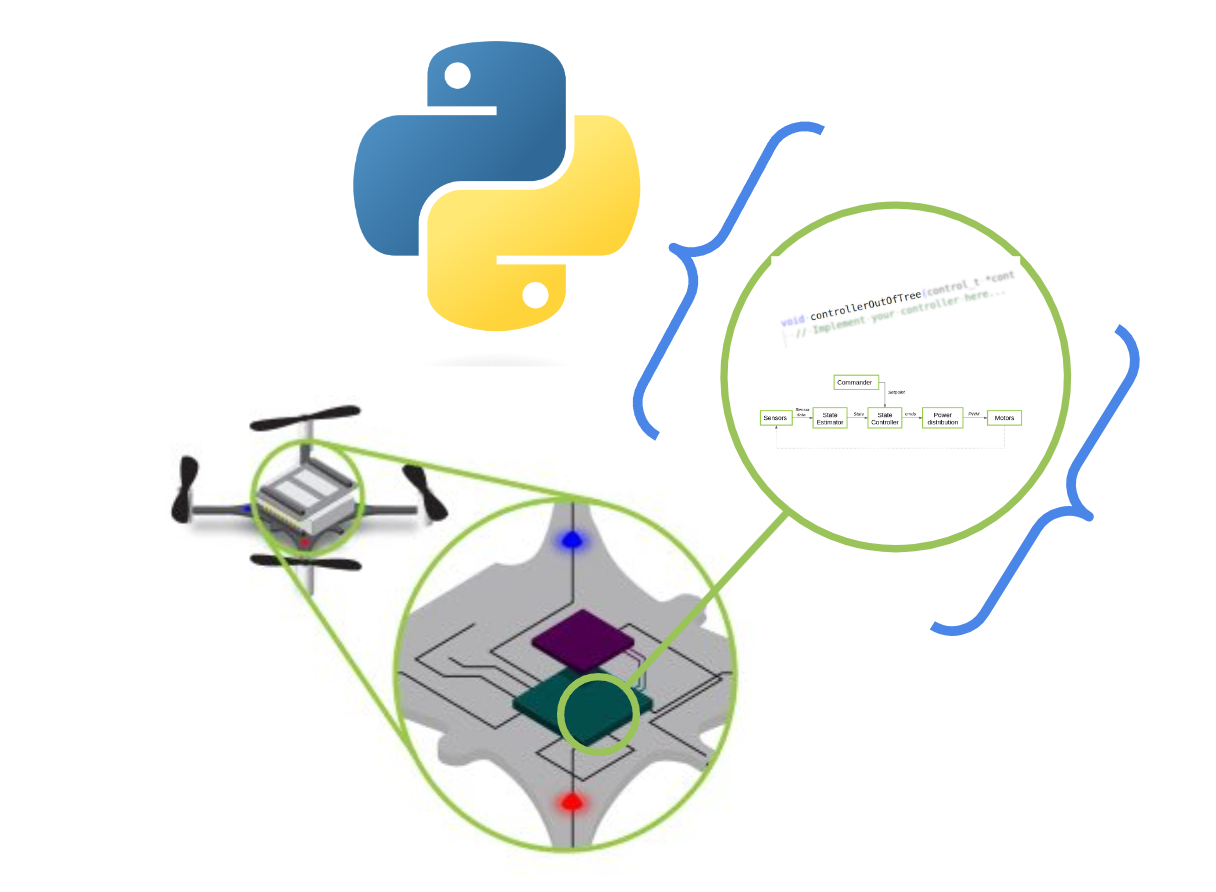
The simulation was implemented in Python, using Stable Baselines, OpenAI Gymnasium, and NumPy, accelerated with Numba for performance. At its core, the system employed the Proximal Policy Optimization (PPO) algorithm, a state-of-the-art reinforcement learning algorithm known for stability and efficiency.
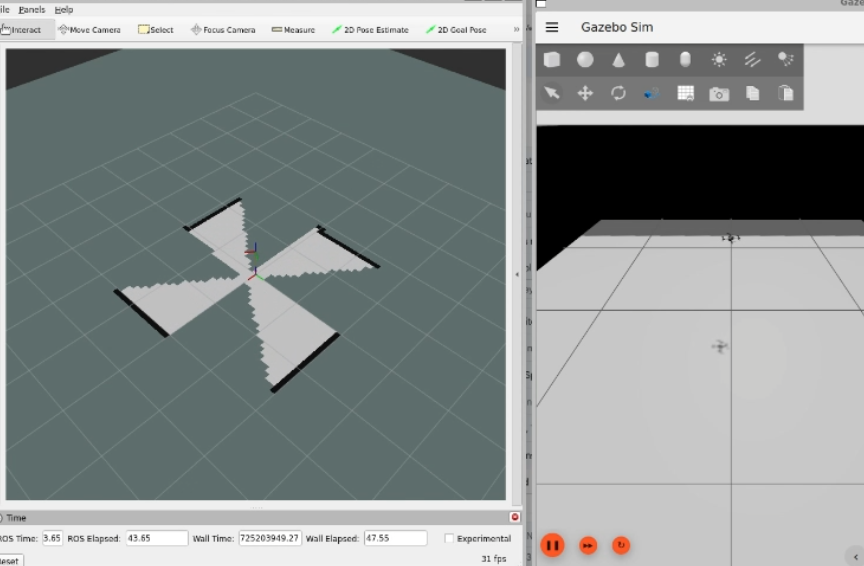
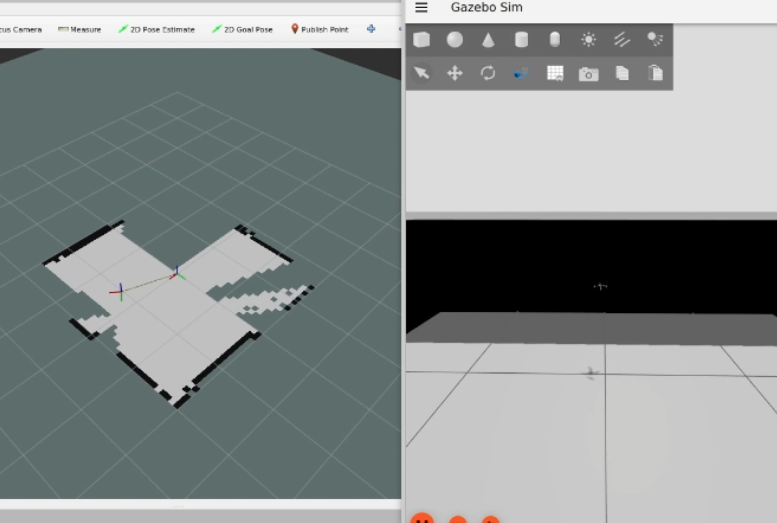
Unlike general-purpose simulators such as Gazebo, my environment was designed specifically for drone racing. It could process tens of thousands of interactions per second, enabling a training run of a few dozen minutes to correspond to nearly a year of simulated flight time.
Key features included:
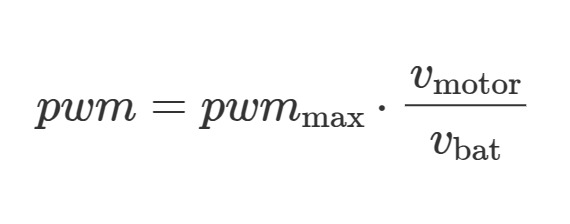
- A physics-based flight dynamics model accounting for thrust, drag and gyroscopic effects.
- A carefully engineered reward function balancing speed, precision and avoiding shortcuts.
- A flexible design that allowed different gate sequences and drone parameters to be tested.
- A multi-agent environment computing on multiple threads, leading to much shorter training time needed.
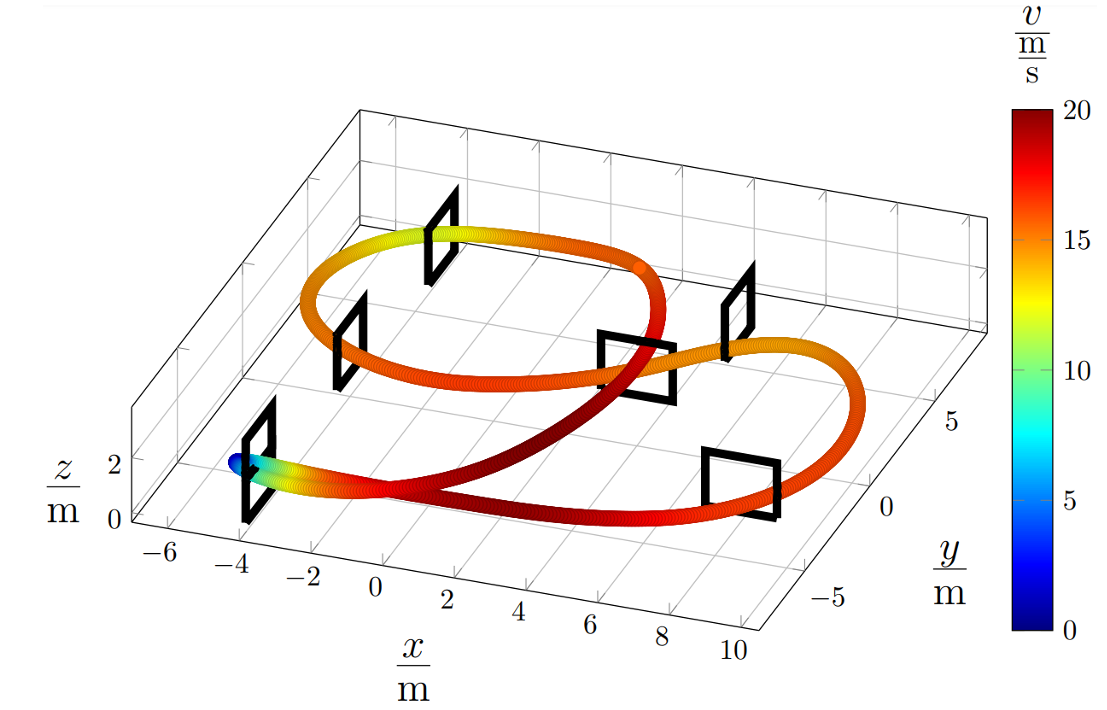
With this setup, an RL agent could learn to complete arbitrary racing tracks in near-optimal time1 after only a few hours of training. In simulation, top speeds of up to 100 km/h were achieved, though these exceeded the physical limits of the real drone and were generated with modified drone parameters.
Motion-Capture-System
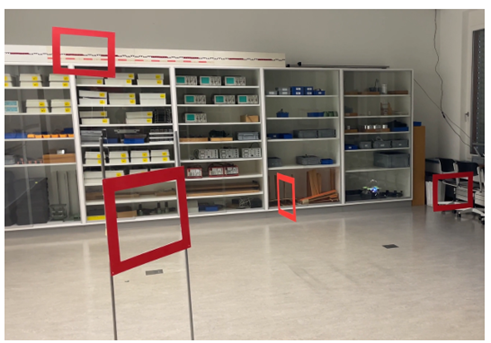
A second cornerstone of the project was the development of a low-cost motion-capture system. Instead of relying on high-end solutions such as VICON or OptiTrack (which can cost tens of thousands of Swiss francs), I built a custom setup. The drone – a Crazyflie 2.1 Nanocopter (later a Crazyflie 2.1 Brushless) – was fitted with infrared diodes. With four cameras capturing at 120 frames per second, the drone’s position was calculated in real time through triangulation. By using three diodes arranged on the drone, I not only wanted to estimate the position but also the orientation. Unfortunately, due to the cameras being budget and thus not having a high-end resolution, the estimation of the orientation was not feasible and was therefore taken from the onboard IMU.
System Integration
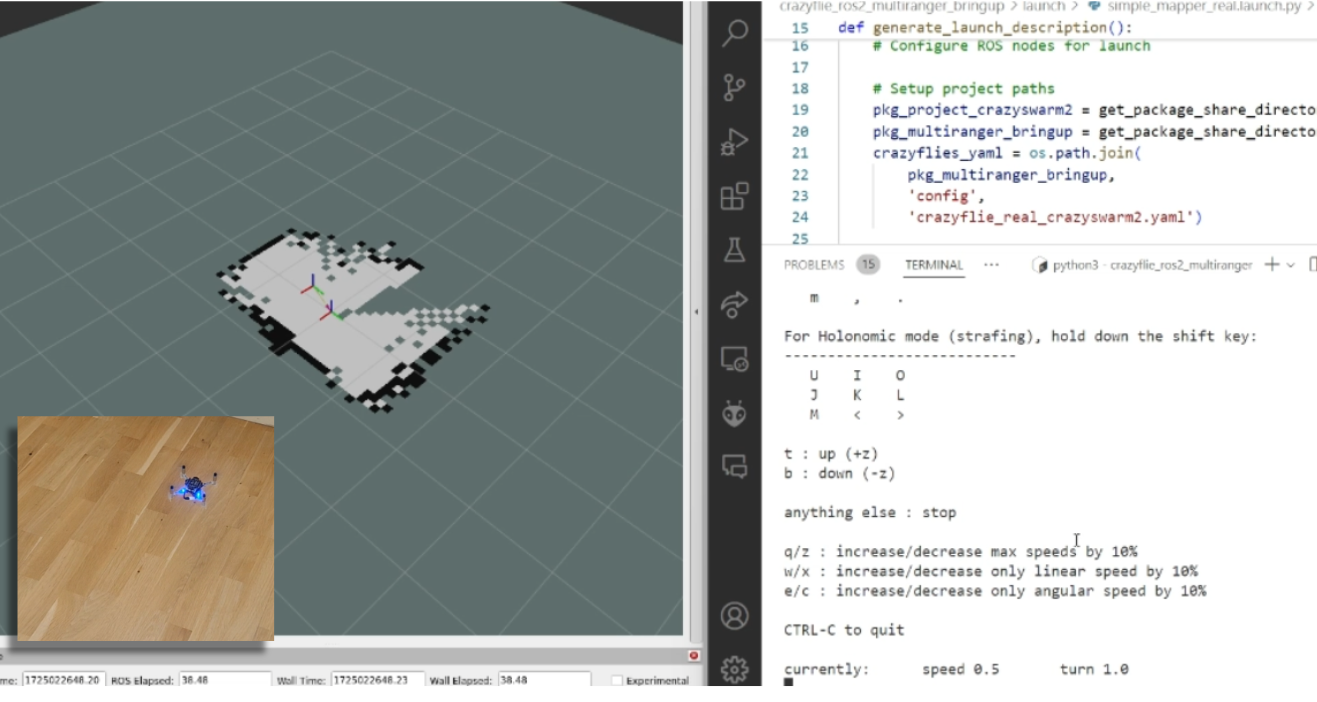
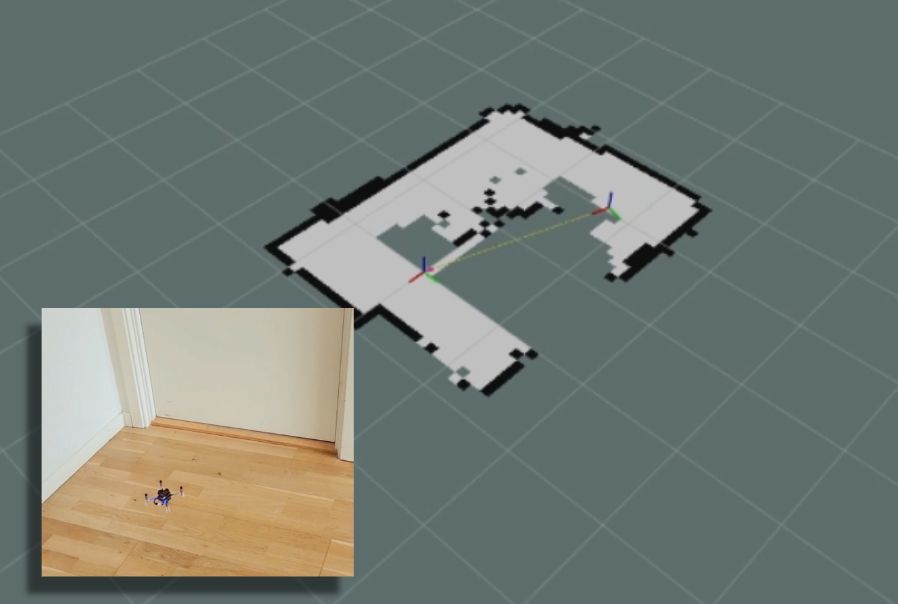
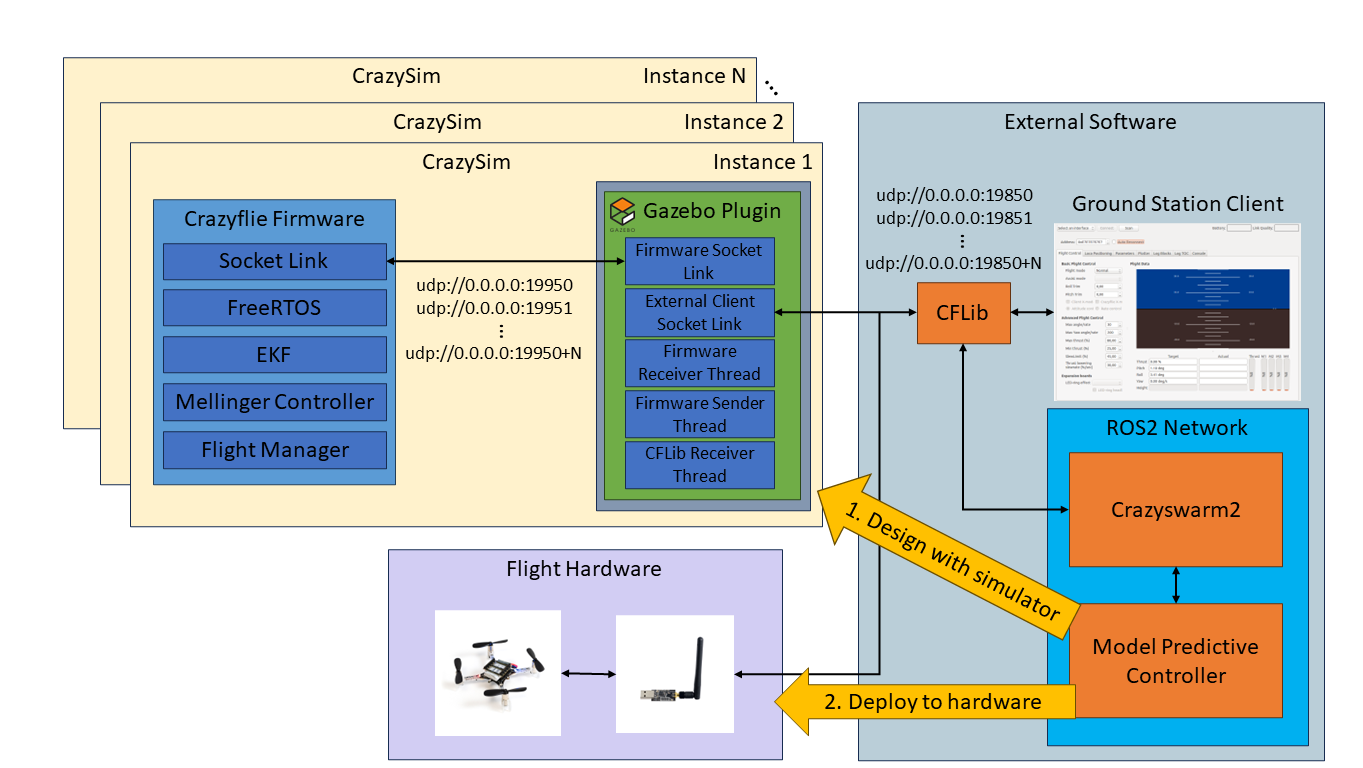
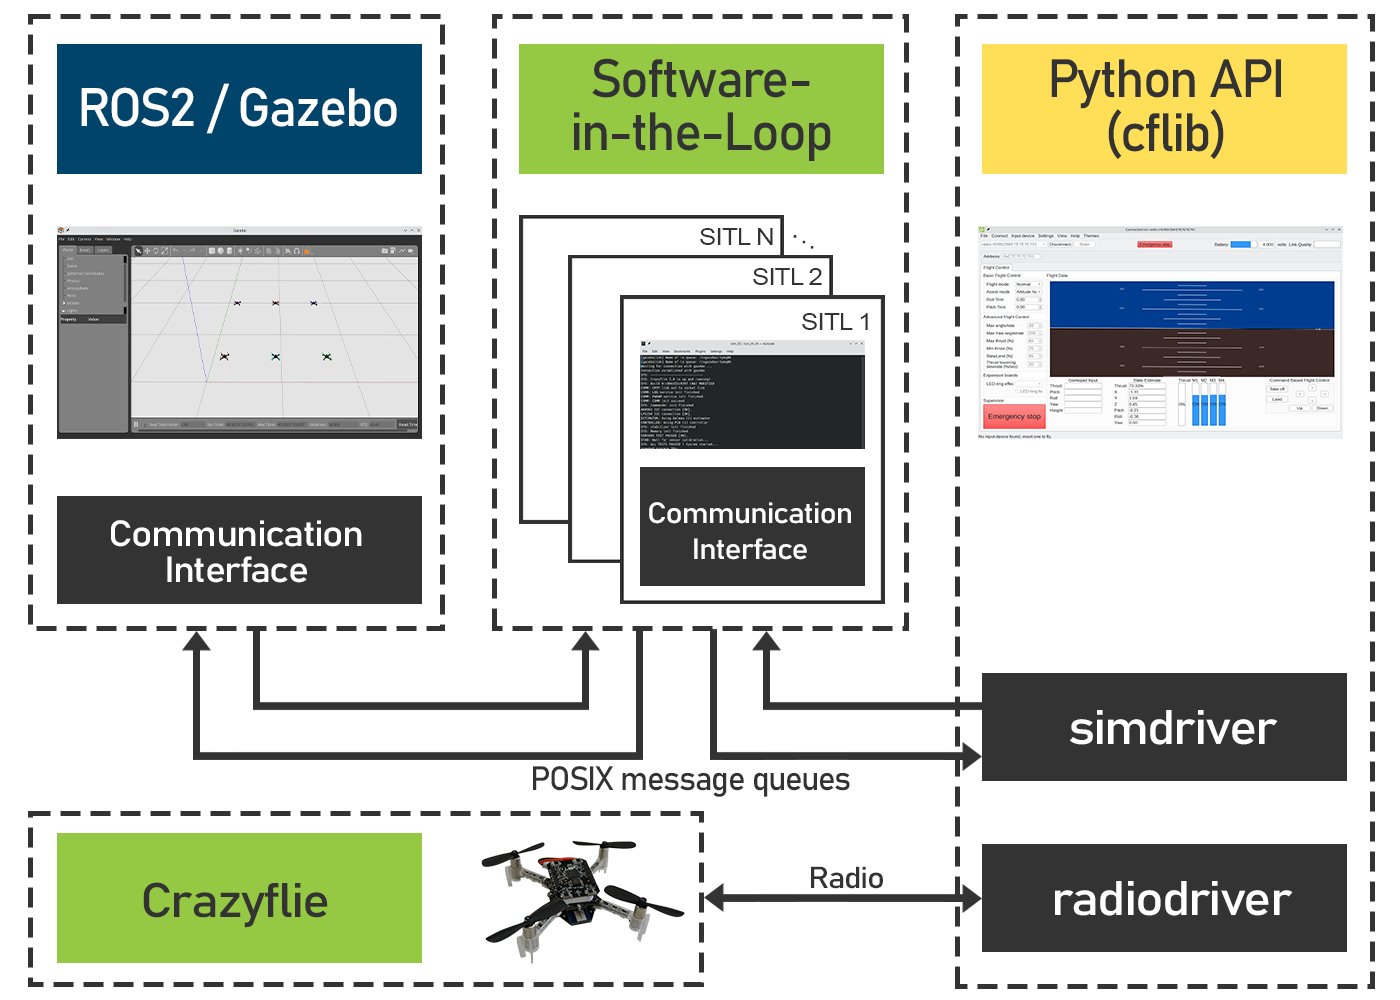
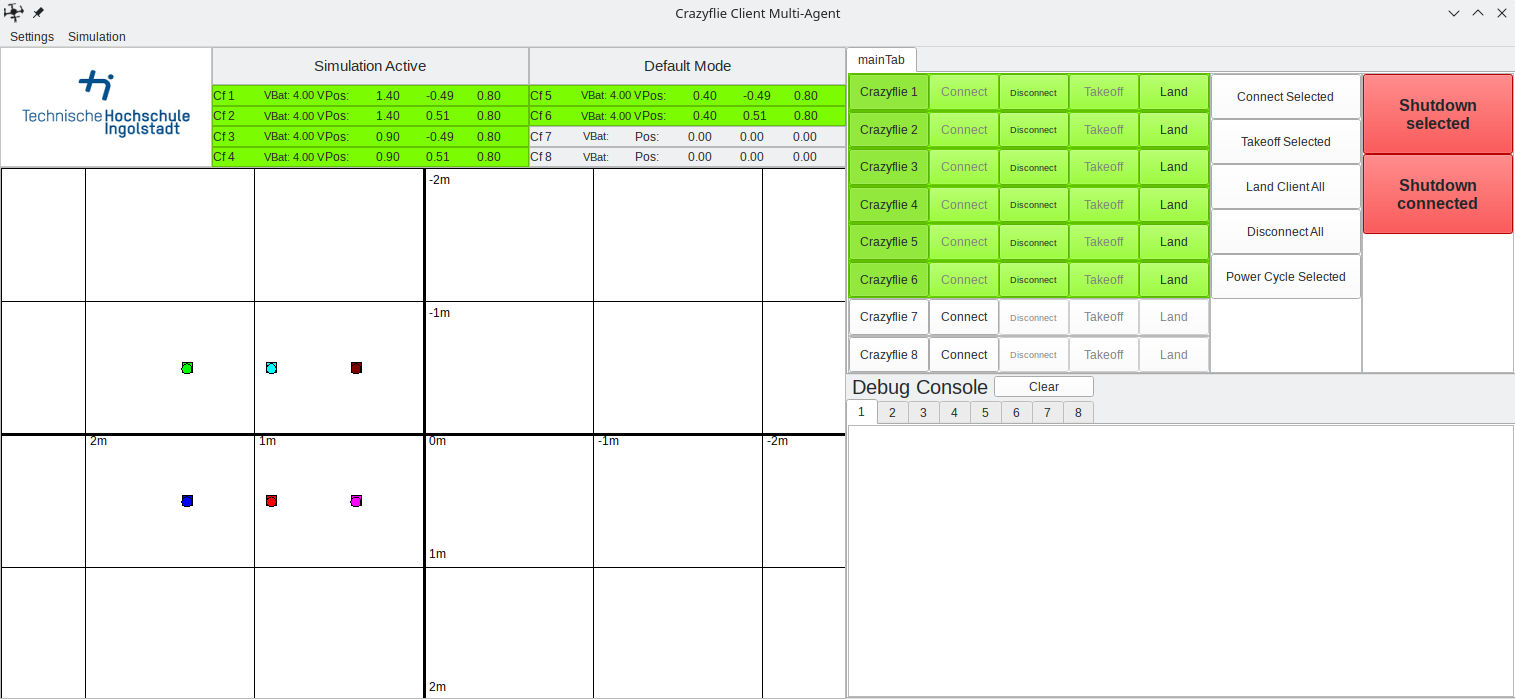
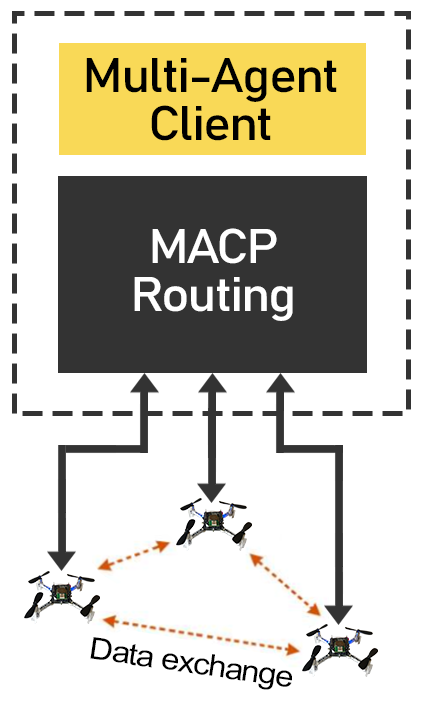
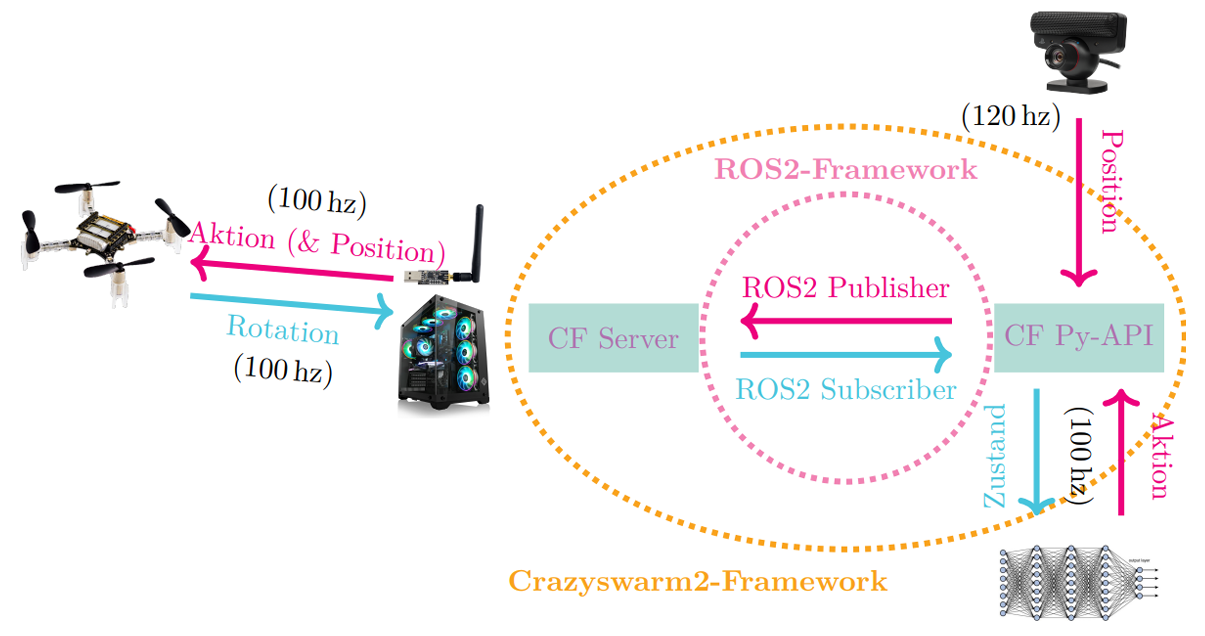
For integration, I relied on the ROS2 middleware and the Crazyswarm2 framework, which allowed the simulation and MoCap data to be processed together with minimal latency. This setup ensured that a policy trained in simulation could be executed on the real drone almost seamlessly.
Results & Discussion
The results demonstrated the effectiveness of the combined system:
- In simulation, the RL agent completed tracks in nearly optimal time1, demonstrating robust generalization across different gate sequences.
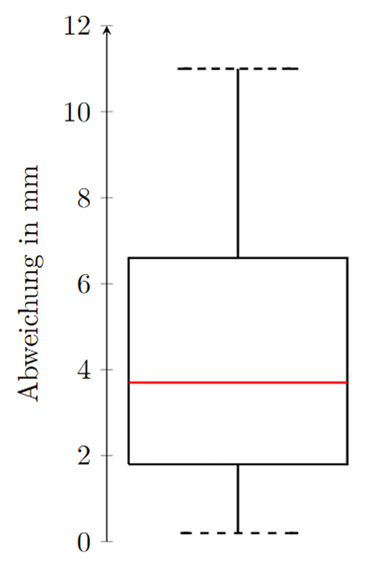
- The motion-capture system delivered millimeter-level accuracy and reliable tracking in real time despite its simplicity. (see Fig. 5)
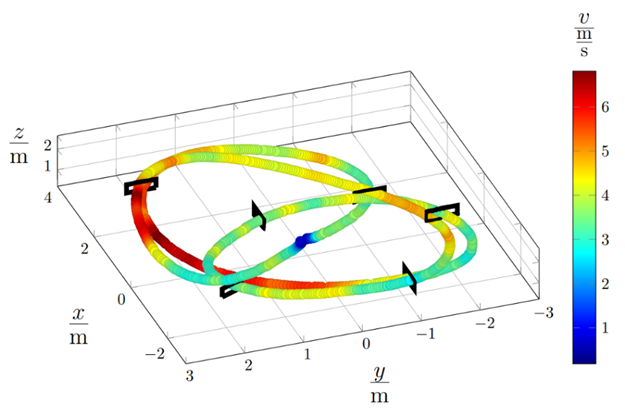
- In real-world tests, the Crazyflie drone successfully completed tight gate sequences, even at speeds of up to 25 km/h, with a positional deviation of only 5–12 cm compared to the simulated trajectories. (see Fig. 6)
Given that the gates were roughly A3-sized openings (38 × 29 cm), the precision was sufficient to consistently hit every gate, confirming the feasibility of transferring simulated training into real-world racing. (Video)
The system demonstrated that RL-based controllers can generalize effectively from simulation to reality, even with imperfect models. This robustness shows that RL is promising for real-world robotics applications where exact physical modeling is difficult or costly. To further investigate this robustness, I conducted ablation studies in simulation focusing on aerodynamic drag, as well as analyses of the MoCap system’s accuracy in measuring dynamic motion.
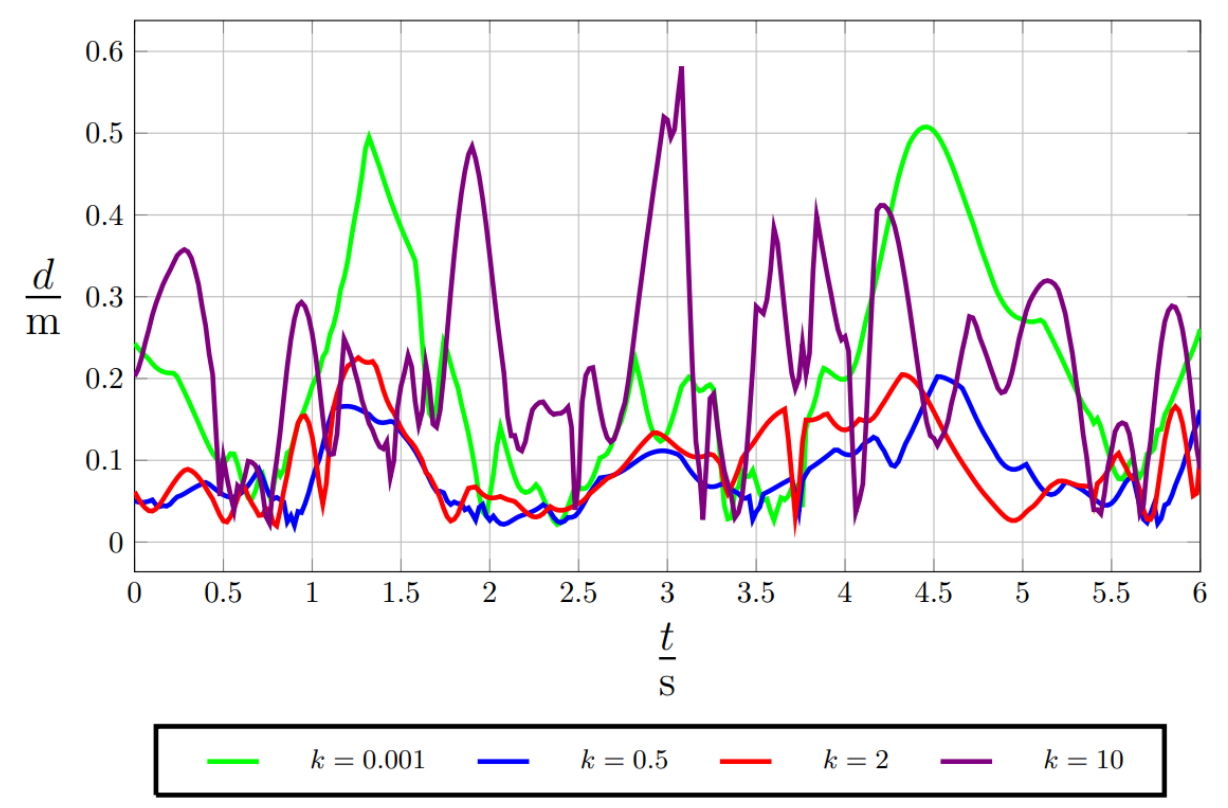
- As for the aerodynamic drag, I introduced some randomness during evaluation, which deviated largely from what the Algorithm had trained upon. To achieve this, I introduced a parameter k which was multiplied with the correct aerodynamic drag to view how these differences would impact the flight. In Fig. 8 you can see the deviation from the real path over the course of a flight. As obviously more drag results in lower velocities, the two paths had to be fitted using the nearest two possible points. The results are impressive, even with an enormous change to training such as k = 10 the flight still performed somewhat okay, even though the gates probably wouldn’t have been hit anymore.
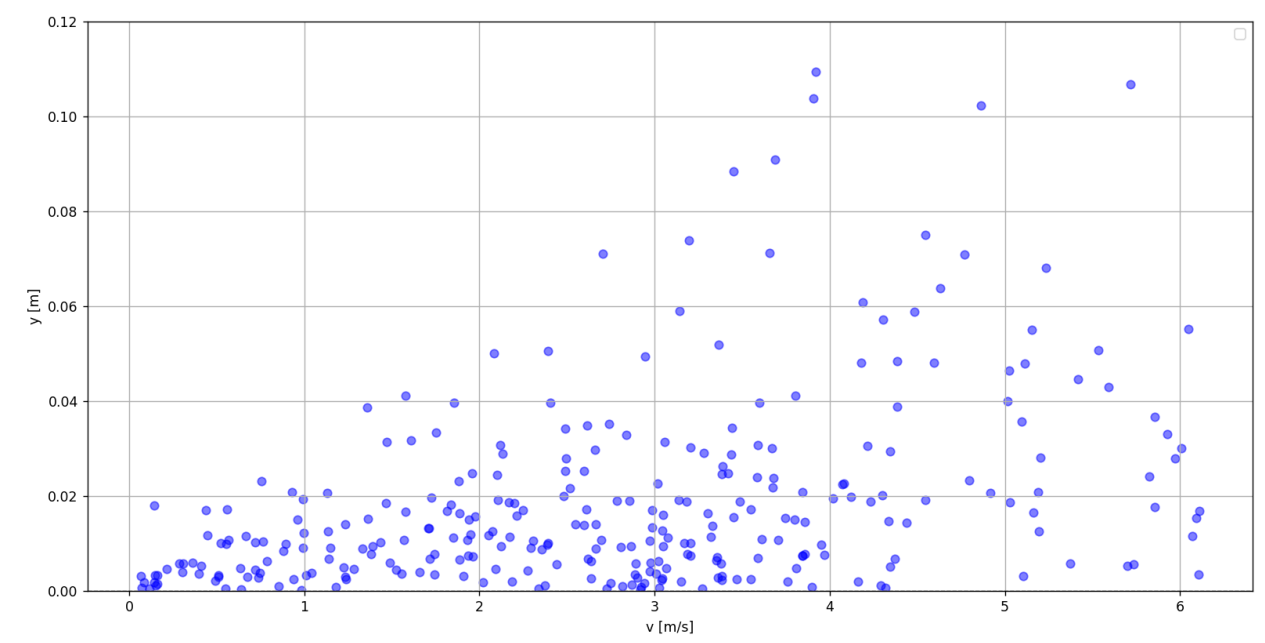
- For the MoCap System, I used a mathematically representable motion, such as a pendulum. Then I performed a parameter optimization on this mathematical model and measured the deviation based on the current speed. There is a clear correlation between speed and deviation (see Fig. 9), which most likely was caused by the missing calibration of the cameras.
Conclusion and Reflection
This work demonstrates that RL, combined with accessible hardware, enables precise and robust autonomous flight in dynamic indoor environments. The results underscore the potential of low-
cost robotics solutions to democratize drone research. Even though it was a large project and there were some hard times, I enjoyed working on it a lot and believe that the result and the memories made with it are even more rewarding than any prize money!
Acknowledgments
To end this guest post, I want to sincerely thank Bitcraze for their amazing work and support during the development of this project. They have genuinely built such an incredible testbed for research in autonomous drones, it’s amazing! Without them, this project wouldn’t have worked out the way it did!
- Near-optimal time here references to the theoretical boundary of a drone completing this track, given it’s parameters. To be clear, this is not fitting a polynomial with boundaries on their derivatives onto gate segments, as it was done during earlier approches in the 2010s. It was compared to multiple previous approches by UZH RPG such as Optimal Control (OC). Nevertheless, this comparison could be done more extensively in the future, as time ran short in the end. ↩︎