Month: October 2020

Back in 2014 a friend of ours dropped by our office to chat a bit about how things were going for Bitcraze. During the conversation we got a few questions that we should have been able to answer, but we couldn’t. Things like “How many Crazyflies have you sold?” and “To which countries do you mostly sell?”. We realized that we need some way of keeping track of things like this. Since I was mostly handling economics and admin, and also like developing things, this became the start of our internal “do a bit of everything” system.
At this point in time we were only selling our products though Seeedstudio, so the system was mostly used to keep track of the stock levels there. But as things at Bitcraze started to change, so did the system. Later that year our Crazyflie 2.0 was heading into production and we wanted a better way to keep track of production, so we modified the production scripts to upload the production test results to our servers. Now we had production stats and could trace returns from the field trough production using serial numbers.

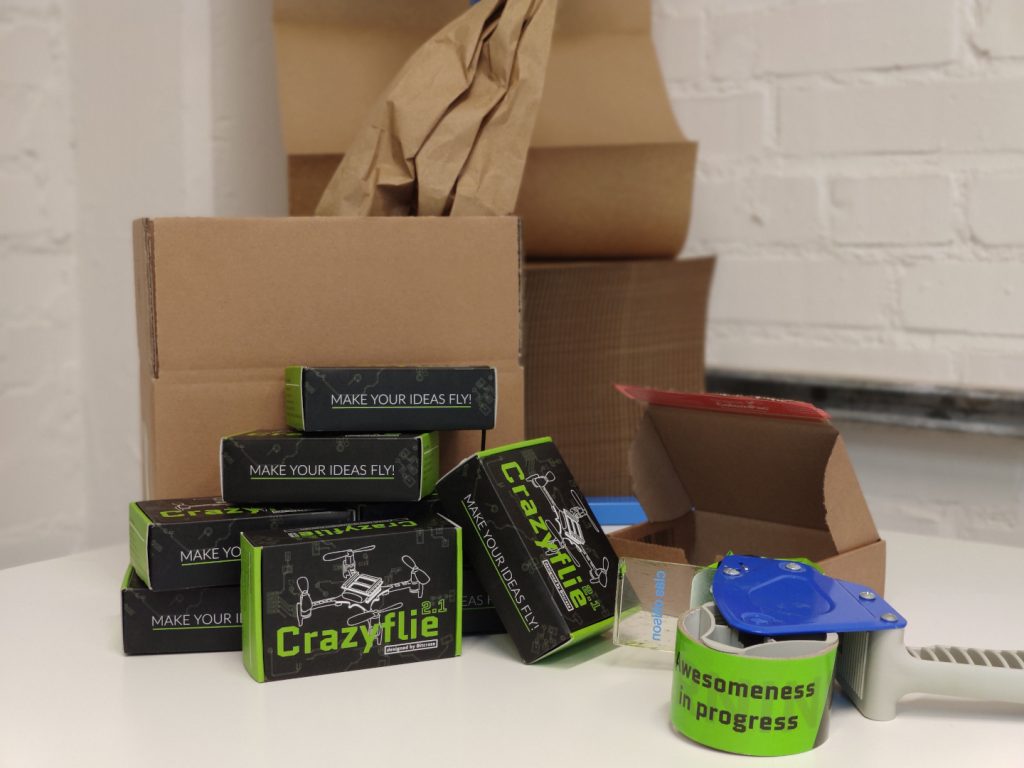
Fast forward to 2016 and we’ve decided to start selling our products in our own E-store. We found a 3PL partner in Hong Kong to do our packaging and shipping. It was a big step for us and something we really liked since we got direct contact with our customers. But the amount of work quickly started to increase. Our main issue was that some customers were not keeping track of their shipments and the shipments would end up sitting in customs awaiting questions from the customers and would eventually be returned to us, and this was a big hassle. So the tracking of orders were added to our internal system, now it would keep track of the shipment progress and warn us if there were any issues.

Apart from the E-store we also had orders though our invoicing software. In order for us to get a unified picture of what was happening our internal system started to merge information from the different systems: our E-store, invoicing software and Seeedstudio.

At this point the system had grown so much that the architecture was a bit out of hand and we re-wrote the system from scratch to be able to handle more changing requirements. In hindsight was a good decision, since the next big change change was around the corner. In 2018 everything was running smoothly but our 3PL partner was suddenly moving the warehouse from Hong Kong to Shenzhen (blog post), something that was supposed to take a week and run smoothly. Unfortunately the move was everything else than smooth and after battling for months trying to get the operation back up again, we finally pulled the breaks and started to re-route newly produced units to our office in Sweden instead.

Now we had an office full of products and an E-store were things were being sold. But we didn’t have any solution for actually taking the orders and shipping them. At first we were booking everything manually, but as order counts increased this quickly became a problem. We looked at a few solutions but didn’t find anything that matched well for integrating all our systems. So our internal system once again got expanded to handle the warehouse part, print packing lists, book shipments and print labels (blog post).

As time passes (and more challenges pop up) we’ve been adding more and more functionality and have been able to quickly adapt to what’s been happening. While developing the system over the years, my overall goal has been to automate as much as possible of the admin/logistics in order to keep the workload the same even though sales increase. So far this has been successful!

Today we use this system for a wide range of administration, logistics and production tasks. Below is a list of some of the things it handles:

  • E-store and sales
    • Live shipping quotes during checkout
    • Requesting order quotes from the basket
    • It handles all of the accounting from the E-store
    • GMail plugin for easily accessing information
  • Logistics
    • Warehouse functionality (stock, incoming products etc)
    • Printing picking/packaging lists
    • Warnings for shipments that are stuck or lost
    • Booking and printing of shipping labels
  • Manufacturing
    • Keep track of all tested units with all data from the tests
    • Production planning and warning if things will run out of stock
  • Analytics
    • Various harmonized business analytics from our different sales systems
    • Harmonized data that is used for various analysis
  • Reminds us about various things like unpaid invoices

So have we made back the time we spent building the system? Probably not, but we will. There’s a lot of good solutions for similar systems out there, but the decision to make our own system came from not finding a solution where all our pieces fit. In order to minimize the work I’ve tried to use various external services to speed up development. In the end the list of systems that are used together is quite long:

  • Our production test software
  • Shopify (E-store SaaS)
  • Fortnox (Bookkeeping, invoicing and quoting SaaS)
  • Easypost (shipping API)
  • Riksbanken (for exchange rates)
  • Our printing station software for label/document printers
  • Slack for notifying us about various issues
  • Sendgrid for sending emails
  • Mondido (our payment gateway)
  • Google docs
  • Seeedstudio

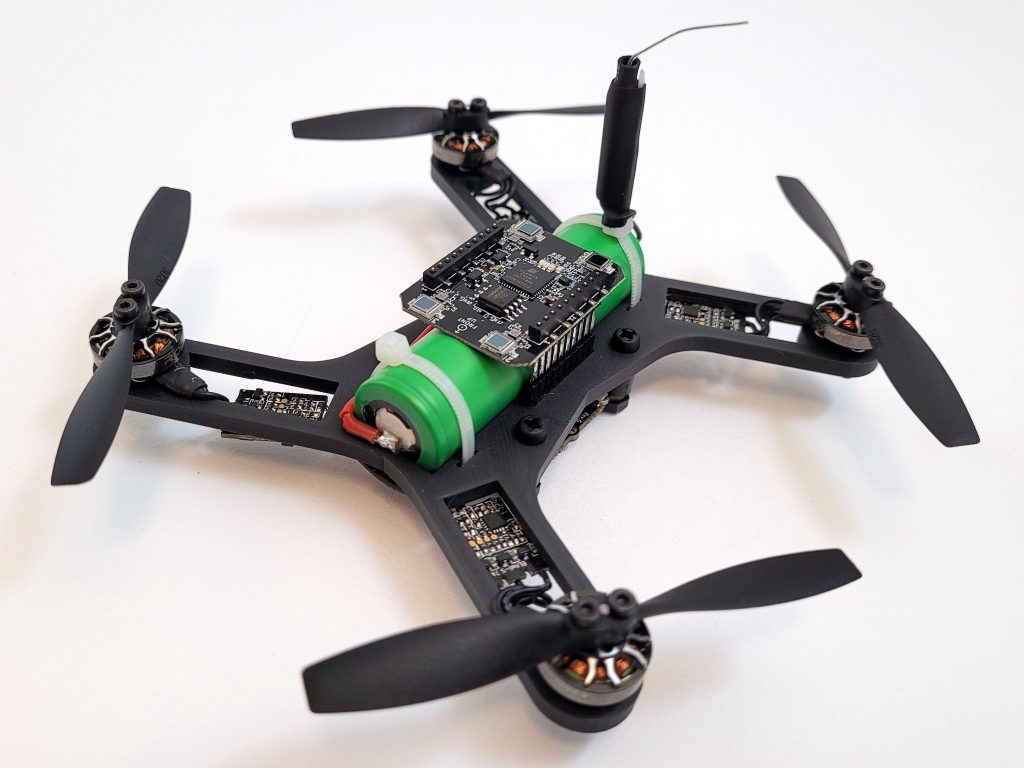
Li-Ion batteries have packed more energy per gram for a long time compared to Li-Po batteries. The problem for UAV applications has been that Li-Ion can’t deliver enough current, something that is starting to change. Now there are cells that are supposed to be able to deliver 30-35A continuously in the 18650 series, at least according to the specs. Therefor we thought it was time to do some testing and decided to build a 1 cell Li-Ion drone using the Crazyflie Bolt as base.

Since a 18650 battery is 18mm in diameter and 65mm long, the size would affect the design but we still wanted to keep the drone small and lightweight. The battery is below 20mm wide which means we can run the deck connectors around it, that is nice. We chose to use our 3D printer to build the frame and use off the shelf ESCs, motors and props. After a couple of hours of research we selected 3″ propellers, 1202.5 11500kv motors and tiny 1-2s single ESCs for our first prototype.

Parts list:

  • 1 x Custom designed 130mm 3D printed frame
  • 1 x Crazyflie Bolt flight controller
  • 4 x Eachine 3020 propeller (2xCW + 2xCCW)
  • 4 x Flywoo ROBO RB 1202.5 11500 Kv motors
  • 4 x Flash hobby 7A 1-2S ESC
  • 1 x Li-Ion Sony 18650 VTC6 3000mAh 30A
  • Screws, anti vib. spacers, zipties, etc.

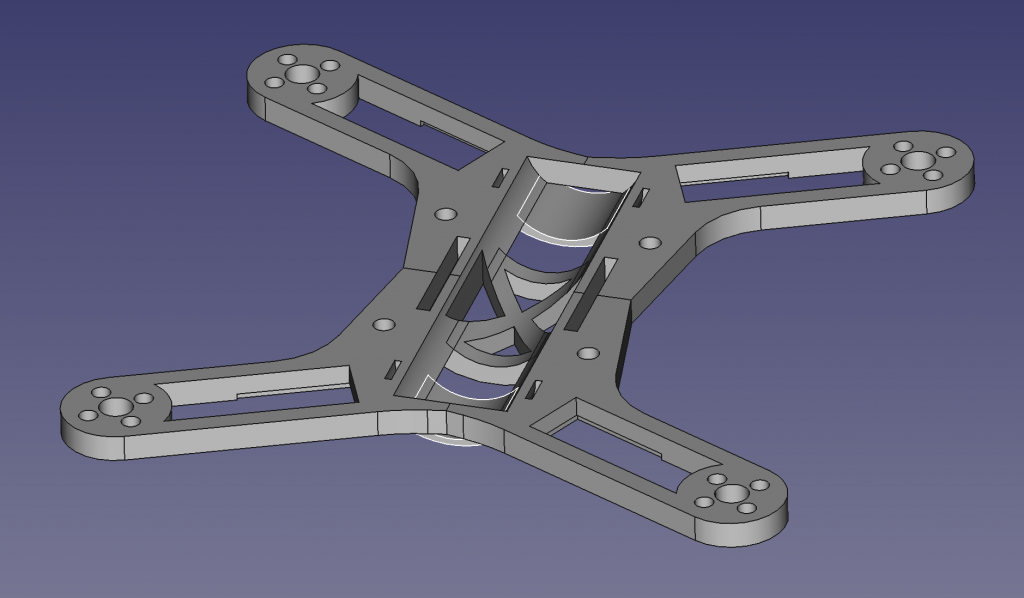
The custom designed frame was developed in iterations, and can still be much improved, but at this stage it is small, lightweight and rigid enough. We wanted the battery to be as central as possible while keeping it all compact.

Prototype frame designed in FreeCAD.

Assembly and tuning

The 3D printed frame came out quite well and weighed in at 13g. After soldering the bolt connectors to the ESCs, attaching motors and props, adjusting battery cable and soldering a XT30 to the Li-Ion battery it all weighed ~103g and then the battery is 45g of these. It feels quite heavy compared to the Crazyflie 2.1 and we had a lot of respect when we test flew it the first time. Before we took off we reduced the pitch and roll PID gains to roughly half and luckily it flew without problems and quite nicely. Well it sounds a lot but that is kind of expected. After increasing the gains a bit we felt quite pleased with:

#define PID_ROLL_RATE_KP  70.0
#define PID_ROLL_RATE_KI  200.0
#define PID_ROLL_RATE_KD  2
#define PID_ROLL_RATE_INTEGRATION_LIMIT    33.3

#define PID_PITCH_RATE_KP  70.0
#define PID_PITCH_RATE_KI  200.0
#define PID_PITCH_RATE_KD  2
#define PID_PITCH_RATE_INTEGRATION_LIMIT   33.3

#define PID_ROLL_KP  7.0
#define PID_ROLL_KI  3.0
#define PID_ROLL_KD  0.0
#define PID_ROLL_INTEGRATION_LIMIT    20.0

#define PID_PITCH_KP  7.0
#define PID_PITCH_KI  3.0
#define PID_PITCH_KD  0.0
#define PID_PITCH_INTEGRATION_LIMIT   20.0

This would be good enough for what we really wanted to try, the endurance with a Li-Ion battery. A quick measurement of the current consumption at hover, 5.8A, we estimated up to ~30 min flight time on a 3000mAh Li-Ion battery, wow, but first a real test…

Hover test

For the hover test we used lighthouse 2 which is starting to work quite well. We had to change the weight and thrust constants in estimator_kalman.c for the autonomous flight to work:

#define CRAZYFLIE_WEIGHT_grams (100.0f)

//thrust is thrust mapped for 65536 <==> 250 GRAMS!
#define CONTROL_TO_ACC (GRAVITY_MAGNITUDE*250.0f/CRAZYFLIE_WEIGHT_grams/65536.0f)

After doing that and creating a hover script that hovers at 0.5m height and was set to land when the voltage reached 3.0V. We leaned back with excitement, behind a safety net, and started the script… after 19 min it landed… good but not what we hoped for and quite far from the calculated 30 min. Maybe Li-Ion isn’t that good when it needs to provide more current…? A quick internet search and we could find that Li-Ion can run all the way down to 2.5V, but we have to stop at 3.0V because of electronics and loosing thrust, so we are missing quite a bit of energy… Further investigations are needed.

Lighthouse 2 flight test

As a final test we launched some flight scripts to fly in a square and in a spiral so we would get a feel for Lighthouse 2 + Bolt with PID controller combination. We think it turned out quite nicely, and this with almost no optimization effort:

Summary

Li-Ion felt like it could be a game changer when it comes to flight time but was not as promising as we hoped for. It doesn’t mean we can’t get there though. More research and development is required.

We’re happy to announce that we have taken an important step forward in the development of the lighthouse positioning system, we have improved the calibration compensation. The changes improves the correctness of the coordinate system, especially for lighthouse V2 base stations.

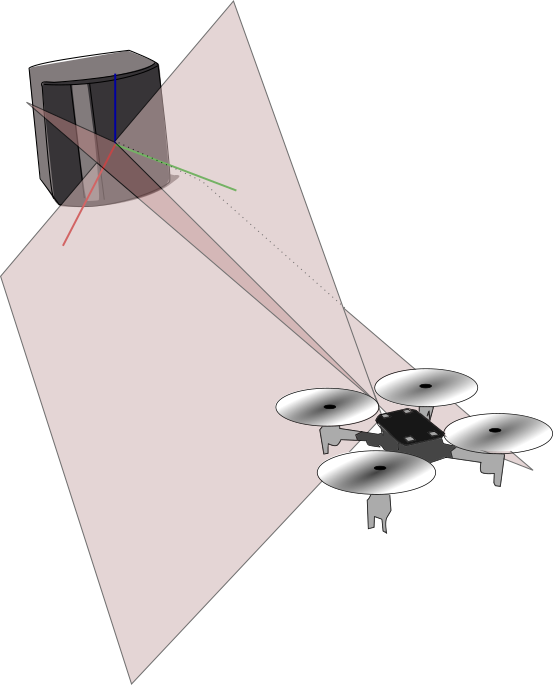
As mentioned in this blog post one of the remaining areas to solve was handling of calibration data and this is what we have addressed lately. In the manufacturing process mechanical elements are mounted within some tolerances but since the precision of the system is so good, also a very fine tolerances makes a big difference in the end result. Each base station is measured in the factory and the calibration data describing these imperfections are stored in the base station. The calibration data is transmitted in the light sweeps to enable a receiver to use it to correct for the errors in the measured angles.

As with everything else related to lighthouse, there is no official information of how to interpret the calibration data so we (and the community) had to make educated guesses.

Lighthouse 1

The compensation model for lighthouse 1 has been known for quite long, see the Astrobee project by Nasa and Libsurvive. The most important parameter is the phase and until now this is the only part of the calib data that we have used in the firmware. In the new implementation we use all parameters.

The parameters of the lighthouse 1 calibration model are phase, tilt, gib mag, gib phase and curve.

Lighthouse 2

The compensation data for lighthouse 2 is similar to lighthouse 1 but there are two new parameters, ogee mag and ogee phase. It also seems as some parameters that are sharing names between lighthouse 1 and 2 have different meanings, for instance curve.

Libsurvive has implemented compensation for lighthouse 2 but we have unfortunately not managed to use their work with good results, instead we have tried to figure out what the model might look like and match it to measurements. We have managed to get good results for the phase, tilt, gib mag and gib phase, while we don’t know how to use curve and ogee mag and ogee phase. The solution seems to be pretty good with a subset of the parameters and we have decided to leave it at that for now.

Use of calibration data

The way we have used the calibration data so far has been to apply it to the measured angles to get (more) correct sweep angles that have been fed into the position estimation algorithms. The problem is that the compensation model is designed the other way around, i.e. it goes from correct angles to measured angles, and an iterative approach is required to apply it to the measured angles. A better way (most likely by design) is to apply it in the kalman estimator instead where it simply becomes part of the measurement model.

Currently we do calculate the corrected angles as well and expose them as log data, but it is not required for the standard functionality of the lighthouse system. We may make it possible to turn it on/off via a parameter in the future to save some CPU power.

Functional improvements

So what kind of improvements will the calibration add?

The first improvement is the base station geometry estimation. With more correct angles the estimated base station position and orientation will be better. This is important to be able to get a good estimation of the Crazyflie position since poor geometry data will give the position estimator conflicting data.

Secondly more correct angles will straighten the coordinate system. With angular distortion the position estimator will not be able to estimate the correct position and the coordinate system will be warped, bent or stretched. The improvement can be seen when flying parallel to the floor at constant height for instance.

Thirdly the stability will hopefully be improved. When the angles from two base stations match better, the estimated position will change less when one base station is occluded and generally make life easier for the position estimator. We will take a look at the outlier filter to see if it can be improved as well.

Remaining problems

The calibration data is transmitted as a part of the sweeping light planes with a low bitrate. For lighthouse 1 the decoding process works well and all calibration data is usually received within 20-30 seconds. For lighthouse 2 it does not work as well in our current implementation it takes (much) longer before all data has been received correctly from both base stations.

It is possible to get the calibration data via the USB port on lighthouse 2 and we are considering storing the calibration data in the Crazyflie somehow instead. This will be even more important when we support larger systems (2+ base stations) and all base stations are not within range at startup.

During the summer we were discusses at the office of what would be a good substitute of us not being able to go to conferences or fairs anymore (see this blogpost). We sparred with a few ideas, ranging from organizing an online competition to an seminar. Although we initially were quite enthusiastic about organizing the competition, the user questionnaire from the previous blog-post showed us that many of you are rather interested in online tutorials. Based on that we actually started to make some more step-by-step guides, however we definitely would agree that is not the same as meeting each-other face-to-face!

So now we are planning to organize one for real this time! So our first online live tutorial will be on:

Wednesday 4th of November, 18:00 (CET, Malmö Sweden)

Register for the first session here to indicate your interest and to receive up-to-date information. There are of course no cost involved!

First topic: Spiraling Swarm Demo (Live!)

The last couple of years we have been showing our demo at many robotics conferences and fairs, such as ICRA, IMAV and IROS. Since we do not have a opportunity to do that anymore (at least for the foreseeable future), we thought that a suitable first topic of the online tutorial to be about the Spiraling Swarm demo! We will go through the different elements of the demo, which includes the implementation details on the Crazyflie and the Lighthouse Positioning system. We hope to explain all of in about 20-30 minutes and that this would enable you to set the demo up yourself if you want.

We have been thinking about just doing a prerecorded tutorial, however we also really like to talk with our users about their needs and research topics. That is why we think it is important to do it live where we can answer your questions on the go or after the tutorial. This also means that we will be demonstrating the demo live as well! Afterwards we will have a social interaction where we have a friendly chat :)

Mozilla Hubs and Discord

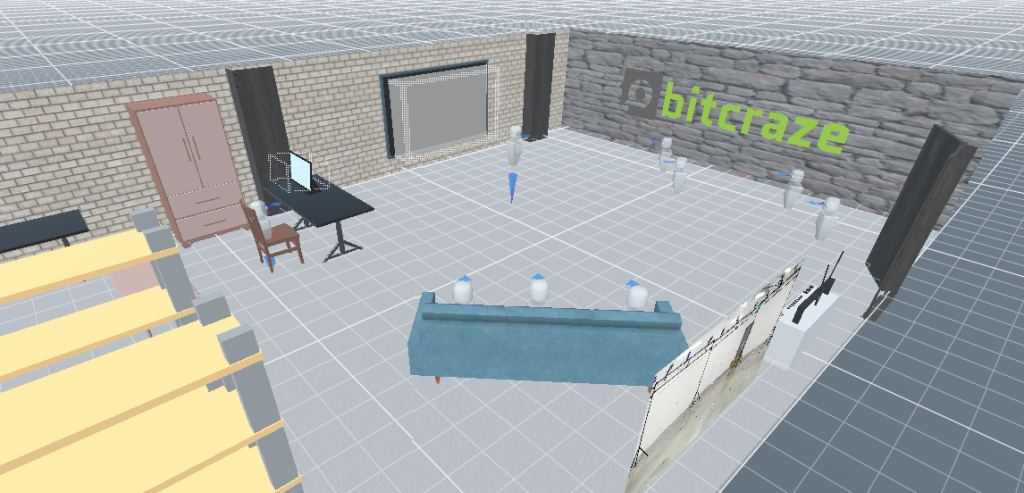
There are so many options on how to exactly host this event, as there are a gazillion alternatives for video conferencing. Currently we have are looking at Mozilla hubs. which fits nicely with our interests in the lighthouse positioning system with the HTC Vive basestations. The nice thing aspect of Hubs is that you don’t need a fancy headset to join, since it is possible to join via your browser or your phone. Me (Kimberly) has joined a Virtual Reality seminar at the beginning of the pandemic, organized by Roland Meertens of pinchofintelligence.com, and it was definitely a very interesting and fun experience. When giving a presentation, it really felt like people were paying attention and were engaged. So, we recently recreated our own flight-lab in VR (using Hub’s environment creator Spoke) and tested it out ourselves. This way you will be able to see our workplace as well!

Of course, we can imagine not everybody is waiting to go full VR. That is why we will combine the online tutorial with Discord, where we will make a video channel where we will stream the live demo and tutorial. It will also be possible to send messages that are visible in both the VR space and the Discord chat channel with Hub’s discord bot. You can choose where to follow the tutorial — fully in VR, or first discord and afterwards socialize in VR — that is totally up to you.

We still need to figure out the specifics, but if you register with your email we will send all the necessary information for the first session to you directly.

IOT conference Malmö

Now something else: tomorrow, namely Tuesday the 5th of October, we will also present at the IOT conference 2020 in Malmö. It is free for participants and it is still possible to register! Come and join if you can not wait to see us until the 4th of November.