Hi everyone! I have a bit of news to share… I’ve decided to leave Bitcraze at the end of 2024. But not before I share with you my latest Fun Friday project that I’ve tried my best to finish up before I leave before my Christmas holiday in December.
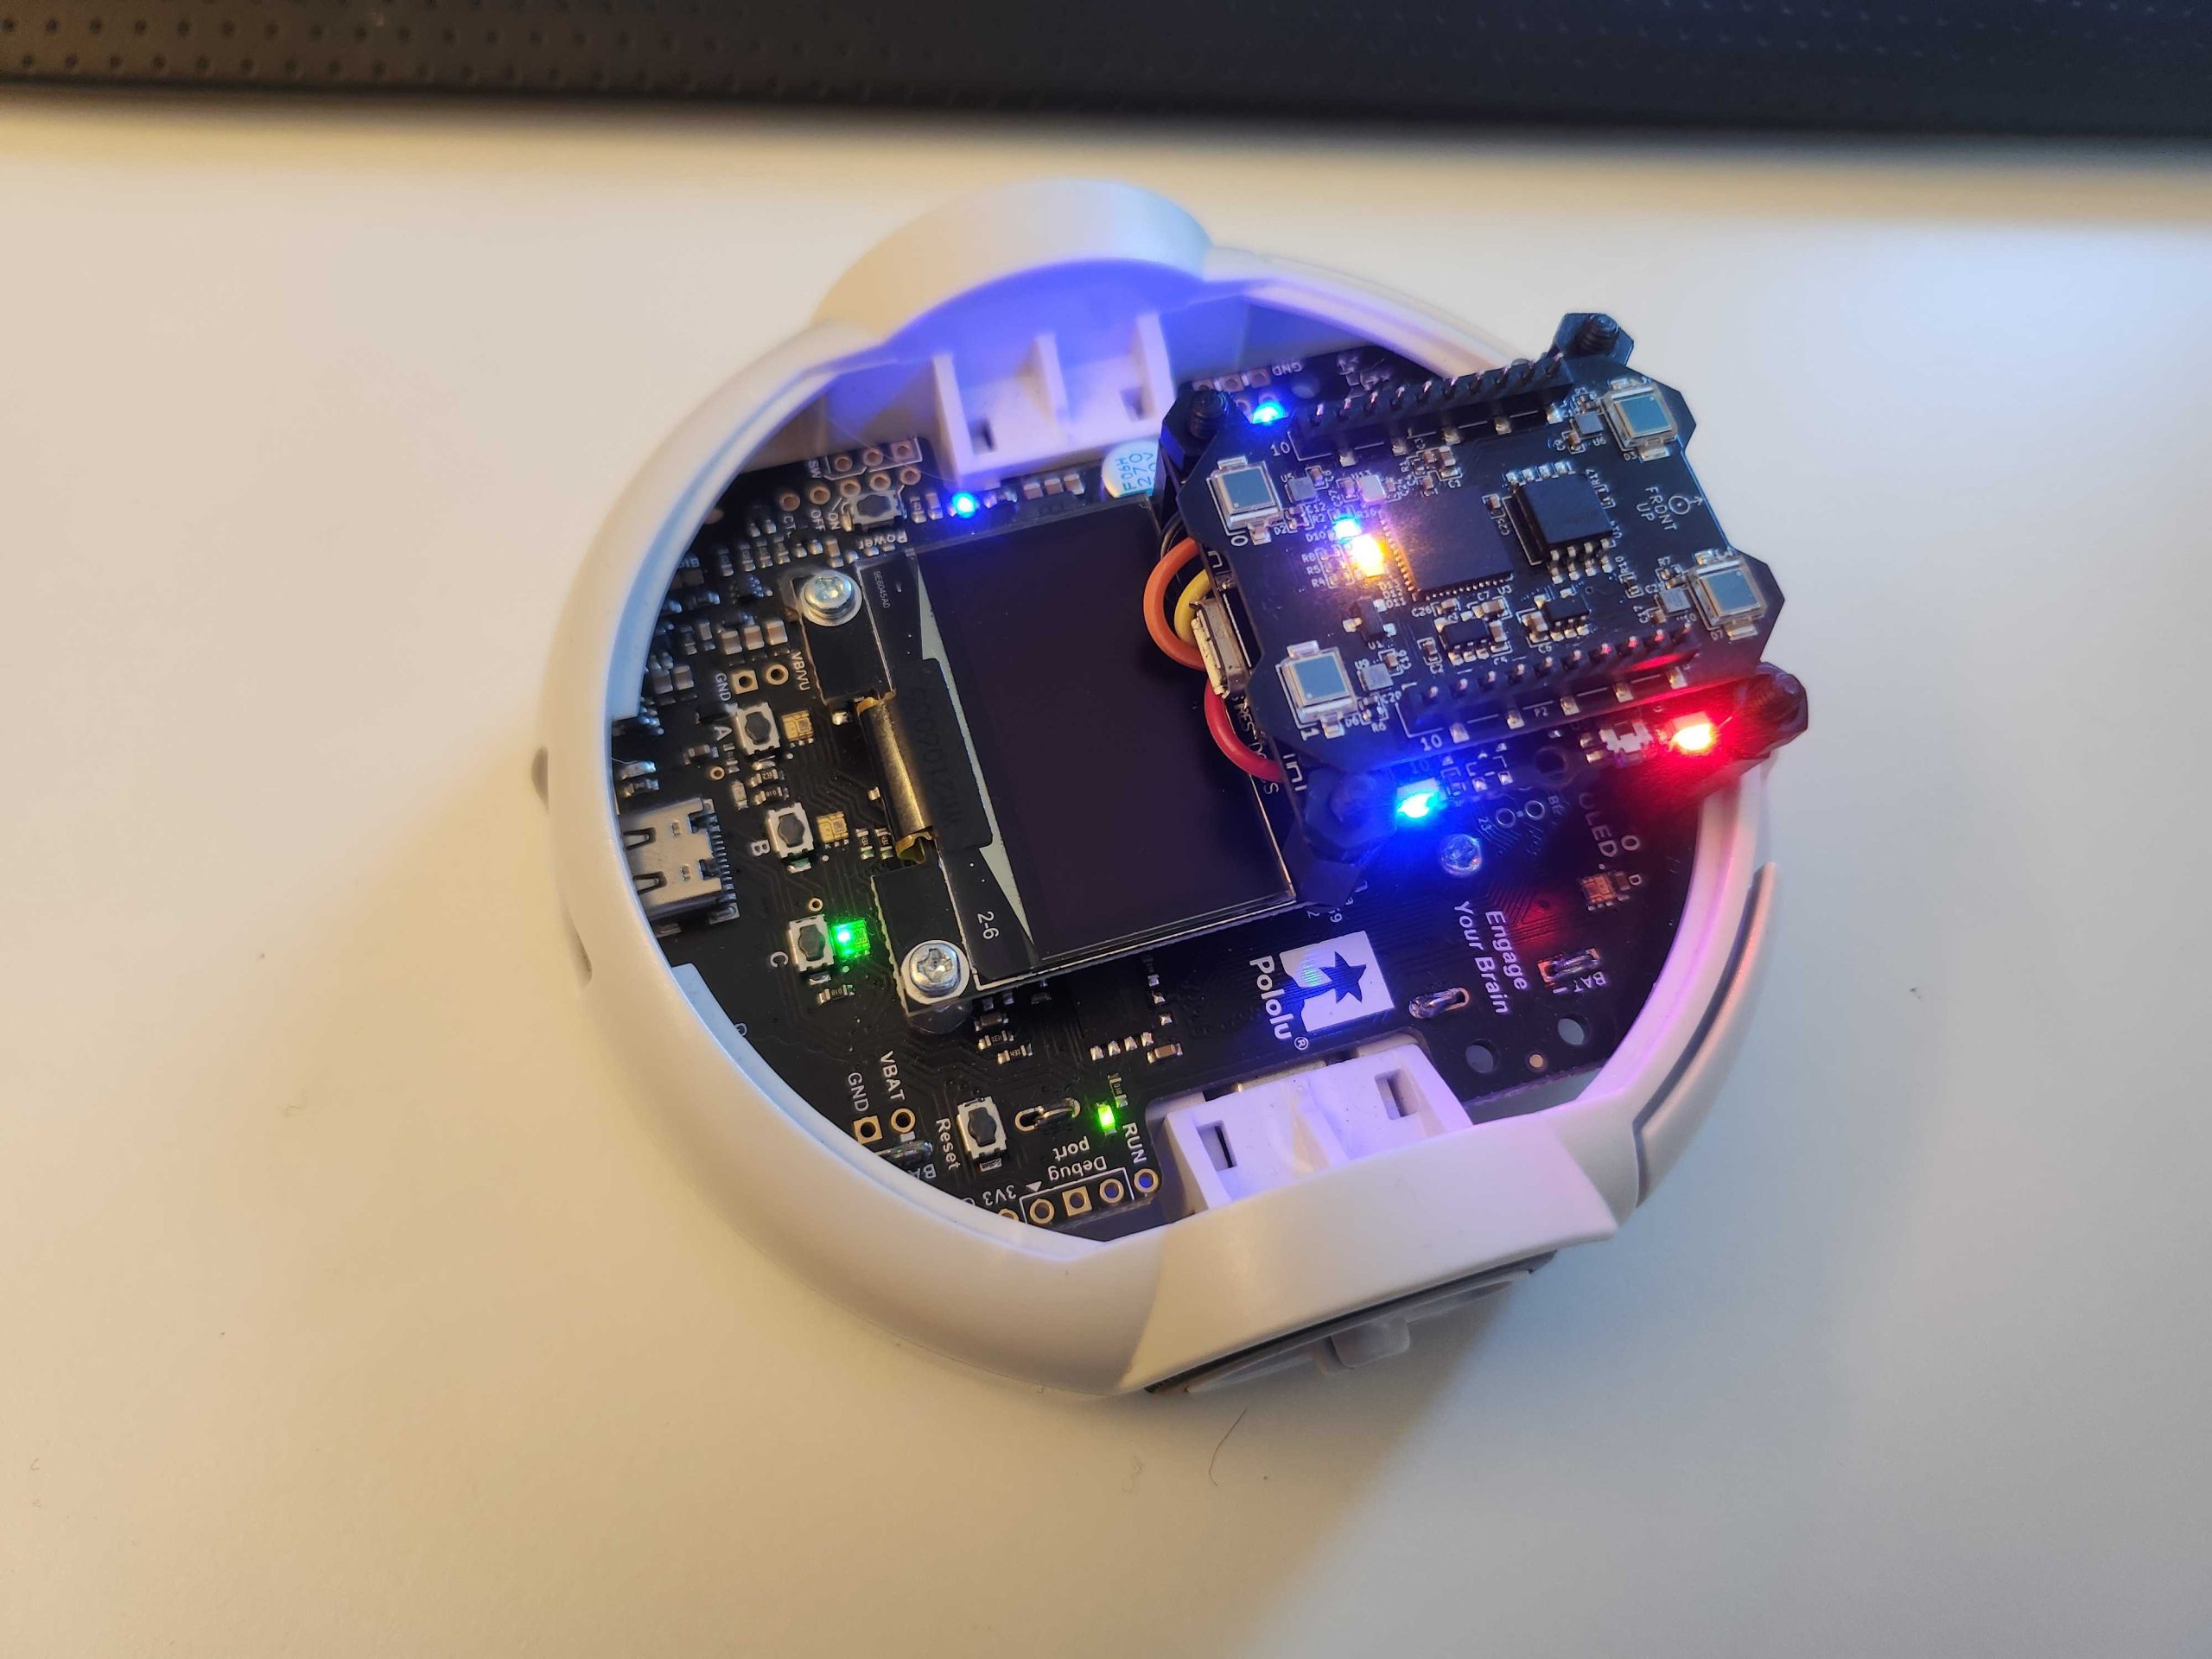
Frankensteining the Pololu Robot with the Crazyflie Bolt
During the ROSCon talk about the lighthouse system (see the recording here), I’ve already shown a small example of how the lighthouse system could be used on other robots as well. Here you see a Pololu RPI 2040 (the hyper edition of course), with a slimmed down Crazyflie Bolt and a Lighthouse deck. The UART2 port on the Bolt (pinout is the same as Crazyflie) is interfacing with the UART0 connection on the Pololu (pinout). Then the Pololu’s 3v3 is connected to the vUSB and GND to GND (obviously), so 4 wires in total. Technically, the 3v3 port is not supplying enough power for the Crazyflie on paper, but it seemed to be enough as long as the Crazyflie Bolt doesn’t have motors connected it should be fine. But if anyone would like to do a driving-flying hybrid with this combo, you might need to check the specifications a bit closer. For now, just ignore the red low-battery LED on the Bolt, but if you see it restarting then perhaps give the Pololu a fresh set of batteries.
Since the Pololu RPI 2040 doesn’t have any wireless communication, this can be done through the Crazyflie Bolt and the Crazyradio. I’ve made an app layer variant for the Bolt to forward state estimates and velocity commands; however, it did require a bit of an extra logging variable in the firmware itself. But this allows me to control the Pololu through the CFclient! Since it’s using velocity commands, this means that the mobile app is out though, but perhaps if anyone is interested in getting this rolling, let me know. Also, the screen shows the current X, Y, Z, and yaw estimate of the Bolt transferred to the Pololu with the commands that I’ve given it.
I’d like to have connected this to a differential drive controller to make use of the position setpoints, but unfortunately the AA batteries ran out at the office and I was unable to complete this by the last day. It would have been great to use the Lighthouse positioning for this. Perhaps in the next coming months, I can try to continue with it and have my cats chase an autonomous robot around the house, who knows! If anyone is interested in playing around with this, these are the repositories/branches for both the Bolt and the Pololu:
First of all, I’ll take a long holiday in the US, first visiting New York (first time) before I hop over to Tulsa and Santa Barbara to visit family. Early 2025 I’ll be taking a long break, or a mini sabbatical of sorts, where I plan to work on some personal projects but mostly have a breather. I haven’t had a break like this in over 15 years, and given a tough 2023, I can definitely say that I’ve deserved some time off. What will happen after, I will hopefully figure out then, but for sure I will be continuing to co-lead the Aerial Robotics Interest Group at ROS and helping out in support of the Crazyswarm2 project.
I’d like to thank my colleagues at Bitcraze for an amazing 5 years here in Malmö, Sweden, and everyone that I was able to meet through them. I’ve learned a lot in terms of joint software development, code maintenance, community interaction, and, most importantly, having fun during work. I also will never forget the support I received while I was going through cancer treatment, and for that I’m very grateful. I wish you all the best and I hope the Crazyflie continues to thrive, saving more PhD projects as it did mine. Thank you.
It’s been 2 weeks ago that we went to ROSCon ’24 in Odense Denmark as exhibitor and silver sponsor! Since it was a 2-hour train ride for us, it made much sense for us to attend this as a company and we are very happy we did. In this blog post we are sharing our experiences of the event.
The Booth Build-up and Demo
We made some changes to our well-known cage that is a must at every conference we have exhibited. Usually, it would take us a good few hours just to set up the cage alone, but we have improved the corners which improved our build-up experience quite a lot and we were done within an hour! Just in time for us to join the tours and bird of feather sessions with no stress!
All done before 11 am!
For ROSCon we prepared a more ROSflavored demo that enabled full demo control from ROS, which was based on the swarming mapping demo shown in this tutorial and the robotics developer day (see this video). Here we already hit a couple of issues that all had to do with the differences between demos for exhibitions versus one-time talk demos (see OpenCV! Live episode where we talked about demo driven development). We switched back to our usual fully decentralized autonomous swarm demo (see this blog post). Luckily, the Crazyflie could still communicate at the same time to give through the multiranger values, such that the computer could still generate the Swarm merging map while the Crazyflies were flying around avoiding each other.
Exhibition Booth
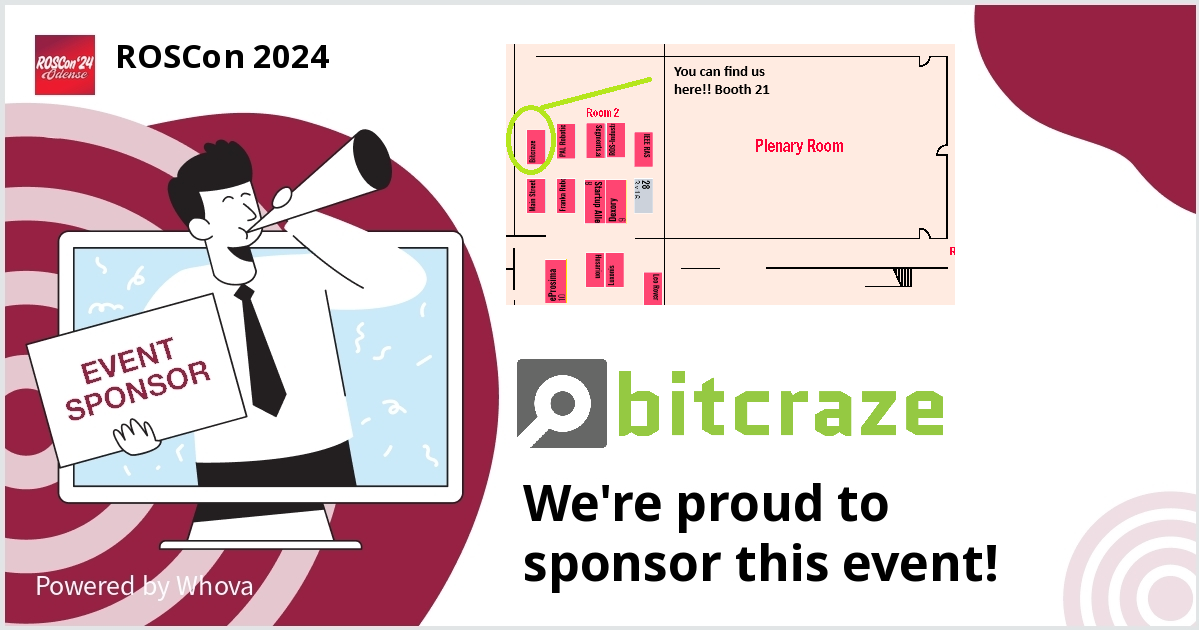
Tuesday and Wednesday were the actually exhibition days so that is when we talked with most of the people. It was a bit slow in the beginning as we were located at the end of the hall, but luckily the ROSCon passport game motivated people to go by each of the booth to get a stamp. We went a bit rogue and made our own much bigger stamp ;) but luckily it still fit as long as we aligned properly. We donated a STEM Ranging bundle as one of the prizes to congratulate whoever won this! And now they can try out this ROS tutorial ;)
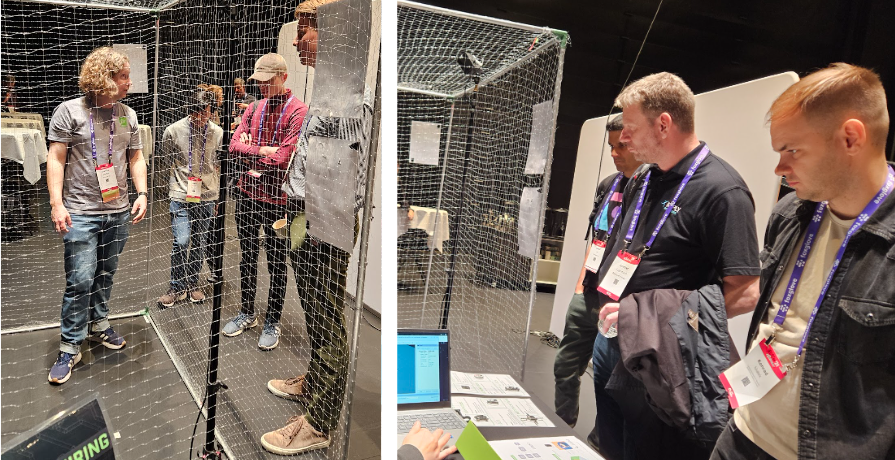
Talking to people outside and inside the cage
We noticed that the Crazyflie Brushless got a lot of attention. The ability to carry more than a regular Crazyflie seemed of great interest to many of the ROSCon attendees. Moreover, the prototype of the forward-facing expansion connector (a.k.a. the Camera deck) was also a well-requested feature of the Crazyflie and has solidified our belief that the community needs something like this as well. In general, the lighthouse positioning system and the stand-alone lighthouse node were also quite well received. Luckily we were able to forward people to our accepted talk about the Lighthouse position system on Thursday
Lighthouse Positioning Talk
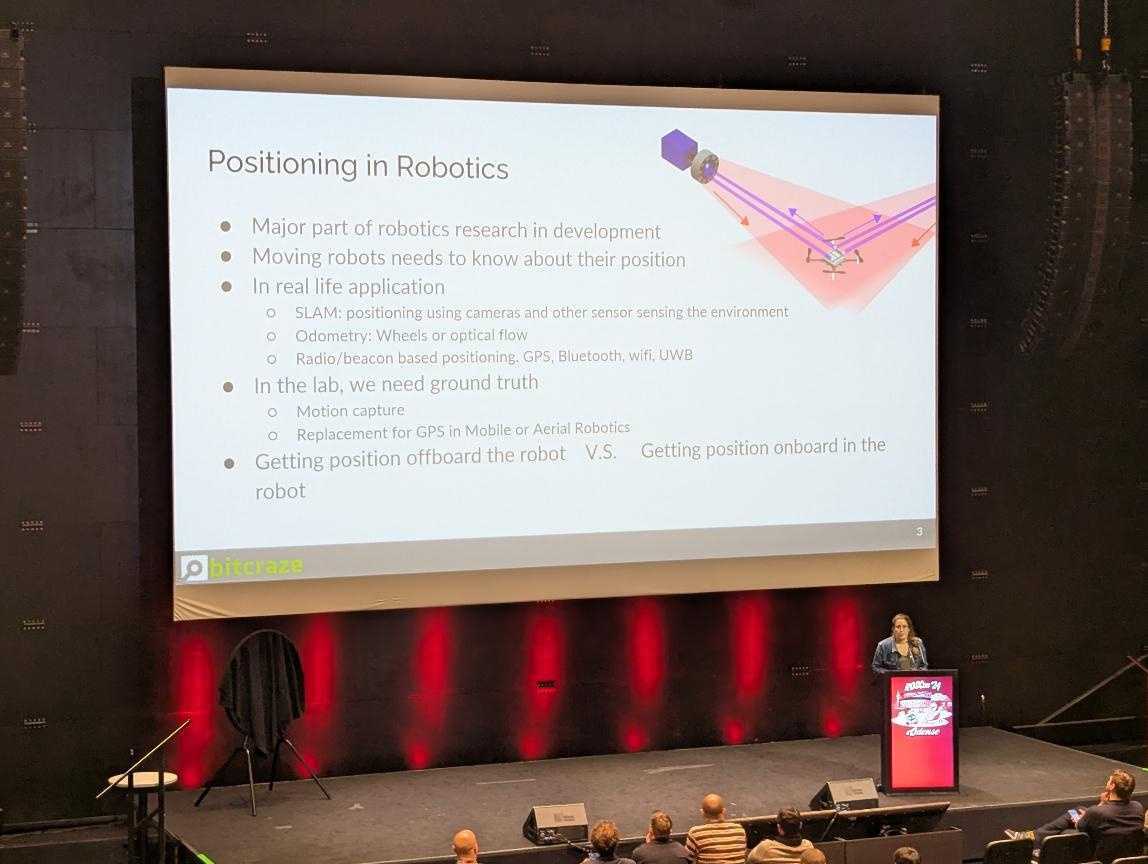
One of the reasons we were present at ROSCon 2024 was to gauge the interest of the general robotics community in the lighthouse positioning system. We have been using it for years for the Crazyflies, but we’d like to also evangelize its submillimeter and cost-effective awesomeness for any other platform. And there seems to be quite some interest for it! We gave a short presentation on Thursday Afternoon during the ‘ROS Tooling & Testing’ session (we will share the recording once it becomes available).
Talk about Lighthouse Positioning – Taken by Dharini Dutia from Women in Robotics
We also send out some polls just to see what kind of positioning systems are used and for what purpose. It was evident that there are many outdoor roboticists that also use onboard-sensing based state-estimation like SLAM, but there was still a significant portion of people that used indoor positioning systems for the actual positioning replacement and/or Ground truth. And also we got some valuable feedback, like if it would still work out with a Lidar or Kinect, or if it is suitable for a 12-meter size robot (wow). We will take this all in for improvements for any new upgrades to the lighthouse deck and stand-alone nodes for it. Thanks to you all for providing all the feedback and the interest!
Side-events
We also attended a couple of events related to ROSCon 2024. Marcus and Kimberly both attended tours of Odense Robotics, Universal robots and Teradyne facilities. The tour of the SDU Drone Center was particularly impressive. Moreover, we also attended the Aerial Robotics Meetup, who attracted about 90-100 people at the max, with drinks and snacks provided by Dronecode Foundation. It was great to see such a big aerial presence at ROSCon. There was also the Karaoke meetup, the ROSCon afterparty by Odense Robotics with a beer-serving robot arm, the Women in Robotics lunch… there was just too much to attend to but it all was a great success!
Check out the ROSCon 2024 event page on our website of what we have shown at ROSCon 2024 and see more information about the demos/products we had there.
We have some very busy weeks behind us and ahead! As we are working hard on releasing the new CF Brushless, we have been preparing for the upcoming ROSCon in Odense Denmark next week (see this previous blogpost) and we also featured on the latest OpenCV live episode as well! So more about both in this blogpost.
OpenCV Live! Demo Driven Development
We were featured as guests on the latest OpenCV Live! episode hosted by Phil Nelson and Satya Mallick, where we went through a bit of the history of the start of Bitcraze and all of the (crazy) demos done with the Crazyflie in the last decade. We have done a similar topic for our latest developer meeting, but for this episode we put the focus more on vision based demos, since OpenCV has been definitely used in the past at Bitcraze for various reasons! Just type in OpenCV in the top right search barto check out any of the blogs we have written.
During the OpenCV live episode of the 10th of October, Arnaud and Kimberly told the backstories of these demos that went from a manual flight fail where Arnaud flew the Crazyflie 1.0 in Marcus’ hair, using OpenCV and Aruco markers for positioning to flying a swarm in your kitchen. It was really fun to do and alos one lucky listener managed to answer the two questions the host Phil asked at the end, namely “Where does the name Crazyflie come from?” and “Why is the last part (‘-flie’) spelled this way?” and won a STEM ranging bundle. If you’d like to know the answers, go and watch the latest OpenCV! Live episode ;) Enjoy!
ROSCon – What to expect?
So next week we will be present as Silver Sponsor at ROSCon Odense, namely on Monday 21th and Wednesday 23rd of October. The Bitcraze booth will be located on number 21 so that should be near the coffee break place! We will have are old trusty cage with some upgrades with a nice ROS demo which is similar to the one explained in this Crazyflie ROS tutorial we have written a while ago, but then the swarming variant of it. We also hope to show a Brushless Crazyflie Prototype, and a new camera deck prototype, along with anything else we can find lying around at our office :D.
Moreover, Arnaud will be given a presentation on the lighthouse positioning system, namely at Wednesday 23rd of October 14:40 (2:30 pm) called ‘The Lighthouse project: from Virtual Reality to Onboard Positioning for Robotics’. The lighthouse positioning system will also be the system that we will demo at our booth so if you’d like to see it for yourself, or perhaps (during downtime) hack around together with us, you are more than welcome to do so! Check out the Bitcraze ROSCon Eventpage for more details about our demo or the hardware we will show.
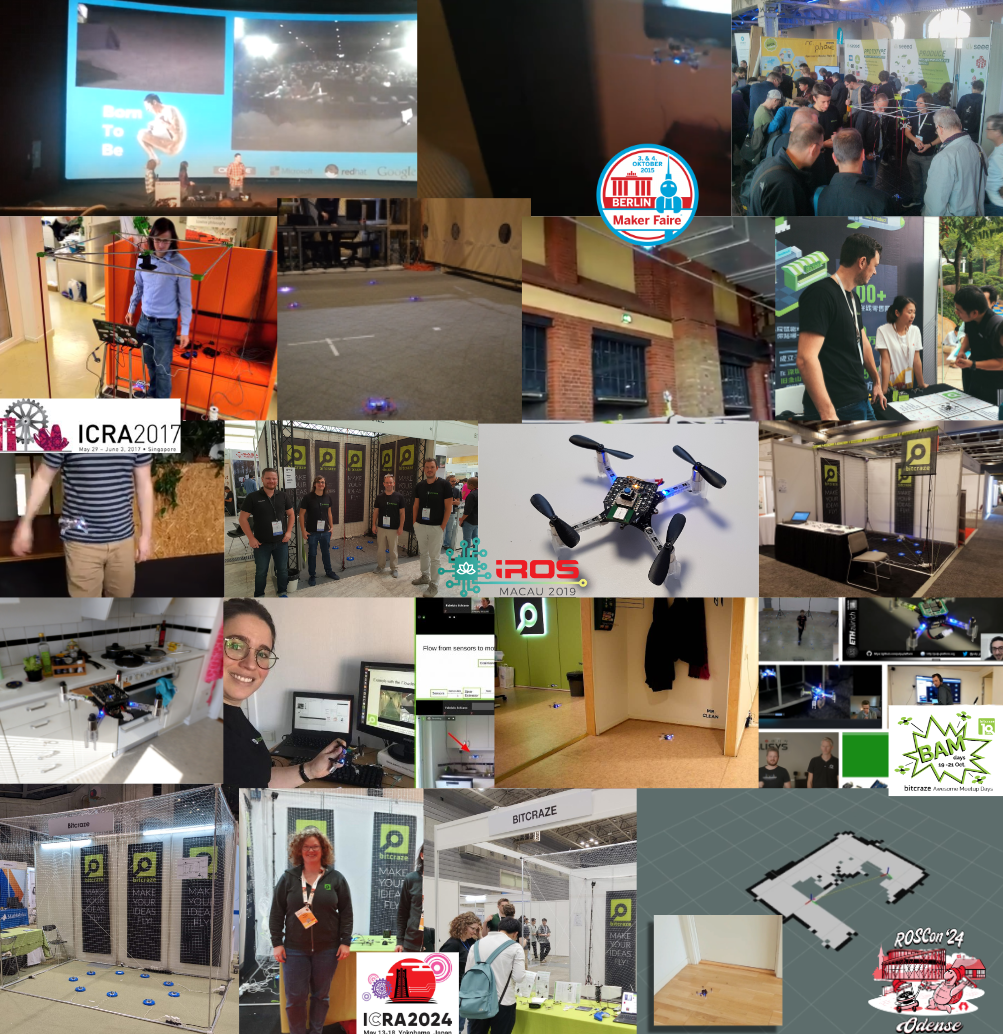
There is one thing that has driven both the hardware/software and our enthusiasm forward in the last 13 years, and that is making demos! Whether it’s a new piece of hardware/deck for the Crazyflie or the integration with an existing software framework, it doesn’t matter, but we have got to show it and, by all means… it needs to fly!
We have used fairs, conferences, and online meetings as perfect opportunities to push the capabilities of the little Crazyflie to the fullest. Of all the development goals we set, those self-made deadlines and over-ambitiousness have pushed both the hardware and software to the limit. In this blog post, we will take a look back at all of those demos we’ve done in the past and what we have learned from them.
2013 – 2017: Hacker and Developer Fairs
One of the very first conferences we were invited to was Devoxx in the UK. This was back in 2013, and we flew the Crazyflie (1) with an FPV camera over the actual crowd (blogpost, video), which was something we had already been working on for about half a year before showing it at the conference (blogpost, video). A year later, at Devoxx France (2014), they let us fly at the actual exhibition and over the booths, which showed much better quality (blogpost, video)! Not sure if they would still let us do this at fairs, but back then it was a bit of a wild west :D.
By the time the Crazyflie 2.0 was released, we started going to Makerfaires and even visited 3 of them, all in 2015! At the Makerfaire in the Bay Area (blogpost), New York, and Berlin (blogpost 1, blogpost 2), we prepared an external positioning system with the Kinect 2 and augmented reality markers (ArUco) (blogpost). That was one hectic year, and not without issues with the demo itself along the way (blogpost), but it showcased the Crazyflie and pushed the Crazyflie Python library and client to a more mature state.
Once 2016 came, the ultra-wideband positioning hacks reached a point where we could start demoing them as well. At first, the positioning was still calculated offboard with a ROS(1) node and transmitted to the Crazyflie, which was first showcased at Makerfaire Berlin 2016 (blogpost, video) at the booth itself. Eventually, a live demo was given at FOSDEM 2017 in the actual devroom for Embedded, Mobile, and Automotive (talk page). The Flowdeck was also in development at that time, and we had a small tabletop demo at Makerfaire Shenzhen 2017, where people could press a button, and the Crazyflie would take off, fly a circle, and land again (blogpost, video).
2017 – 2019: Academic Robotics Conferences
From 2017, we made it a habit to also meet with our research users, so we started going to academic robotics conferences as well, starting with ICRA 2017 in Singapore. Here, we showcased the Loco Positioning System, where the positioning was estimated onboard, so no external computer was required to perform the calculations (blogpost, video).
At IROS 2018, we took it up a notch by joining our collaborator Qualisys, showcasing the Loco Positioning System for a swarm, Motion Capture-based localization, and the brand new Lighthouse positioning prototype (blogpost 1, blogpost 2). We also added autonomous charging to it as well, so it was a great deal of work! Maybe we took on a bit too much, but one thing is for sure—we learned a lot by doing it (blogpost 1, blogpost 2, video)! With ICRA and IROS 2019, we perfected the circling swarm demo so that it was fully autonomous. However, this time we only used the Lighthouse positioning system since it was a bit easier to set up (blogpost 1, blogpost 2, video). The computer still had to command which Crazyflie to start flying, but other than that, we didn’t have to mind it that much and had plenty of time to talk with the users.
2020 – 2022: Covid and the Home Lab
As everyone knows—and probably tries to forget—2020 was the year that Covid hit us hard, and we couldn’t travel anywhere anymore. For us, it was quite an adjustment period, as we had to find another type of motivation to keep moving forward and continue development. We introduced the concept of the home lab and gave online talks and tutorials to still show cool stuff with the Crazyflie to the world (blogpost, video).
In 2020, we all joined together to work on the Hyper demo, which was a showcase that demonstrated the Crazyflie could fly with three positioning systems at the same time, enabling it to fly all the way from the meeting room to the flight arena (blogpost, video). We also celebrated Bitcraze’s 10-year anniversary with the BAM Days, a full 3-day online seminar about all things Crazyflie, for which we and our collaborators prepared a whole range of different demos, including a Rust-based app layer example and a peer-to-peer onboard swarming example (blogpost).
2022-now: Back to conferences
At the end of 2022, we managed to go to fairs again, namely IMAV and IROS 2022, where we showcased the fully autonomous swarm demo as before Covid hit. However, due to the demos we conducted during Covid, we also added full onboard peer-to-peer communication. This enabled the Crazyflies to negotiate which Crazyflie could take off, which pretty much completely eliminated the need for an external computer. Moreover, the Crazyflies communicated their positions to each other, which made it possible for them to avoid collisions on the fly (blogpost, video).
We have shown this demo as well for ICRA 2023 in London (blogpost) and ICRA 2024 in Yokohama (blogpost) with different variations and the upcoming brushless version as well (blogpost). The demo is quite robust, but it’s great to learn about the quality of the new motors and props, the guard prototypes of the Crazyflie Brushless, and the flight stability. But as you know us by now, it is time for something different!
Soon – ROSCon 2024
We have been to ROSCon before, back in 2022 (blogpost), but now we will be going to ROSCon 2024 for the first time as exhibitors (blogpost). ROS is a framework that is used by many researchers, including our users through Crazyswarm2, but ROSCon is more developer-oriented, and there will be more companies present that focus more on industry than academia. This time we won’t show our swarm demo as we usually do, but we will be showing demos more in line with what is presented in the ROS skill learning session of the robotics developer day (blogpost, video), but we will be hacking around on the spot! So this will be something new for us to try out, and we are very much looking forward to it!
Developer meeting, 9th of October 2024
This blog post only represents a subset of demos that we have done, but we will go into further detail at the next developer meeting on Wednesday, the 9th of October, at 3 PM CEST! Please join us to learn about all the great demos we have done in the past, get a glimpse of the history of Bitcraze, and discuss why demo-driven development is so important in moving your development forward.
You might remember that at the beginning of this summer, we were invited to do a skill-learning session with the Crazyflie at the Robotics Developer Day 2024 (see this blog post) organized by The Construct. We showed the Crazyflie flying with the multi-ranger deck, capable of mapping the room in both simulation and the real world. Moreover, we demonstrated this with both manual control and autonomous wall-following. Since then, we wanted to make some improvements to the simulation. We now present an updated tutorial on how to do all of this yourself on your own machine.
Note: This tutorial was originally developed for a demonstration at Robotics Developer Day 2024. As the integration depends on specific versions of ROS 2, Gazebo, and related packages, it may require adjustments to work with current software. This post is no longer actively maintained by the Bitcraze team.
This tutorial will focus on using the multi-ranger ROS 2 nodes for both mapping and wall-following in simulation first, before trying it out on the real thing. You will be able to tune settings to your specific environment in simulation first and then use exactly the same nodes in the real world. That is one of the main strengths of ROS, providing you with that flexibility.
We have made a video of what to expect of the tutorial, for which you should use this blogpost for the more detailed instructions.
Watch this video first and then again with the instructions below
What do you need first?
You’ll need to setup some things first on the PC and acquire hardware to follow this tutorial in full:
Gazebo Harmonic – Install via these instructions This is not the recommended Gazebo for humble but we will install the specific ROS bridge for this later. Just make sure that you don’t have gazebo classic installed on your machine.
Hardware
You’ll need to components at least of the STEM ranging bundle
If you have any different setup of your computer or positioning system, it is okay as the demos should be simple enough to work, but, be prepared for some warning/error handling that this tutorial might have not covered.
Time to complete:
This is an approximation of how much time you need to complete this tutorial, depended on your skill level, but if you already have experience with both ROS 2/Gazebo and the Crazyflie it should take 1 hour.
If you have the Crazyflie for the first time, it would probably be a good idea to go through the getting started tutorial and connect to it with a CFclient with the Flowdeck and Multi-ranger deck attached as a sanity check if everything is working before jumping into ROS 2 and Gazebo.
Go to the ros2_ws workspace and build the packages
cd ~/crazyflie_mapping_demo/ros2_ws/
source /opt/ros/humble/setup.bash
colcon build --cmake-args -DBUILD_TESTING=ONCode language:JavaScript(javascript)
Building will take a few minutes. Especially Crazyswarm2 will show a lot of warnings and std_err, but unless the package build has ‘failed’, just ignore it for now until we have proposed a fix to that repository.
If the build of all the packages passes and non failed, please continue to the next step!
2. Simple mapping simulation
This section will explain how to create a simple 2D map of your environment using the multi-ranger. The ROS 2 package designed for this is specifically made for the multi-ranger, but it should be compatible with NAV2 if you’d like. However, for now, we’ll focus on a simple version without any localization inferred from the map.
Open up a terminal which needs to be sourced for both the gazebo model and the newly build ROS 2 packages:
If you get a ‘No such file or directory’ error on the model, try entering the full path in GZ_SIM_RESOURCE_PATH export.
Gazebo will start with the Crazyflie in the center. You can get a close-up of the Crazyflie by right-clicking it in the Entity tree and pressing ‘Move to’. You can also choose to follow it, but the camera tracking feature of Gazebo needs some tuning to track something as small as the Crazyflie. Additionally, you will see RVIZ starting with the map view and transforms preconfigured.
Open up another terminal, source the installed ROS 2 distro and open up the ROS 2 teleop keyboard node:
source /opt/ros/humble/setup.bash
ros2 run teleop_twist_keyboard teleop_twist_keyboard
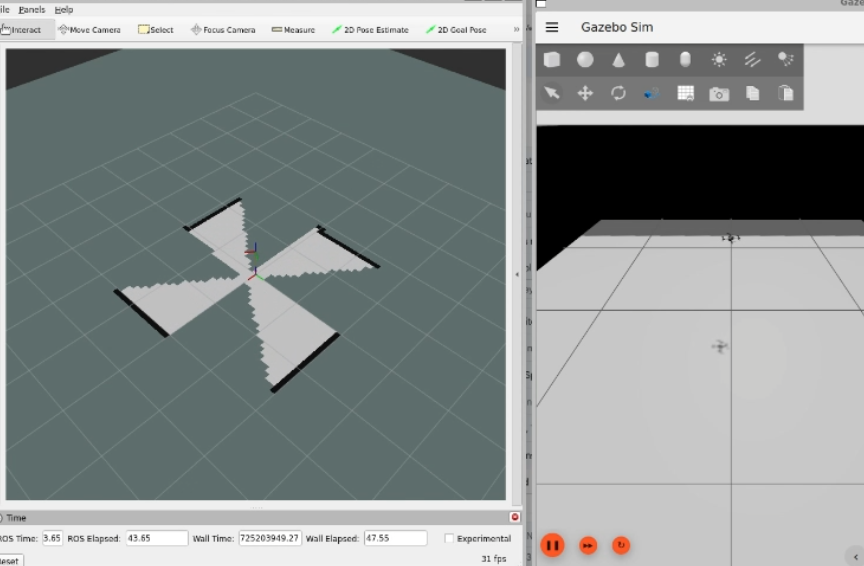
Have the Crazyflie take off with ‘t’ on your keyboard, and rotate it around with the teleop instructions. In RVIZ you should see the map being created and the transform of the Crazyflie moving. You should be able to see this picture, and in this part of the video.
Screenshot of the Crazyflie in Gazebo generating a map with Teleop (video)
3. Simple mapping real world
Now that you got the gist of it, let’s move to the real Crazyflie!
First, if you have a different URI of the Crazyflie to connect to, first change the config file ‘crazyflie_real_crazyswarm2.yaml’ in the crazyflie_ros2_repository. This is a file that Crazyswarm2 uses to know to which Crazyflie to connect to.
Open up the config file in gedit or your favorite IDE like visual code:
and change the URI on this line specifically to the URI of your Crazyflie if necessary. Mind that you need to rebuild ros2_ws again to make sure that this has an effect.
Now source the terminal with the installed ROS 2 packages and the Gazebo model, and launch the ROS launch of the simple mapper example for the real world Crazyflie.
Now open up another terminal, source ROS 2 and open up teleop:
source /opt/ros/humble/setup.bash
ros2 run teleop_twist_keyboard teleop_twist_keyboard
Same thing, have the Crazyflie take off with ‘t’, and control it with the instructions.
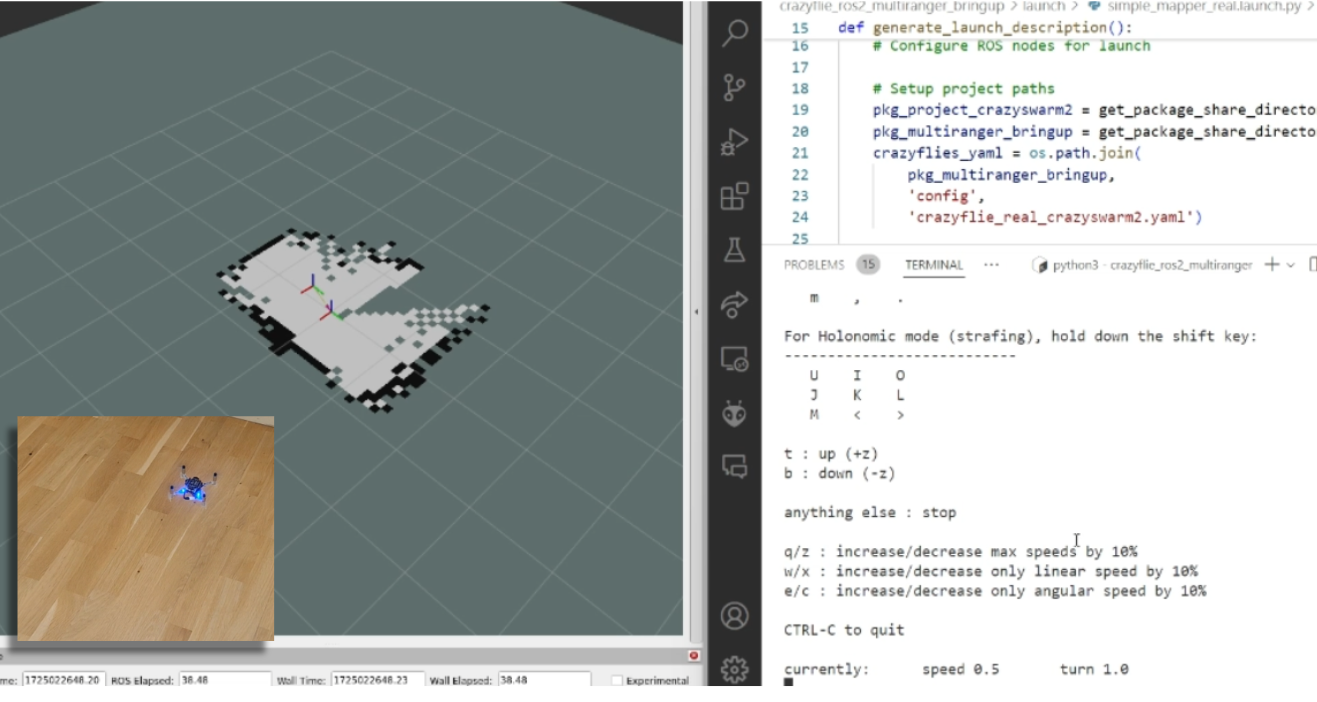
You should be able to see this on your screen, which you can also check with this part of the video.
Screen shot of the real Crazyflie mapping while being controlled with ROS 2 teleop (video)
Make the Crazyflie land again with ‘b’, and now you can close the ROS 2 node in the launch terminal with ctrl + c.
4. Wall following simulation
Previously, you needed to control the Crazyflie yourself to create the map, but what if you could let the Crazyflie do it on its own? The `crazyflie_ros2_multiranger` package includes a `crazyflie_ros2_multiranger_wall_following` node that uses laser ranges from the multi-ranger to perform autonomous wall-following. Then, you can just sit back and relax while the map is created for you!
Let’s first try it in simulation, so open up a terminal and source it if you haven’t already (see section of the Simple mapper simulation). Then launch the wall follower ROS 2 launch file:
Take off and wall following will go fully automatic. The simulated Crazyflie in Gazebo will fly forward, stop when it sees a wall with it’s forward range sensor and follow the wall on its left-hand side.
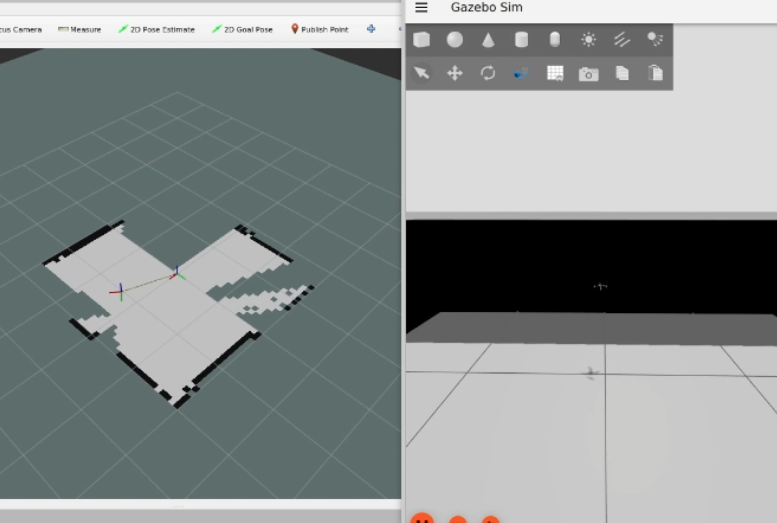
You’ll see on RVIZ2 when the full map is created like here below and this part of the tutorial video.
Screenshot of the simulated Crazyflie in Gazebo mapping will autonomously wall following (video)
You can stop the simulated Crazyflie by the following service call in another terminal that is sourced with ROS 2 humble.
ros2 service call /crazyflie/stop_wall_following std_srvs/srv/Trigger
The simulated Crazyflie will stop wall following and land. You can also just close the simulation, since nothing can happen here.
5. Wall following real world
Now that we have demonstrated that the wall-following works in simulation, we feel confident enough to try it in the real world this time! Make sure you have a fully charged battery, place the Crazyflie on the floor facing the direction you’d like the positive x-axis to be (which is also where it will fly first), and turn it on.
Make sure that you are flying with a room with clear defined walls and corners, or make something with cardboard such as a mini maze, but the current algorithm is optimized to just fly in a squarish room.
Source the ROS 2 workspace like previously and start up the wall follower launch file for the
Like the simulated Crazyflie, the real Crazyflie will take off automatically and automatically do wall following, so it is important that it is flying towards a wall. It should look like this screenshot, or you can check it with this part of the video.
The real crazyflie wall following autonomously while mapping the room (video).
Be careful here to not accidently run this script with the Crazyflie sitting on your desk!
If you’d like the Crazyflie to stop, don’t stop theROS2 nodes with ctrl-c, since it will continue flying until crash. It’s not like simulation unfortunately where you can close the environment and nothing will happen. Instead, use the ROS 2 service made for this in a different terminal:
ros2 service call /crazyflie_real/stop_wall_following std_srvs/srv/Trigger
Similar the real Crazyflie will stop wall following and land. Now you can close the ROS 2 terminals and turn off the crazyflie.
Next steps?
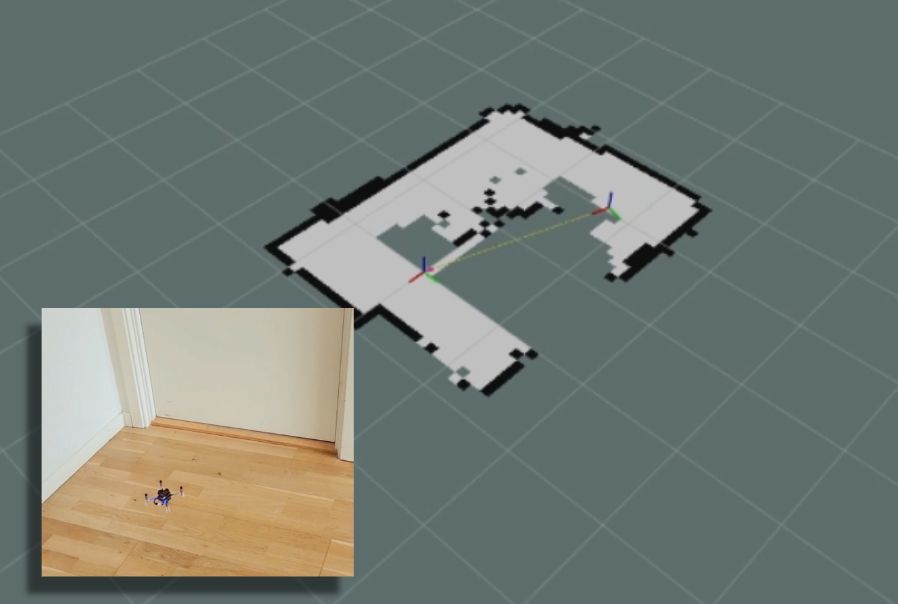
We don’t have any more demos to show but we can give you a list of suggestions of what you could try next! You could for instance have multiple Crazyflies mapping together like in the video shown here:
This uses the mapMergeForMultiRobotMapping-ROS2 external project, which is combined with Crazyswarm2 with this launch file gist. Just keep in mind that, currently, it would be better to use a global positioning system here, such as the Lighthouse positioning system used in the video. Also, if you’d like to try this out in simulation, you’ll need to ensure different namespaces for the Crazyflies, which the current simulation setup may not fully support.
Another idea is to connect the NAV2 stack instead of the simple mapper. There exists a couple of instructions on the Crazyswarm2 ROS2 tutorials so you can use those as reference. Check out the video below here.
Moreover, if you are having difficulties setting up your computer, I’d like to remind you that the skill-learning session we conducted for Robotics Developer Day was entirely done using a ROSject provided by The Construct, which also allows direct connection with the Crazyflie. The only requirement is that you can run Crazyswarm2 on your local machine, but that should be feasible. See the video of the original Robotics Developer Day skill-learning session here:
The last thing to know is that the ROS 2 nodes in this tutorial are running ‘offboard,’ so not on the Crazyflies themselves. However, do check out the Micro-ROS examples for the Crazyflie by Eprosima whenever you have the time and would like to challenge yourself with embedded development.
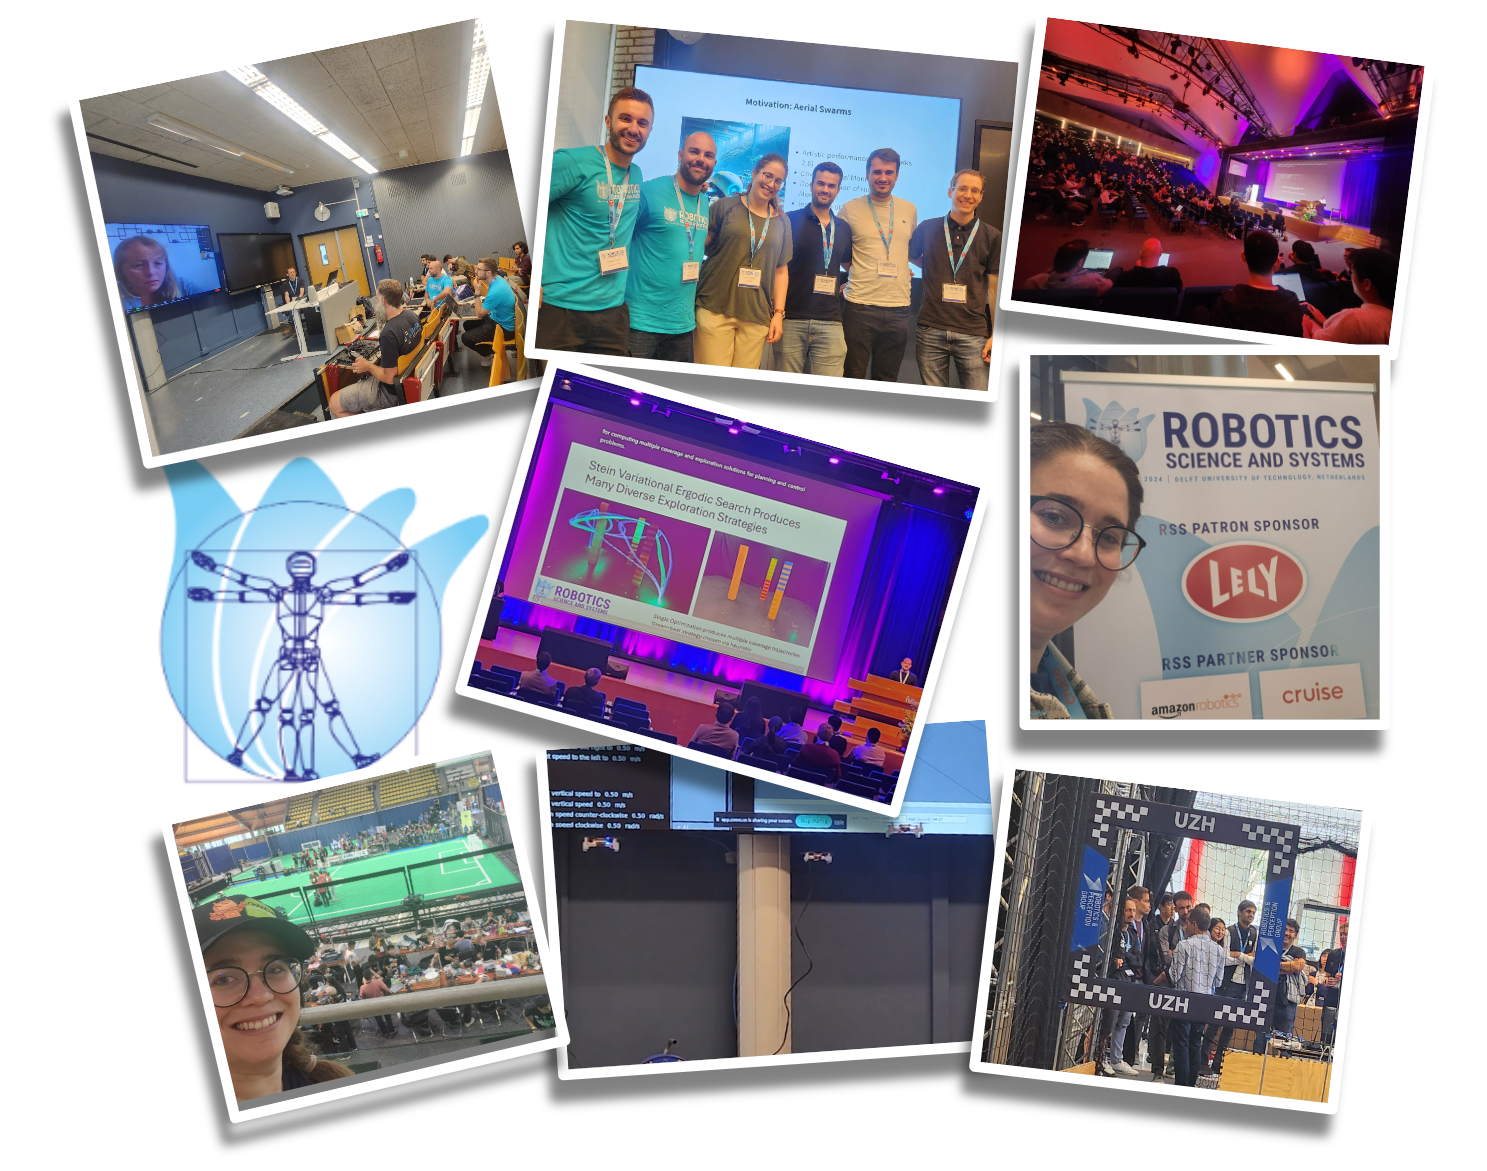
A few weeks ago, the prestigious Robotics: Science and Systems (RSS) conference was held at Delft University of Technology. We helped with the co-organization of a half-day tutorial and workshop called “Aerial Swarm Tools and Applications” so Kimberly (I) was there on behalf of both Bitcraze and Crazyswarm2. In this blog post, we will tell you a bit about the conference itself and the workshop (and perhaps also a tiny bit about RoboCup)
The Robotics: Science and Systems conference
The Robotics: Science and Systems conference, also known as RSS, is considered one of the most important robotics conferences to attend, alongside ICRA and IROS. It distinguishes itself by having only a single track of presented papers, which makes it possible for all attendees to listen to and learn about all the cool robotics work done in a wide range of fields. It also makes it more difficult to get a paper accepted due to the fixed number of papers they can accept, so you know that whatever gets presented is of high quality.
This year the topic was very much on large language models (LLMs) and their application in robotics, most commonly manipulators. Many researchers are exploring the ways that LLMs could be used for robotics, but that means not a lot of small and embedded systems were represented in these papers. We did find one paper where Crazyflies were presented, namely the awesome work by Darrick et al. (2024) called ‘Stein Variational Ergodic Search’ which used optimal control for path planning to achieve the best coverage.
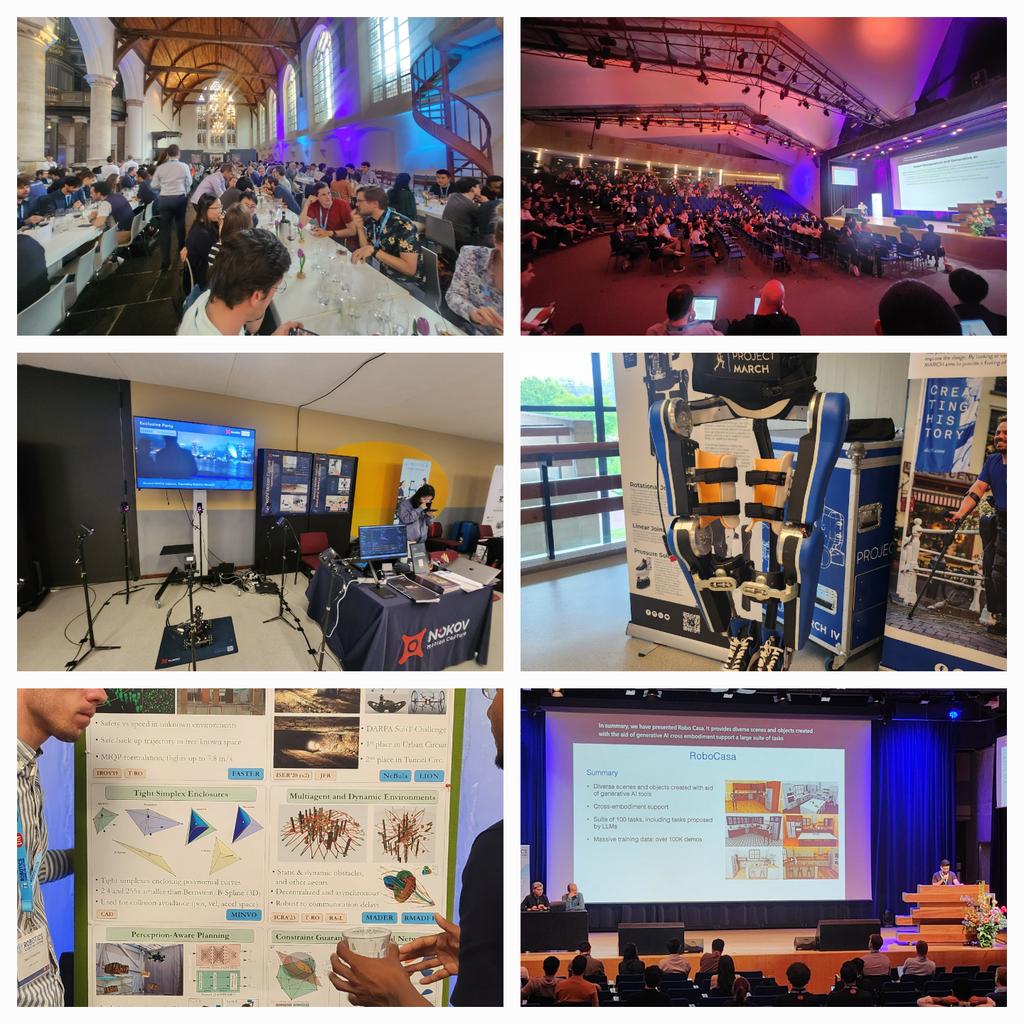
It gave us the chance to experience many of the other works that could be found at RSS. One in particular was about the robotic design of the cute little biped from Disney Imagineering named “Design and Control of a Bipedal Robotic Character” by Grandia et al. (2024). Also very impressive was the Agile flight demo by the group of Davide Scaramuzza, and we enjoyed listening to the keynote by Dieter Fox, senior director at Nvidia, talking about ‘Where is RobotGPT?’. The banquet location was also very special, as it was located right in the old church of Delft.
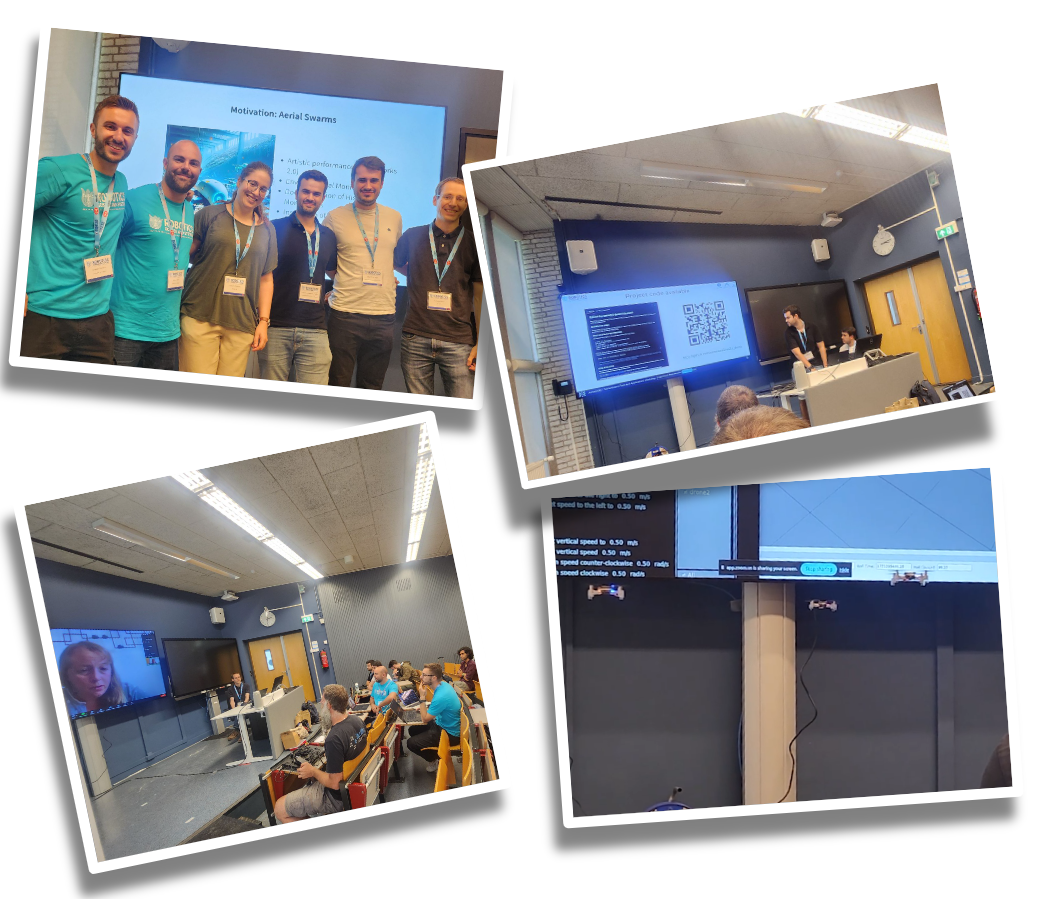
The main reason we joined RSS was that we were co-organizing the workshop ‘Aerial Swarm Tools and Applications’. This was done in collaboration with Wolfgang Hönig from Crazyswarm2/TU Berlin, Miguel Fernandez Cortizas and Rafel Perez Segui from Aerostack2/Polytechnic University of Madrid (UPM), and Andrea Testa, Lorenzo Pichierri, and Giuseppe Notarstefano from CrazyChoir/University of Bologna. The workshop was a bit of a hybrid as it contained both talks on various aerial swarm applications and tutorials on the different aerial swarm tools that the committee members were representatives of.
Photos of the Aerial Swarm Tools and Applications workshop
Sabine Hauert from the University of Bristol started off the workshop by talking about “Trustworthy swarms for large-scale environmental monitoring.” Gábor Vásárhelyi from Collmot Robotics and Eötvös University gave a talk/tutorial about Skybrush, showing its suitability not only for drone shows but also for research (Skybrush was used for the Big Loco Test show demo we did 1.5 years ago). The third speaker was SiQi Zhou, speaking on behalf of Angela Schöllig from TU Munich, discussing “Safe Decision-Making for Aerial Swarms – From Reliable Localization to Efficient Coordination.” Martin Saska concluded the workshop with his talk “Onboard relative localization for agile aerial swarming in the wild” about their work at the Czech TU in Prague. They also organize the Multi-robot systems summer school every year, so if you missed it this year, make sure to mark it in your calendar for next summer!
We had four tutorials in the middle of the workshop as well. Gábor also showed Skybrush in simulation after his talk for participants to try out. Additionally, we had tutorials that included real, flying Crazyflies live inside the workshop room! It was a bit of a challenge to set up due to the size of the room we were given, but with the lighthouse system it all worked out! Miguel and Rafael from Aerostack2 were first up, showing a leader-follower demo. Next up were Wolfgang and Kimberly (Crazyswarm2) who showed three Crazyflies collaboratively mapping the room, and finally, Andrea and Lorenzo from CrazyChoir demoed formation control in flight.
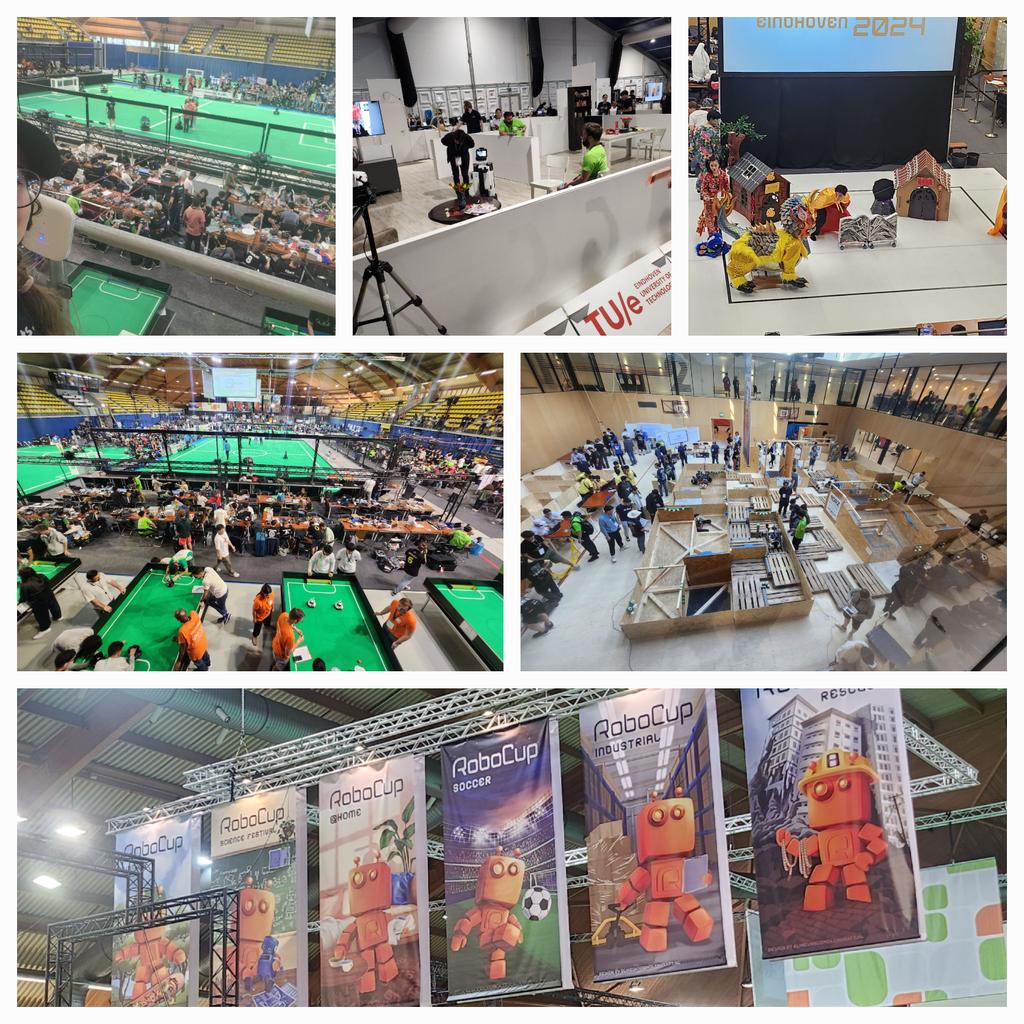
Luckily, there was also a bit of time to visit Eindhoven for a field trip to the 2024 edition of the world championship competitions of RoboCup! This is a very large robotics competition held in several different divisions, namely Soccer (with many subdivisions), Industrial, Rescue, @Home, and Junior. Each country usually has its own national championships, and those that win there can compete in the big leagues at events like these. RoboCup was extremely fun to attend, so if any robotics enthusiasts happen to live close to one of these, go! It’s awesome.
Photos of the field trip to RoboCup
Maybe drone competitions might be one of RoboCup’s divisions in the future :)
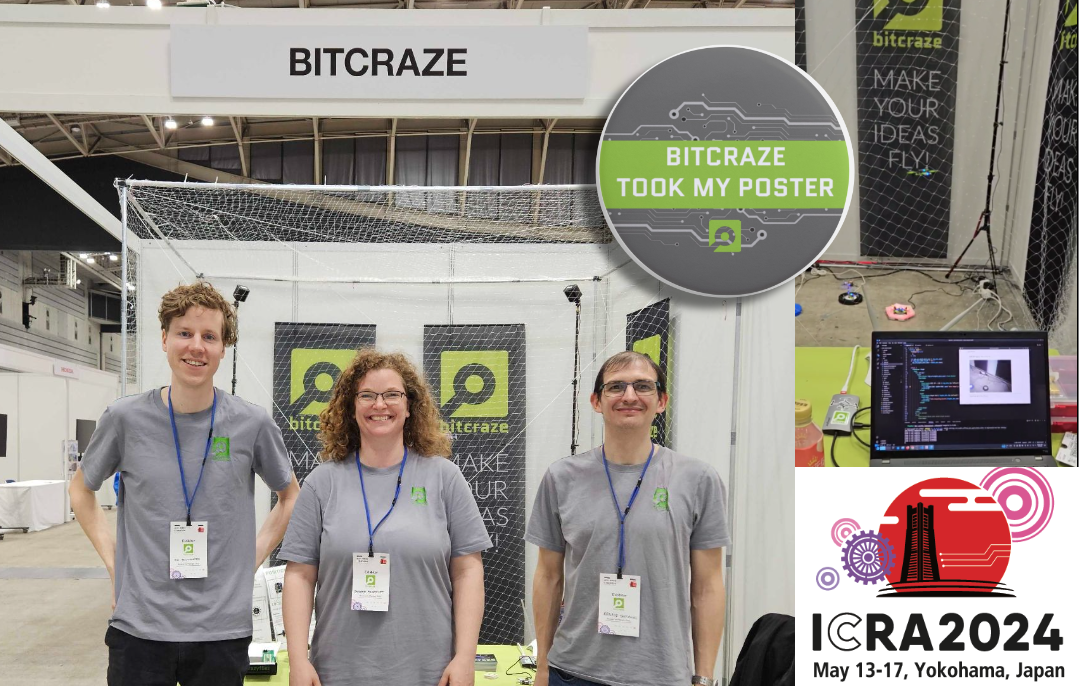
Whenever we show the Crazyflie at our booth at various robotics conferences (like the recent ICRA Yokohama), we sometimes get comments like ‘ahh that’s cute’ or ‘that’s a fun toy!’. Those who have been working with it for their research know differently, but it seems that the general robotics crowd needs a little bit more… convincing! Disregarding its size, the Crazyflie is a great tool that enables users to do many awesome things in various areas of robotics, such as swarm robotics and autonomy, for both research and education.
We will be showing that off by giving a live tutorial and demonstration at the Robotics Developer Day 2024, which is organized by The Construct and will take place this Friday, 5th of July. We have a discount code for you to use if you want to get a ticket; scroll down for details. The code can be used until 12 am midnight (CEST) on the 2nd of July.
The Construct and Robotics Developer Day 2024
So a bit of background information: The Construct is an online platform that offers various courses and curriculums to teach robotics and ROS to their users. Along with that, they also organize all kinds of live training sessions and events like the Robotics Developer Day and the ROS Awards. Unfortunately, the deadline for voting in the latter has passed, but hopefully in the future, the Crazyflie might get an award of its own!
What stands out about the platform is its implementation of web-based virtual machines, called ‘ROSJects,’ where ROS and everything needed for it is already set up from the start. Anyone who has worked with ROS(2) before knows that it can be a pain to switch between different versions of ROS and Gazebo, so this feature allows users to keep those projects separate. For the ROS Developer Day, there will be about five live skill-learning sessions where a ROSject is already preconfigured and set up for the attendees, enabling them to try the tutorial simultaneously as the teacher or speaker explains the framework.
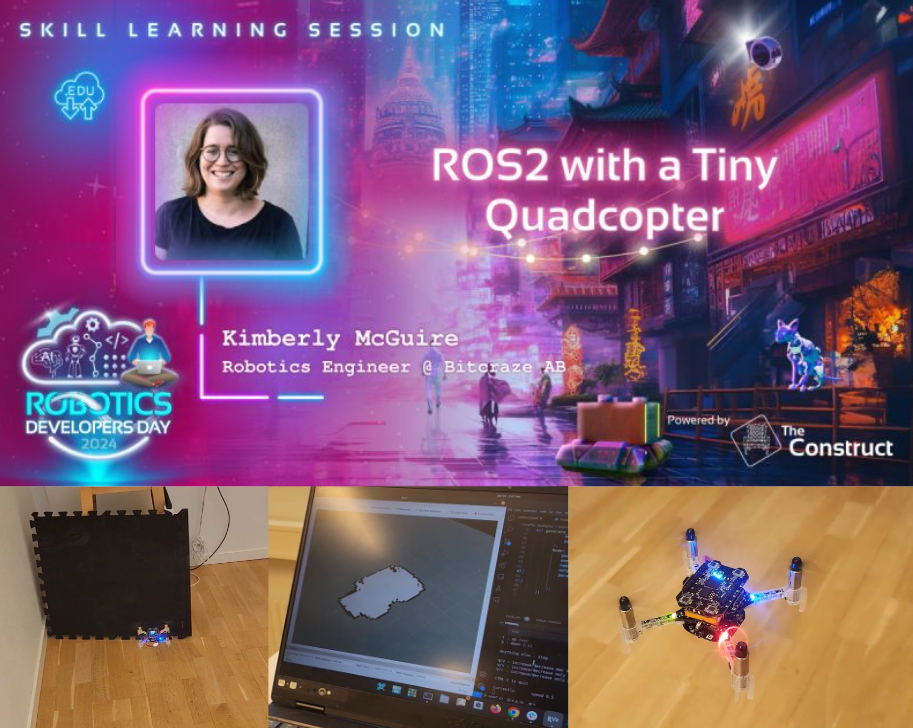
Skill learning session with the Crazyflie
One of the earlier mentioned skill learning sessions is, of course, one with the Crazyflie! The title is “ROS 2 with a Tiny Quadcopter,” and it is currently planned to be the first skill learning session of the event, scheduled at 15:15 (3:15 pm) CEST. The talk will emphasize the use of simulation in the development process with aerial robotics and iterating between the real platform and the simulated one. We will demonstrate this with a Crazyflie 2.1 equipped with a Lighthouse deck and a Multi-ranger deck. Moreover, it will also use a Qi-charging deck on a charging platform while it patiently waits for its turn :D
What we will be showing is a simple implementation of a mapping algorithm made specifically for the Crazyflie’s Multiranger deck, which we have demonstrated before at ROSCon Kyoto and in the Crazyswarm2 tutorials. What is especially different this time is that we are using Gazebo for the simulation parts, which required some skill learning on our side as we have been used to Webots over the last couple of years (see our tutorial for that). You can find the files for the simulation part in this repository, but we do advise you to follow the session first.
You can, if you want, follow along with the tutorial using a Crazyflie yourself. If you have a Crazyflie, Crazyradio, and a positioning deck (preferably Lighthouse positioning, but a Flowdeck would work as well), you can try out the real-platform part of this tutorial. You will need to install Crazyswarm2 on a separate Ubuntu machine and add a robot in your ROSject as preparation. However, this is entirely optional, and it might distract you from the cool demos we are planning to show, so perhaps you can try this as a recap after the actual skill learning session ;).
Here is a teaser of what the final stage of the tutorial will look like:
Win a lighthouse explorer bundle and a Hands-On Pass discount
We are also sponsors of the event and have agreed with The Construct to award one of the participants a Crazyflie if they win any contest. Specifically, we will be awarding a Lighthouse Explorer bundle, with a Qi deck and a custom-made charging pad similar to the ones we show at fairs like ICRA this year. So make sure to participate in the contests during the day for a chance to win this or any of the other prizes they have!
It is possible to follow the event for free, but if you’d like to participate with the ROSjects, you’ll need to get a hands-on pass. If you haven’t yet gotten a hands-on ticket for the Robotics Developer Day, please use our 50% off discount code:
On a side note, we will be at the Robotics: Science and Systems Conference in Delft from July 15th to 19th, 2024—just about two weeks from now. We won’t have a booth as we usually do, but we will be co-organizing a half-day workshop titled Aerial Swarm Tools and Applications (more details on this website).
We will be organizing this workshop together with our collaborators at Crazyswarm2, as well as the developers of CrazyChoir and Aerostack2. We’re excited to showcase demos of these frameworks with a bunch of actual Crazyflies during the workshop, if the demo gods are on our side :D. We will also have great speakers, including: SiQi Zhou (TU Munich), Martin Saska (Czech Technical University), Sabine Hauert (University of Bristol), and Gábor Vásárhelyi (Collmot/Eötvös University).
It’s been over a little year since we started the ROS Aerial Robotics community group together with the Drone Code Foundation, and it is still going strong (blogpost 1, blogpost 2). Since there is a nice mix of people joining the meetings from different backgrounds and drone operating systems, we have had quite a few discussions and overviews of various topics. For instance, we’ve explored courses in Aerial Robotics and other subjects in previous meetings. An important goal of the group has been to make it easier for people to get started with flying robotics, which we’ve achieved by collecting essential information in the ‘Aerial Robotic Landscape’.
Starting out in Aerial Robotics
Let’s cut to the chase: Aerial Robotics is a very challenging field to get started in. Not only do you need a comprehensive understanding of which hardware to acquire, but users also face a multiple choices. These decisions include selecting the right autopilot, simulator for testing ideas, and necessary sensors to achieve autonomy. Unlike the well-established Turtlebot in other robotics domains, there isn’t a universally accepted and field-tested getting-started development drone in the aerial robotics world. While we at Bitcraze would love everyone to go for the Crazyflie, we recognize its limitations. Like, it may not handle outdoor flights with GPS or carry heavy cameras effectively. Our goal, as the ‘Aerial Robotics Community group,’ is to make it easier for beginners by providing users with information about the hardware and software they truly need.
Drone Code Foundation and Bitcraze AB had a keynote speech together at ROSCon 2023 about getting started in Aerial Robotics called ‘Up, Up, and Away: Adventures in Aerial Robotics’. Please take a look at the talk here on Vimeo.
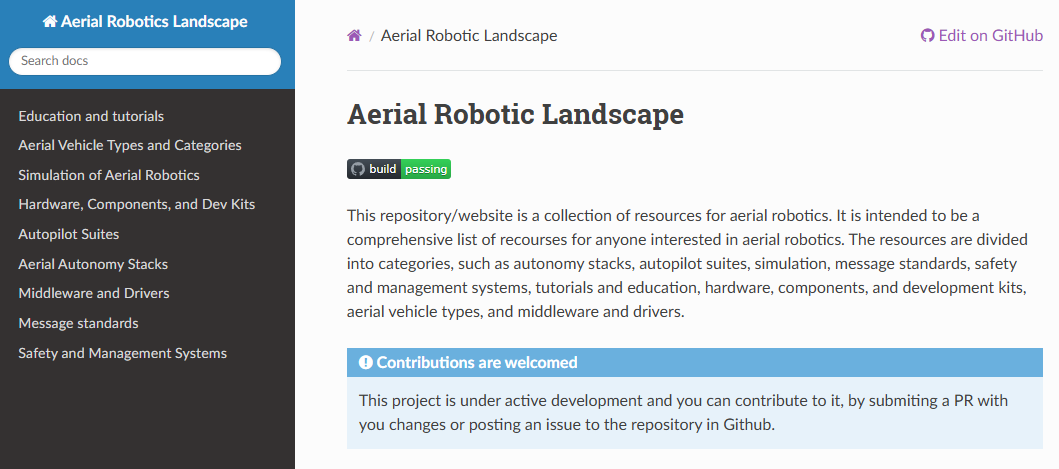
The Aerial Robotics Landscape website
The Aerial Robotics Landscape serves as a repository of information related to all things Aerial Robotics. It started out in the GitHub repository, and it grew due to the discussions held at the aerial robotics community group meetings. Additionally, contributions from both group members and external contributors have played an important role (you can explore the merged PRs).
As the pages and tables expanded, it became clear that a better representation was necessary than just the mere README documentation on the GitHub repository. The group therefore experimented with MKDocs, creating a website in the ‘Read the Docs’ theme. This is a similar theme that important packages within in the ROS ecosystem use, such as the ROS documentation, as well as ROS 2 packages like Nav2 and Crazyswarm2.
The Aerial Robotics Landscape is a dynamic , where development kits emerge while others are discontinued, new simulators rise while some remain unsupported, and autopilot and autonomy features evolve monthly. This ever-changing landscape demands constant updates and additions. We try to do this to the best of our ability, but we can’t do it alone — we need your help.
If you believe that your favorite hardware platform is missing from the landscape, or if you’ve recently developed a new planning algorithm for fixed-wing vehicles or created a YouTube course on optical-based flight, please contribute by means of a pull request to the GitHub repository. We’ve put together a guide on how to contribute to the Aerial Robotics Landscape here. Let’s make the website useful together!
If you’d like to join the ROS aerial Robotics meetings, please take a look at our community github repository for joining information. The next meeting is the 5th of June, 4 PM UTC and was announced on ROS discourse.
“What? You are in Japan? Again!?”. Yup that is right! We loved IROS Kyoto 2022 so much that we just couldn’t wait to come back again. Barbara, Arnaud and Rik are setting up the booth as we speak to show some Bitcraze awesomeness to you! Come and say hi at booth IC085.
The gang before the rush starts!
Crazyflie Brushless and Camera expansion
Of all the prototypes we are the most excited of showing you the Crazyflie Brushless and the ‘forward facing expansion connector prototype’ aka the Camera deck. Here you can see them both in action at a tryout of our demo. We have also written blogposts about both so make sure to read them as well (Brushless blogpost, Camera expansion blogpost)
The Crazyflie Brushless flying with a Camera deck.
Also we will explain about the contact charging prototype (see the blogpost here) and will be showing all of our decks at the booth as well. And of course our fully autonomous, onboard, decentralized peer-to-peer and avoiding swarm demo will be displayed as always. Make sure to read this blogpost of when we showed this demo at IROS 2022 to understand what is fully going on!
We will be providing a ‘special disposal service’ for your conference poster! We would love to see what you are working on and get your poster, because we have a lot of space in our updated office/flight space but a lot of empty walls.
If you hand in your poster at the booth, you’ll get a special, one-of-a-kind, button badge that you can wear proudly during the conference! So we will see you at booth IC085!
Today, we’d like to take the opportunity to spotlight a feature that’s been in our code base for some time, yet hasn’t been the subject of a blog post: the Python bindings for our Crazyflie firmware. You may have noticed it mentioned in previous blog posts, and now we’ll delve into more detail about what it is, how we and others are utilizing it, and what its future holds.
What are the Python bindings?
Language bindings, in essence, are libraries that encapsulate chunks of code, enabling one programming language to interface with another. For instance, consider the project Zenoh. Its core library is crafted in Rust, but it offers bindings/wrappings for numerous other languages like Python, C/C++, and so on. This allows Zenoh’s API to be utilized in scripts or executables written in those languages. This approach significantly broadens the functionality without necessitating the rewriting of code across multiple programs. A case in point from the realm of robotics is ROS(1), which initially created all of their APIs for different languages from scratch—a maintenance nightmare. To address this, for ROS 2, they developed the primary functionality entirely in C and provided wrappers for all other programming languages. This strategy eliminates the need to ‘reinvent the wheel’ with each iteration.
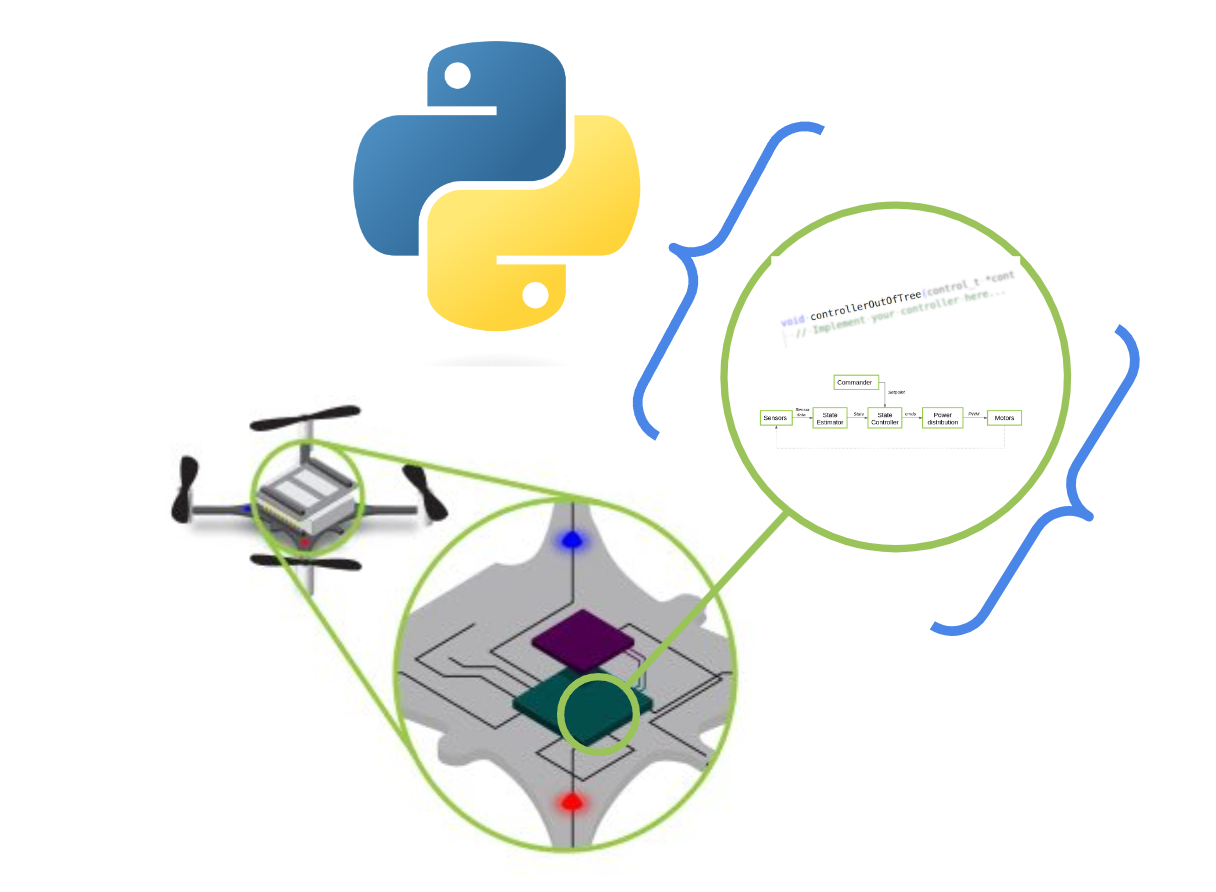
Rather than redeveloping the firmware in Python, our esteemed collaborators Wolfgang Hönig and James Preiss took a pragmatic approach. They selected parts of the Crazyflie firmware and wrapped them for Python use. You can see the process in this ticket. This was a crucial step for the simulation of the original Crazyswarm (ROS1) project and was continued for its use in the Crazyswarm2 project, which is based on ROS 2. They opted for SWIG, a tool specifically designed to wrap C or C++ programs for use with higher-level target languages. This includes not only Python, but also C#, GO, Javascript, and more, making it the clear choice for implementing those bindings at the time. We also strongly recommend checking out a previous blogpost by Simon D. Levy, who used Haskell to wrap the C-based Crazyflie Firmware for C++.
Where are the Python bindings being used?
As previously mentioned, the Crazyswarm1 & 2 projects heavily utilize Python bindings for testing key components of the firmware (such as the high-level commander, planner, and controller) and for a (hybrid) software-in-the-loop simulation. During the project’s installation, these Python bindings must be compiled so they can be used during simulation. This approach allows users to first test their trajectories in a simulated environment before deploying them on actual Crazyflies. The advantage is that minimal or no modifications are required to achieve the same results. While simulations do not perfectly mirror real-world conditions, they are beneficial because they operate with the same controller as the one used on the Crazyflie itself. In our own Crazyflie simulation in Webots, it’s also possible to use these same bindings in the simulator by following these instructions.
Three controllers (PID, Mellinger, and Brescianini), intra-drone collision avoidance, and the high-level commander planner have all been converted into Python bindings. Recently, we’ve added a new component: the Extended Kalman Filter (EKF). This addition is ideal as it allows us to test the filter with recorded data from a real Crazyflie and experiment with different measurement models. As we discussed in a previous blogpost, estimators are complex due to their dependence on chance and environmental factors. It’s beneficial for developers to have more control over the inputs and expected outputs. However, the EKF is deeply integrated into the interconnected processes within the Crazyflie Firmware. After a significant refactoring effort, these were added to the bindings by creating an EKF emulator (see this PR). This enabled Kristoffer to further enhance the TDOA outlier filter for the Crazyflie by emulating the full process of the EKF, including IMU data.
In addition to SITL simulation and EKF development, Python bindings are also invaluable for continuous integration. They enable comprehensive testing that encompasses not just isolated code snippets, but entire processes. For instance, if there’s a recording of a Crazyflie flight complete with sensor data (such as flow, height, and IMU data), and it’s supplemented with a recorded ground truth (from lighthouse/mocap), this sensor data can be fed into the EKF Python binding. We can then compare the outputted pose with the ground truth to verify accuracy. The same principle applies to the controllers. Consequently, if any changes are made to the firmware that affect these crucial aspects of Crazyflie flight, these tests can readily detect them.
If you like to try the python bindings tests for yourself, clone the Crazyflie-firmware repo and build/install the python bindings via these instructions. Make sure you are in the root of the repository and run: python3 -m pytest test_python/. Mind that you might need to put the bindings in the same path with export PYTHONPATH=<PATH_TO_>/crazyflie-firmware/build:$PYTHONPATH (please see this open ticket)
The next steps of the python bindings
We’ve seen how Python bindings have proven to be extremely useful, and we’re keen to further expand their application. At present, only the Loco positioning system has been incorporated into the EKF part of the Python bindings. Work is now underway to enable this for the Lighthouse system (see this draft PR). Incorporating the Lighthouse system will be somewhat more complex, but fortunately, much of the groundwork has already been laid, so we hope it won’t be too challenging. However, we have encountered issues when using the controller bindings with simulation (see this open ticket). It appears that some hardware-specific timing has been hardcoded throughout the PID controller in particular. Therefore, work needs to be done to separate the hardware abstraction from the code, necessitating additional refactoring work for the controller.
Recent projects like Sim_CF2 (see this blogpost) and Crazysim (see this discussion thread) have successfully compiled the Crazyflie firmware to run as a standalone node on a computer. This allows users to connect it to the Crazyflie Python library as if it were an actual Crazyflie. This full Software-In-The-Loop (SITL) functionality, already possible with autopilot suites like PX4 and Ardupilot, is something we at Bitcraze are eager to implement as well. However, considering the extensive work required by the aforementioned SITL projects to truly separate the hardware abstraction layer from the codebase, we anticipate that refactoring the entire firmware will be a substantial task. We’re excited to see what we can achieve in this area.
Indeed, even with a more comprehensive Software-In-The-Loop (SITL) solution, there’s no reason to completely abandon Python bindings. For developments requiring more input/output control—such as the creation of a new controller or an addition to the Extended Kalman Filter (EKF)—it’s beneficial to start with just that portion of the firmware code. Python bindings and a SITL build can coexist, each offering its own advantages and disadvantages for different stages of the development process. By leveraging the tools at our disposal, we can minimize the risk of damaging Crazyflies during development. Let’s continue to make the most of these valuable resources!