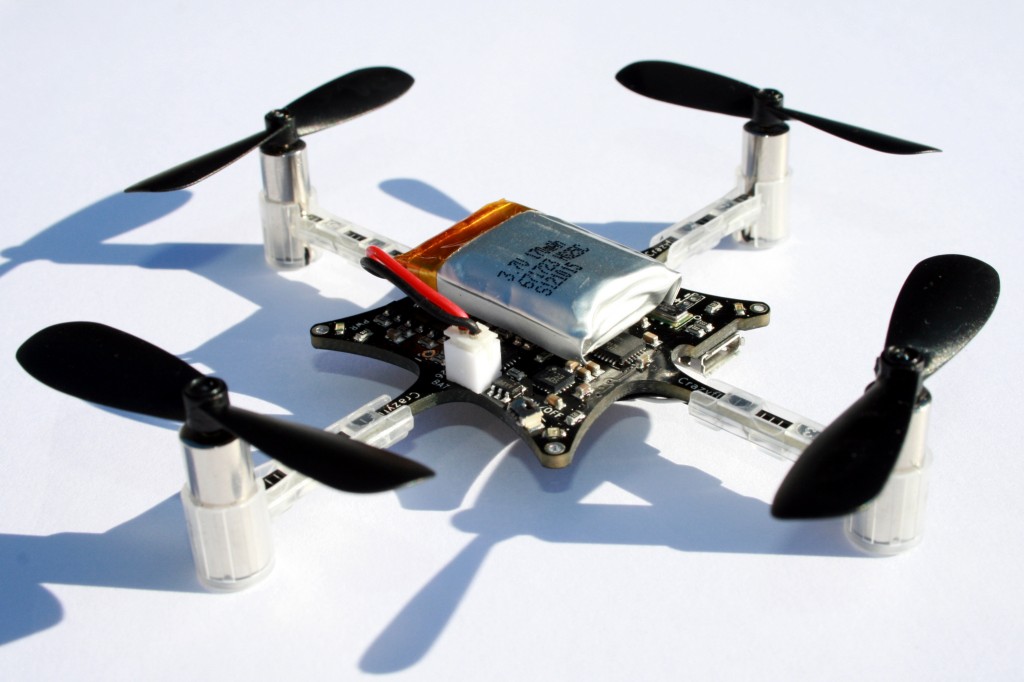
Author: Tobias

It’s been a really hectic last couple of weeks and we are now very close to shipping the first batch of Crazyflies. It is a very big step for us so we would like to start by thanking you for your support! We wouldn’t be able to do this without your support and we really hope you will be pleased with the product and that it lives up to your expectations!

There are some updates to the pre-order kits which we hope you will be happy about. We have added two extra propellers in each kit. We have also updated the motor mounts to real moulded ones which should be easier to work with and more durable. They don’t require any glue, handles impacts and vibration better. The 3D printed motor mounts was not a viable solution when the volume increased so we have been working really hard on getting these ready in time. Since the new motor mount wasn’t available to order as a spare part during the pre-order, we have include a spare one in the kit for you.

Assembled Crazyflie with new motor mounts

Assembled Crazyflie with new motor mounts

The pre-order shipments will start as announced, on Apr. 25th, and finish on Apr. 30th. Orders will be shipped out in the order they where placed so second batch orders will be shipped a bit earlier with the last order going out on Apr. 30th.  Since Seeedstudio got a lot more pre-orders than expected, the first batch orders will need some more time for packaging and delivery and couldn’t all be shipped on Apr.25th, please understand.

Keep in mind that we are still doing development on both the firmware and software as well as continuously updating the wiki. So once you get your Crazyflie visit our page to get the latest updates and information on how to assemble the kit and start flying. Updating the firmware only takes a few minutes and you will get the latest features.

Thank you!
Bitcraze

Back in November when we got the pre-series we shot an assembly video showing how to assemble a Crazyflie kit. We shot it in Tobias shed in his back garden where it was about 10*C, that’s why Marcus is wearing a winter jacket. It was also pretty late and it’s the 7th Crazyflie in a row that we have tested and assembled, so we where pretty tired. We are not trying to find excuses but it might not have been our best work. For example the words “the best way” is frequently used, and due to our Swedish heritage, “one good way” might have been more appropriate, but that day we where just feeling confident :-).

If you have ~8 minutes to spare have a look at the video, so you know what to expect in terms of assembly, when you pretty soon will be able to pre-order the kit.

Finally our yearning has come to an end, the Crazyflie kit pre-series did arrive from Seeedstudio today! We have not had time to do any extensive testing but so far so good, yay! We did however have time to program and assemble one and it flies really well. It feels like the change we did to route the motor supply directly to the battery and not trough the power management circuit made a difference. The acceleration punch when maxing out the throttle feels stronger. We have uploaded some pictures of the received package. What is still not included in this package are the motor mounts which we ordered separately from Shapeways. The motor mount is one of the last things to sort out before the kit can be ready. We are working on a moulded version which will be much cheaper in bigger quantities but it takes way more time then we expected. We might go with rapid prototyped mounts instead to make it available sooner.

The upcoming week is going to be very interesting as the testing will determine if we can go to the next step!

Since the very beginning of the project we have been maintaining a wiki. At first mostly for internal communication and documentation but more recently we have been focusing on making an easily accessible documentation for the Crazyflie kit.

We now think the wiki is good enough to be released. It is still a “work in progress” but most of the basics are there and it will be updated as we go along. On the wiki we plan to have all information regarding the Crazyflie and other projects. We also intend to complement the wiki with a forum which will be the next step.

The wiki is located at wiki.bitcraze.se and can also be accessed via the wiki link in the navigation bar.

While we are waiting for the pre-series to arrive, which hopefully will be within 4-5 weeks, we have tested this idea we have had for a while. On the Crazyflie PCB we placed mounting holes in each corner for the possibility to add e.g. a landing gear, canopy or maybe a protective frame. The holes are about 0.9mm and plated so it is possible to solder something in it and a protective frame made of piano wire would be a good candidate.

We bought a couple of 0.8 mm thick 1m long piano wires at a nearby hobby store and got to work. On the first try we bend the wires into the shape solely by hand and it didn’t look or work well at all. We figured there must be some better way! And after searching the net we found this site explaining how to make your own DIY springs of different types. We however needed a circle with a much bigger diameter than normal springs use so it took us a while to find a tube with the right diameter to bend it around to get the right size. We found out that when bending the piano wire around a tube with the diameter of 20mm it ended up at about 55mm which was close enough to the 60mm we needed. Piano wire is a bit hard to solder but with plenty of solder flux it works well. We are pretty pleased with the result!

The piano wire frame itself weights about 3.5-4g so it is within the acceptable payload limit. The flight characteristics is changed a bit making it more controllable but less agile which is perfect for beginners. We have tested throwing it in the ground and crashing it several times and the Crazyflie just bounces so it works great. It might even be possible to go to a smaller piano wire diameter to save weight because now the frame is very stiff. Next step would be to come up with a design that could be attached/detached without soldering. It should also be cheap and easy to manufacture.

We discovered a new key-chain video camera which is called the 808#16. It had gotten a pretty good review so we decided to give the video camera add-on hack yet another try. A while ago we tried it with a 808#14 but it didn’t work that well when we where running it directly from the Crazyflie battery. It shut down as soon as we used to much throttle and using a separate battery made it to heavy. We didn’t have to high hopes for the 808#16 either and when we discovered that the bare camera weight, no battery nor case, was about 9g we knew it would be at the maximum of what the Crazyflie could carry.  With high hopes we connected the camera directly to the Crazyflie battery terminal and gave it a try.

It worked! The camera didn’t shut down but as you can see the stability is pretty bad during take-off. Once in the air it is controllable but only barely. We haven’t tested the full flight time but it probably wont be more then 2-3 minutes. We are thinking of doing a test where we add 4 more motors “mirrored” directly underneath the existing ones to increase the payload capability. Would be nice to have that option and it should be fairly simple to do.

We are pretty impressed with the video of the 808#16 which still is very cheap. We bought the 808#16 camera with the D-lens which is a wide angle lens and that’s why the video has a bit of a fish-eye.

When I was shopping for some ink-cartridge at this Swedish accessory store named Kjell&Co I also bought one of these 12V LED lamps. I didn’t buy it to actually use it instead I bought it to have a look inside. I cracked it open when I came home and found, not so surprisingly,  a lot of LEDs and a step up converter with a current sensing mode. Since it was made for 12V AC I removed the rectifier bridge and a large cap to get it as light as possible. Testing it with a power supply reviled that it worked all the way down to 2.2V and at 3.7V it consumed about 0.5A. A bit to much for the Crazyflie so I doubled the current sensor resistors to get it down to 0.25A. Some soldering and some double sided foam tape and we suddenly have  a pretty bright lamp hooked up to the Crazyflie. Now we have a search&rescue device :-) or maybe just an UFO…

Let’s not forget the sensor poll. It’s a very close encounter with 55% wanting the extra sensors. We will keep the poll open until next week to see if it gets any clearer.

If you have been reading our previous blog post you know that we redesigned the Crazyflie to use the MPU6050 instead of the IDG500-ISZ500-BMA145 combo. This was done because the IDG500 became obsolete, recently we found out it was because Invensens had production problems with this sensor, anyway when redesigning we managed to squeeze in a HMC5883l magnetometer and a MS5611 pressure sensor.  Now when we are getting close to actually making some kits we have to take some decisions and one of them is if we should build the Crazyflies with the HMC5883l magnetometer and the MS5611 pressure sensor mounted. This will of course increase the price which we have estimated to be about $20. Currently we do not use neither the magnetometer nor the pressure sensor. The yaw drift is so low that when you pilot the Crazyflie it isn’t noticeable and therefore we do not use the magnetometer. The pressure sensor we have just tested briefly and we do not really know how well it would work. Altitude hold might not be so useful inside but maybe outside.

Because of this little decision whether to mount the magnetometer and pressure sensor or not we would like to make a poll so please give us your thoughts.


Should we mount the pressure sensor and the magnetometer?

View Results

Loading ... Loading ...

One Sunday in March when we met up to work on the Crazyflie we suddenly realized that we do a lot of developing and discussing when we meet, but we don’t actually do that much flying. After realizing this we spent most of the Sunday just flying and playing around with the quadcopters.

So what could we try that we haden’t tried before…well we could try to crash each other while we are flying around: Crazyflie dogfight! The idea is that you should try to push the opponent out of the air without being dragged with him/her. This is easiest done by flying above the opponent making his/her crazyflie unstable and crash, however it is easier said then done!

This is not the first time two Crazyflies crash into each other in the air, but it’s the first time it’s actually intentional! It was a lot of fun but it can quickly end if something breaks. This dogfight however ended up with nothing to repair :-)

During this spring we have been involved in a Master thesis together with Epsilon. The goal for the thesis was to embed a camera module on the Crazyflie so it could be remotely controlled. Finding a lightweight camera module with access to documentation without buying a million units turned out to be trickier then we thought. The aptina MT9D131 was chosen as it can be bought from normal distributors, there is access to documentation and it has on-board JPG compression. The NRF24L01 radio was tested to see if it could handle low resolution video streaming, and it could, so no additional radio was needed. An addon board was built which could attach to the Crazyflie expansion port and it was called… Crazycam! (I wonder when we will become crazy for real :-)) . The Crazycam board uses the same STM32F103CB MCU that the Crazyflie uses to read out images from the camera chip.

Crazycam v0.1 (sensor side, mcu side, with mounted lens)

It turned out that the bandwidth to read out the images from the MT9D131 to the STM32 wasn’t enough and finding lightweight lenses was not that easy so the end result wasn’t as good as we hoped for. It wights about 5g and can stream images at about 6FPS. There are still things to try out and in theory it should handle 15-20FPS. It might be fixable so it ain’t over yet. If you would like to read the full report it is available at Linköpings university under the link “fulltext”. Even though we didn’t get all the way Thomas and Joakim, the authors, did a great job!