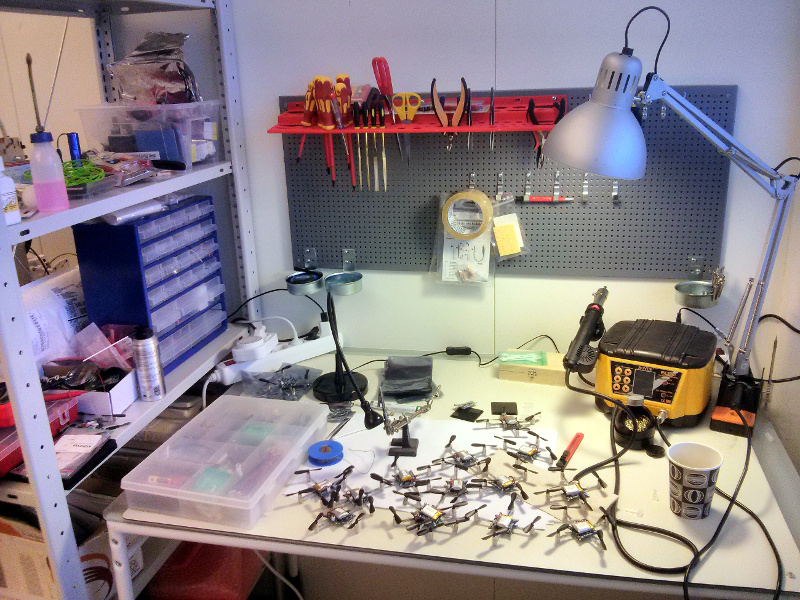
A couple of weeks ago we moved into the Malmö based business incubator Minc. It’s a great chance to get some extra help developing Bitcraze and also to get a chance to meet people from other start-ups. Below is a picture of a bunch of Crazyflies in our lab (i.e the table designated lab).
On a more technical note, here’s a video of a blimp that was hacked together with some left over party-balloons and a broken Crazyflie that we had lying around. It’s the day after the party, so there wasn’t that much lift left in the balloons (that’s why we have a bunch of them). After a few hacks to the firmware it actually works pretty well! The motors power has been redistributed and only the Yaw regulation is active, which explains that the yaw is still pretty stable, we are thinking about pushing the ‘blimp-mode’ at some point (first we will need more balloons and Helium though :) ).
Before it’s time for the holidays we thought that we would do a new video with a Christmas theme, showing our vision of Christmas gift delivery. For anyone that has seen the Amazon Prime Air video, it’s pretty easy to see where we got the inspiration for our video. Needless to say we didn’t have the same budget as Amazon, but to be fair our quad does cover more ground :-)
This Monday post we are devoting to the community development and we will try to give a short summary of what is going on there. We recently haven’t our selves had that much time to help out with this development, something we intend to change, so all credit goes to the community!
A port of the OpenPilot CC3D firmware to the Crazyflie done by webbn. Still under development but video already shows promising results.
Altitude hold functionality which is being developed in parallel by many, omwdunkley, phiamo, et. al. We hope we soon can contribute to this as well.
Improved thrust control which is being discussed a lot and hopefully we will soon see some ideas realized.
The Android client with a lot of work from derf and sebastian.
The FPV implementation driven mainly by omwdunkley and SuperRoach. Omwdunkley has made an awesome HUD (Heads Up Display) which we hopefully sometime will see integrated into the cfclient. Check out the video!
We have probably forgotten some of the great development that has been going on recently and if that is the case please write a comment about it and we will update the post with it.
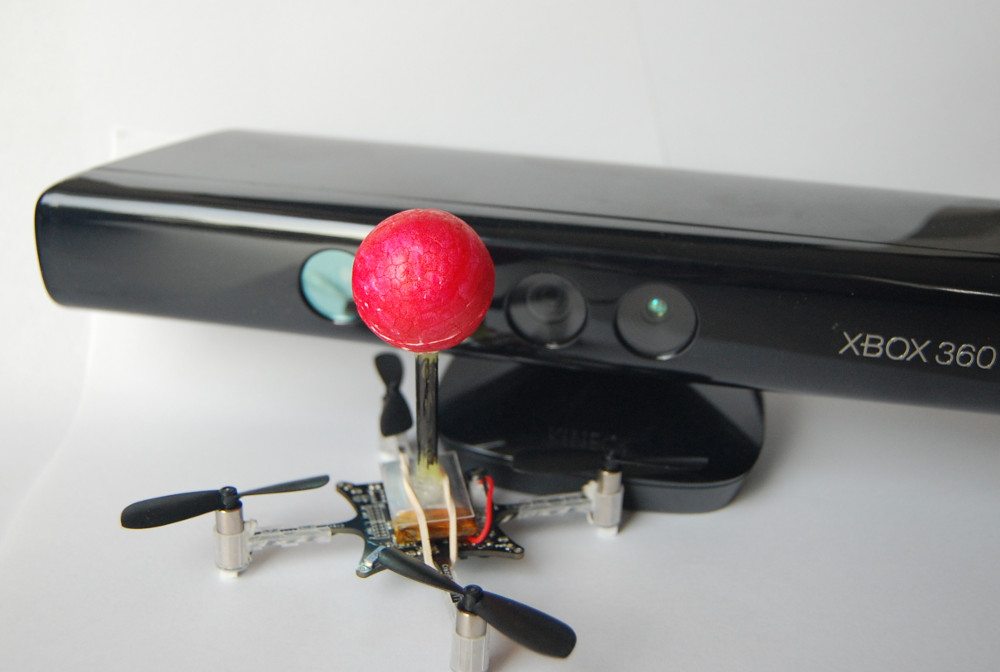
For the last couple of years (!) we have been discussing on and off about automatically flying the Crazyflie from a PC using OpenCV and a camera. We did a try a while ago using a PS3 Eye camera that wasn’t very successful. One of the issues we were having was detecting the distance from the Crazyflie to the camera. Another issue was a lag of about 1 second which made it impossible to control the Crazyflie using the video as input. So last week this discussion came up again and we finally decided to buy a Xbox360 Kinect. The image resolution is higher than the PS3 Eye and of course it has the ability to detect the distance from the camera to the objects it’s seeing.
The goal was to create a proof-of-concept application that shows that it’s possible as well as providing a stub for anyone that’s interested in doing more development. The application uses the normal image as well as the depth image from the Kinect to estimate where the Crazyflie is. This can easily be done by attaching a small colored ball to the Crazyflie and using a white background for flying. The images are processed and the current X/Y/Z co-ordinates given to a control loop. The control loop consists of thee PID regulators that will correct the roll/pitch/thrust that is sent to the Crazyflie to reach a X/Y/Z set-point in the image. The X/Y set-point can be selected by clicking the image or you can hold down the mouse button and drag it around. A cool feature that we would like in the future is to draw a geometric shape that the Crazyflie could follow. But there’s still a lot of work to be done with the control loop before we can achieve that.
After seeing the video you might be asking yourself where the James Bond theme music or the inverted pendulum is. Well, we are’t quite there yet and we will probably not even get near it. But still, this shows that the concept works. And for anyone that’s interested, it’s possible to do some basic trajectory planning algorithms at home with a Crazyflie and a Kinect.
For a more technical details have a look at the Kinect page in the hacks section of the wiki.
The first time we saw the video for the Leap Motion we instantly thought “Wow, we have to fly the Crazyflie with this!”. So finally last week a fresh Leap Motion landed on our desk and we went to work. We were really happy to see that there was an SDK for Linux. Leap Motion listened to the community that thought that an early release of the code was better than nothing at all. The API is very nice to work with and you can easily get metrics for you hand (like elevation and roll/pitch). So we created a Leap Motion driver in the joystick layer that replaces the normal input device, and it’s flying! We are going to be honest, at first it wasn’t that fun. It was more the concept that was very exciting. But as we flew more and more it started getting really great! There’s just something magical about it :-)
You fly the Crazyflie using a single hand. Thrust is calculated using the elevation of you hand from the sensor, so holding your hand higher means larger thrust. Pitch/roll is controlled by tilting you hand the same way you want the Crazyflie platform to tilt. So tilting your hand forward tilts the Crazyflie forward. Lastly the yaw is controlled by rotating your hand in the X/Y plane (around the Z-axis). For thrust/pitch/roll the control values are absolute, but for yaw it’s the rate that you control (just like the normal controls in the Crazyflie client).
As a safety mechanism the Crazyflie will only respond if the Leap Motion detects 4 or more fingers. So holding your fist above the sensor does nothing, but the instant you open up your hand you can start to control the Crazyflie.
The code for flying with the Leap Motion is still on a development branch but if you are eager to try it then have a look at the instructions in the hacks section of the wiki for documentation on how to get flying! The plan is to merge the Leap Motion code into the main track once we are finished with the development.
The community interest for FPV flight made us buy a light weight analog FPV kits a while a go. We bought the 5.8GHz micro combo set from fpvhobby to do a first test. It took a little while to solder things together but it wasn’t that bad. We soldered the camera and the transmitter power to the VCOM voltage on the Crazyflie which is available on the expansion port. Then we taped the camera and transmitter to the Crazyflie and did a test flight. The FPV kit is only about 3 grams which doesn’t affect the flight performances that much.
It was almost too easy, but as soon as we took off we noticed some vertical lines on the TV so maybe it wasn’t that easy. There seems to be some electrical interference, probably from the motors. Also the battery voltage drop generated by fast accelerations cuts the video feed after a couple of minutes of flight. We still think that there are some improvements to be done so hopefully it will work better in the future.
As for the production, so far it is still going forward as planned.
Finally an Alpha version of the virtual machine has been posted on the forum, you are welcome to test and report any problem/suggestion you may have :-).
So finally it’s Monday again :-) As you might have noticed the Crazyflie got released for pre-release last week! All our code has now been pushed onto Bitbucket and our repositories can be found here. Since we did some restructuring of the code before pushing there might be some bugs that we are currently hunting. The Crazyflie is mainly a development platform where you can either add new features/hacks or improve the current features. We added a feature wishlist to the Wiki for features that we never had the time to implement and also to add new features that you suggest. So if you feel like getting you hands dirty there’s still lots of stuff to do! In order to make development easier we have:
Wireless Radio Bootloader: This will enable you to easily update the firmware in the Crazyflie. The bootloader cannot easily be erased without using a JTAG so don’t worry about bricking your Crazyflie when testing new firmware
Crazyradio USB bootloader: The Crazyradio contains a USB bootloader for easy update of the firmware
Well documented: We are currently doing our best to update the documentation on the Wiki and our goal is to create a well documented platform
Parameter setting/getting: This is detailed a bit more here but in short it’s a framework where you can easily add parameters/variables that can be set or fetched from the client. The tab in the client where you can change PID controller parameters on the fly is implemented using the parameter framework.
Variable logging: This is also detailed a bit more here but in short it’s a framework where you can easily log variable values to the client. You select variables that you want to log and the rate you want to get them and the Crazyflie will automatically send you updates for these variables. The attitude indicator and roll/pitch/yaw values on the FlightTab are implemented using the logging framework.
In the upcoming week we are planning on posting a video showing some of these features.
Wait, what? Is it Monday again already?! Well no, don’t worry you didn’t miss the weekend. The reason for breaking our “Monday post” tradition is that we couldn’t wait to announce that the pre-order has started for the Crazyflie!!
The last couple of weeks has been really busy finalizing as much as possible and finally the time has come. In the end we couldn’t decide on whether we should add the extra sensors or not so we decided on making two versions, one with the basic sensors and one with the extra sensors. Keep in mind that there’s no firmware for the extra sensors yet but if you are interested in more advanced regulation algorithms and performance then you should get the kit with the extra sensors.
We put together two bundles for the different “sensor packs”. One is called Crazyflie Nano Quadcopter Kit 6-DOF and the other 10-DOF. They both include the Crazyradio USB dongle and a 2.4GHz antenna for it. The price for the kits are $149 for the 6-DOF and $173 for the 10-DOF. For full product descriptions head over to Seeedstudio and have a look. There’s also spare parts available to pre-order which could be a wise choice depending on what you are planning on using the Crazyflie for :-)
To be totally honest we are not sure how to handle the transition from pre-order to “normal” orders. This depends a bit on how many we sell and how fast we can get a “normal” stock up again. So if you are interested in getting a kit make sure to get one during the pre-order!
Like we’ve said earlier we wanted to release the source for the firmware/software as well as the schematics so you know what you are buying and can already now think of hacks and projects for when your Crazyflie arrives. The choice fell on Bitbucket where all our repos and bugtrackers are located. The only thing we are not releasing yet is the complete KiCad hardware design, but once the pre-orders ship it will be in the repos as well. We are currently pushing the code into the repos on Bitbucket but haven’t had time to complete all of them so we will keep publishing them during the weekend.
So if you want a Crazyflie for flying, doing development or just to help support our project then head over to Seeedstudio and pre-order one.
Last but not least: What would an occasion like this be without a new video :-)
Back in November when we got the pre-series we shot an assembly video showing how to assemble a Crazyflie kit. We shot it in Tobias shed in his back garden where it was about 10*C, that’s why Marcus is wearing a winter jacket. It was also pretty late and it’s the 7th Crazyflie in a row that we have tested and assembled, so we where pretty tired. We are not trying to find excuses but it might not have been our best work. For example the words “the best way” is frequently used, and due to our Swedish heritage, “one good way” might have been more appropriate, but that day we where just feeling confident :-).
If you have ~8 minutes to spare have a look at the video, so you know what to expect in terms of assembly, when you pretty soon will be able to pre-order the kit.
We’re still busy with administrative stuff and preparing everything for release so sorry for the lack of tech posts. Hopefully there will be more time for those later :-)
But we did spend one night this week trying out something that we have talked about forever: Using OpenCV to auto-pilot the Crazyflie. For controlling the Crazyflie from a Python scripts it’s just a couple of lines and then you are ready to go. Add some object tracking to that and you can make an autonomous Crazyflie…or you could make a crashing one like the video below… The video is shot using a Playstation Eye lying on the floor. The camera has good potential for tracking since it’s low resolution, cheap and can do up to 120 fps. The plan is to use the size of the detection to control the thrust and the center of it to control the roll and pitch.
Unfortunately the latency was too large for doing a control loop for roll/pitch/thrust so it crashes. But hopefully in the future we, or someone in the community, will have some more time to spend on this. We think that it definitely has potential!
Part of this test was also to have another project where we use the Crazyflie Python API to make sure that it can easily be dropped into other projects.