It is easy to forget that the reason why it is nice to develop for the Crazyflie is because it weighs only about 30 grams. In case something goes wrong with your script or there is a fly-away, you can simply pick it up from the air without worrying about the propellers hitting you. Moreover, when the Crazyflie crashes, it usually only requires a brush off and a potential replacement of a motor-mount or propeller. The risk of damage to yourself, other people, indoor furniture, or the vehicle itself is extremely low. However, things become very different if you’ve built a larger platform with the Bolt or BQ deck with large brushless motors (like with this blogpost), where the risk of injury to people or to the vehicle itself increases significantly. That is one of the major reasons why the BQ deck and the Bolt are still in early access and have been for a while. In our efforts to get it out of early access, it’s time to start thinking about safety features.
In this blog post, we’ll be discussing how other open-source autopilot programs are implementing safety features, followed by a discussion on current efforts for Crazyflie, along with an announcement of the developer meeting scheduled for May 3rd (see below for more info).
Safety in other Autopilots
We are a bit late to the game in terms of safety compared to other autopilot programs such as PX4, ArduPilot, Betaflight and Paparazzi UAV, which have been thinking about safety for quite some time. It makes a lot of sense when you consider the types of platforms that run these autopilots, such as large fixed VTOL or fixed-wing vehicles or 10-kilo quadcopters with cinematic cameras, or the degree of outdoor flight regulation. Flying a UAV autonomously or by yourself has become much more challenging as the US, EU, and many other countries have made it more restrictive. In most cases, you are not even allowed to fly if fail-safes are not implemented, such as what to do if your vehicle loses GPS signal. These types of measures can be separated into pre-flight checks and during-flight checks.
Pre-flight checks
Before a vehicle is allowed to fly, or even before the motors are allowed to spin, which is called ‘arming’, several conditions must be met. First, it needs to be checked if all internal sensors, such as the IMU, barometer, and magnetometer, are calibrated and functional, so they don’t give values outside of their normal operating range. Then, the vehicle must receive a GPS signal, and the internal state estimator (usually an extended Kalman filter) should converge to a position based on that information. It should also be determined if an external remote control is connecting to the vehicle and if there is any datalink to a ground station for telemetry. Feasibility checks can also be implemented, such as ensuring that the mission loaded to the UAV is not outside its mission parameters or that the start location is not too far away from its take-off position (assuming the EKF is functional). Additionally, the battery should not be low, and the vehicle should not still be in an error state from a previous flight or crash.
All of these features have the potential to be turned off or made less restrictive, depending on your situation. However, keep in mind that changing any of these may require recertification of the drone or make it fall outside what is required for outdoor flight regulation. Therefore, these should only be changed if you know what you are doing.
Preflight checks documentation
- PX4: https://docs.px4.io/main/en/flying/pre_flight_checks.html#preflight-sensor-estimator-checks
- ArduPilot: https://ardupilot.org/copter/docs/common-prearm-safety-checks.html#failure-messages
- Beta flight: https://betaflight.com/docs/wiki/archive/GPS-Rescue-v4-4#sanity-check-options
- Paparazzi UAV: Indicated per platform if necessary, on their wiki: https://wiki.paparazziuav.org/wiki/Failsafe
Fail-safe triggers during flight
Now that the pre-flight checks have passed, the UAV is armed and you have given it the takeoff command. However, there is so much more that can go wrong during a UAV flight, and takeoff is one of the most dangerous moments where everything could go wrong. Therefore, there are many more safety features, aka failsafes, during the flight than for the pre-flight checks. These can also be separated into ‘triggers’ and ‘behaviors,’ so that the developer can choose what the UAV should do in case of a failure, such as ‘GPS loss’ to ‘land safely’ and so on.
Thus, there are triggers that can enable the autopilot’s failsafe mechanics:
- No connection with the remote control
- No connection with the Ground station or Datalink
- Low Battery
- Position estimate diverges or full GPS loss
- Waypoint going beyond geofence or Mission is not feasible
- Other vehicles are nearby.
Also, sometimes the support of an external Automatic Trigger system is required, which is a box that monitors the conditions where the UAV should take action in case there is no GPS, other aerial vehicles are nearby, or the UAV is crossing a geofence determined by outdoor flight restrictions. Note that all of these triggers usually have a couple of conditions attached, such as the level of the ‘low battery’ or the number of seconds of ‘GPS loss’ deemed acceptable.
Fail-safe behavior
If any of the conditions mentioned above are triggered, most autopilot suites have some failsafe behaviors linked to those set by default. These behaviors can include the following:
- No action at all
- Warning on the console or remote control display
- Continue the mission autonomously
- Stay still at the same position or go to a home position
- Fly to a lower altitude
- Land based on position or safely land by reducing thrust
- No input to motors or completely disarming the motors
Usually, these actions are set in regulation, but per trigger, it is possible to give a different behavior than the default. One can decide to completely disarm the vehicle, but then the chances of the UAV crashing are pretty high, which can result in damage to the vehicle or cause harm to people or objects. By the way: disarming is the opposite act of arming, which is not allowing the motors to spin, no matter if it is receiving an input. If you decide to never do anything and force the drone to finish the mission autonomously, then in a case of GPS or position loss, you risk losing your vehicle or that it will end up in areas where it is absolutely not allowed, such as airports. Again, changing these default behaviors should be done by someone who knows what they are doing, and it should be done with careful consideration.
Failsafe documentation other autopilot suites:
- PX4: https://docs.px4.io/main/en/config/safety.html
- ArduPilot: https://ardupilot.org/copter/docs/failsafe-landing-page.html
- Betaflight: https://betaflight.com/docs/development/Failsafe
- Paparazzi UAV: https://wiki.paparazziuav.org/wiki/Failsafe
Emergencies
Fail-safes are measures that ensure safe flight. However, there will always be a chance that an emergency will occur, which will require an immediate action as well. If the vehicle has crashed during any of its phases or has flipped, or if the hardware breaks, such as the motors, arms, or perhaps even the autopilot board itself, what should be done then?
The standard default behavior for this is to completely disarm the vehicle so that it won’t react to any input to the motors itself. Of course, it’s difficult to do if the autopilot program is on, but at least it won’t try to take off and finish its mission while laying on its side. It might be that a backup system is connected to the ESCs that will take over in case the autopilot is not responding anymore, perhaps using a different channel of communication.
Also, the most important safety feature of all is the pilot itself. Each remote control should have a special button or switch that can put the drone in a different mode, make it land, or disarm it so that the pilot can act upon what they see. In case the motors are still spinning, have a net or towel available to throw over them, disconnect the battery as soon as possible, and make sure to have sand or a special fire retardant in case the LiPo batteries are pierced.
All of the autopilots have some tips to deal with such situations, but make sure to do some good research yourself on how to handle spinning parts or potential LiPo battery fires. I’m just giving a compilation of tips given in the documentation above here, but please make sure to read up in detail!
Safety in the Crazyflie Firmware
So how about the Crazyflie-firmware ? We have some safety features build in here and there but it is all over the code base. Since the Crazyflie is so safe, there was no immediate need for this and we felt it is more up to the developer to integrate it themselves. But with the Bolt and BQ deck coming out of early access, we want to at least do something. As we started already started looking into how other autopilot softwares are doing it, we can get some ideas, however we did notice that many of these are mostly meant for outdoor flight. The Crazyflie and the Crazyflie Bolt have been designed for indoor use and perhaps deal with different issues as well.
Current safety features
This is a collection of safety features currently in the firmware at the time of writing this blogpost. Most safety features in the Crazyflie are up for the developer to double check before and during flight, but these are some automatic once that are scattered around the firmware:
- Preflight testing of different systems
- Arming condition to be forced by default for Bolt or BQ-deck as parameter
- Arming set by external receiver
- Emergency stops: crtp generic setpoint , stabilizer stop, Localization system stop
- High level commander stop
- Supervisor: tumble detection or if usb cable is connected
- Kalman_supervisor: resets the Kalman filter if goes out of bounds Kalman filter supervisor reset position
- Crazyflie-lib-python Some scripts in theh cflib checks the estimator variance externally
- Bootloader powerswitch command controlled from cflib
- Commander setpoint timeout (turned off for high level commander)
- Watchdog, hard faults and asserts scattered throughout the firmware.
- We might find more on the way…
However, if for instance your Crazyflie or Bolt platform loses its positioning in air, or doesn’t have a flowdeck attached before takeoff, there are no default safety systems in check. You either need to catch it, make it land or use an self-made emergency stop button using one of the emergency stop services above.
Safety features in works
As mentioned earlier, we have safety features spread throughout the code base of the Crazyflie firmware. Our current effort is to collect all of these emergency stops and triggers in the supervisor module to have them all in one place.
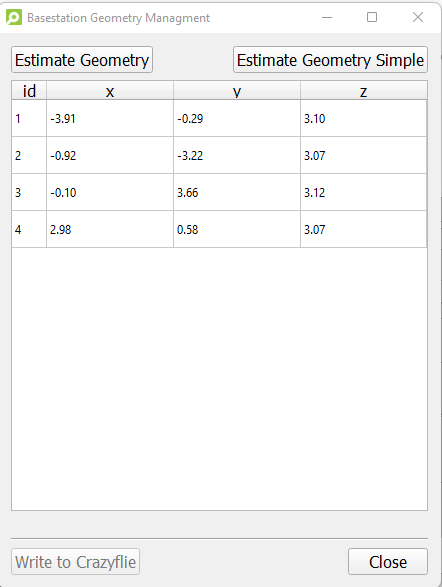
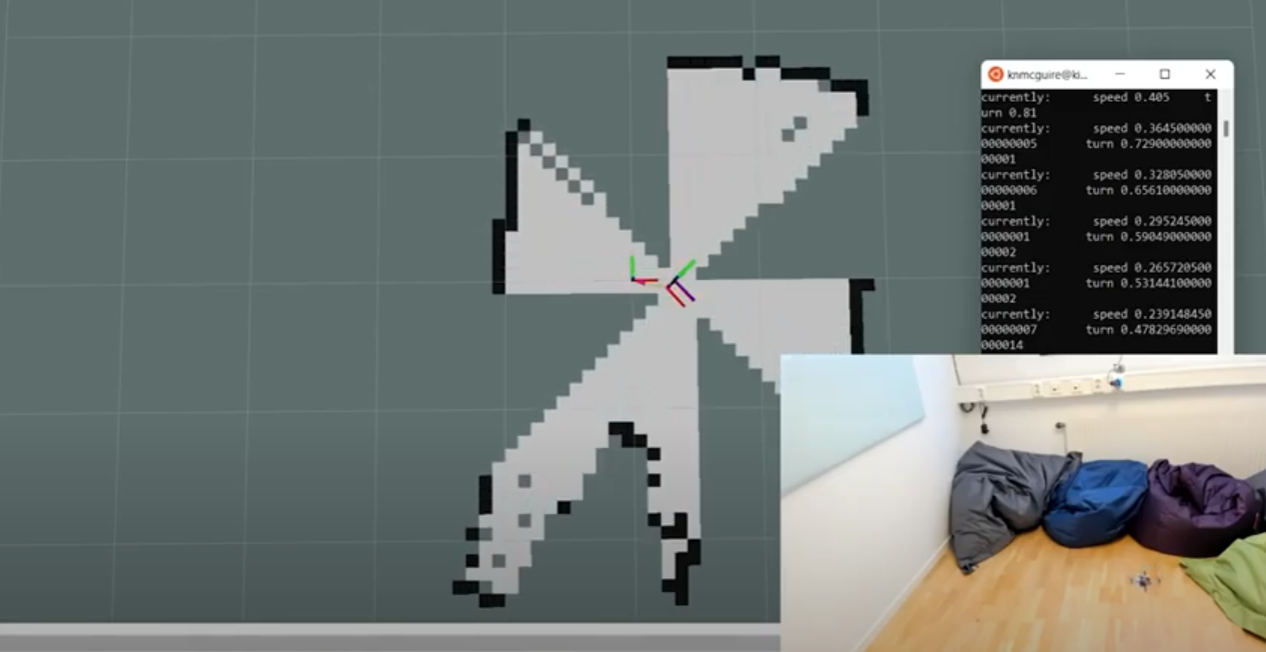
In addition, since indoor positioning is critical, we want to be notified when it fails. For instance, if the lighthouse geometry is incorrect, we need to see if the position diverges. This check was done outside of the Crazyflie firmware in a cflib script, but it has not been implemented inside the firmware. We also want to provide some options in terms of behavior for these triggers. Currently, we are working on two options: ‘turn the motors off’ or ‘safe land,’ with ‘safe land’ decreasing the thrust while keeping the drone level in attitude.
Furthermore, we want to integrate these features into the cfclient as well. For example, we want to add more emergency safety features to our remote control through the cfclient, and show users how to arm and disarm the vehicle.
These are the elements we are currently working on, but there might be more to come!
Developer meeting May 3rd
You probably already guessed it… the topic about the next developer meeting will be about the safety features in the Crazyflie and the Bolt! We will present the current safety features in the Crazyflie and what we are currently working on to make it better. In this sense, we really want to have your feedback on what you think is important for brushless versions of the Crazyflie for indoor flight!
The Dev meeting will be on Wednesday May the 3rd at 3 PM CEST. Please keep an eye on the discussion forum in the developer meeting thread.