A great feature of the Crazyflie is its ability to keep evolving, both by using software but also through hardware expansions. Hardware expansions allow us and our users to keep exploring new problems and doing new experiments, without having to change the flying base. Over the years lots of new decks have been released and we’ve seen lots of users building their own custom electronics and attaching it to their Crazyflies. Although very versatile, the current deck system is limited to up/downwards facing expansions. Adding electronics that face forward, like a camera, has been harder and has required additional mechanics. Over the last couple of months we’ve been experimenting with a new expansion connector aiming at solving this issue. The idea is to be able to add a new class of expansions facing forward. This week’s blog post and next week’s developer meeting are about these experiments.
Goals and design
We’re always trying to find ways to make our platform more versatile, making it easier to expand and to be used in new ways. So we’ve been looking for a new way to be able to expand the platform even more, this time with electronics facing forward instead of up/down. The goal is to easily be able to add things such as cameras, ranging sensors etc. Making a custom deck with custom mechanics for each sensor hasn’t been a good solution, it takes lots of time and it doesn’t enable our users to do their own custom electronics. Finding a generic solution is hard since we’re constrained both in space and in weight. We need a solution which is very small and light, each gram adding cuts into the flight time. The solution also needs a way to handle the data generated from cameras/sensors as well as possibly to stream it over a faster connection than the Crazyradio.
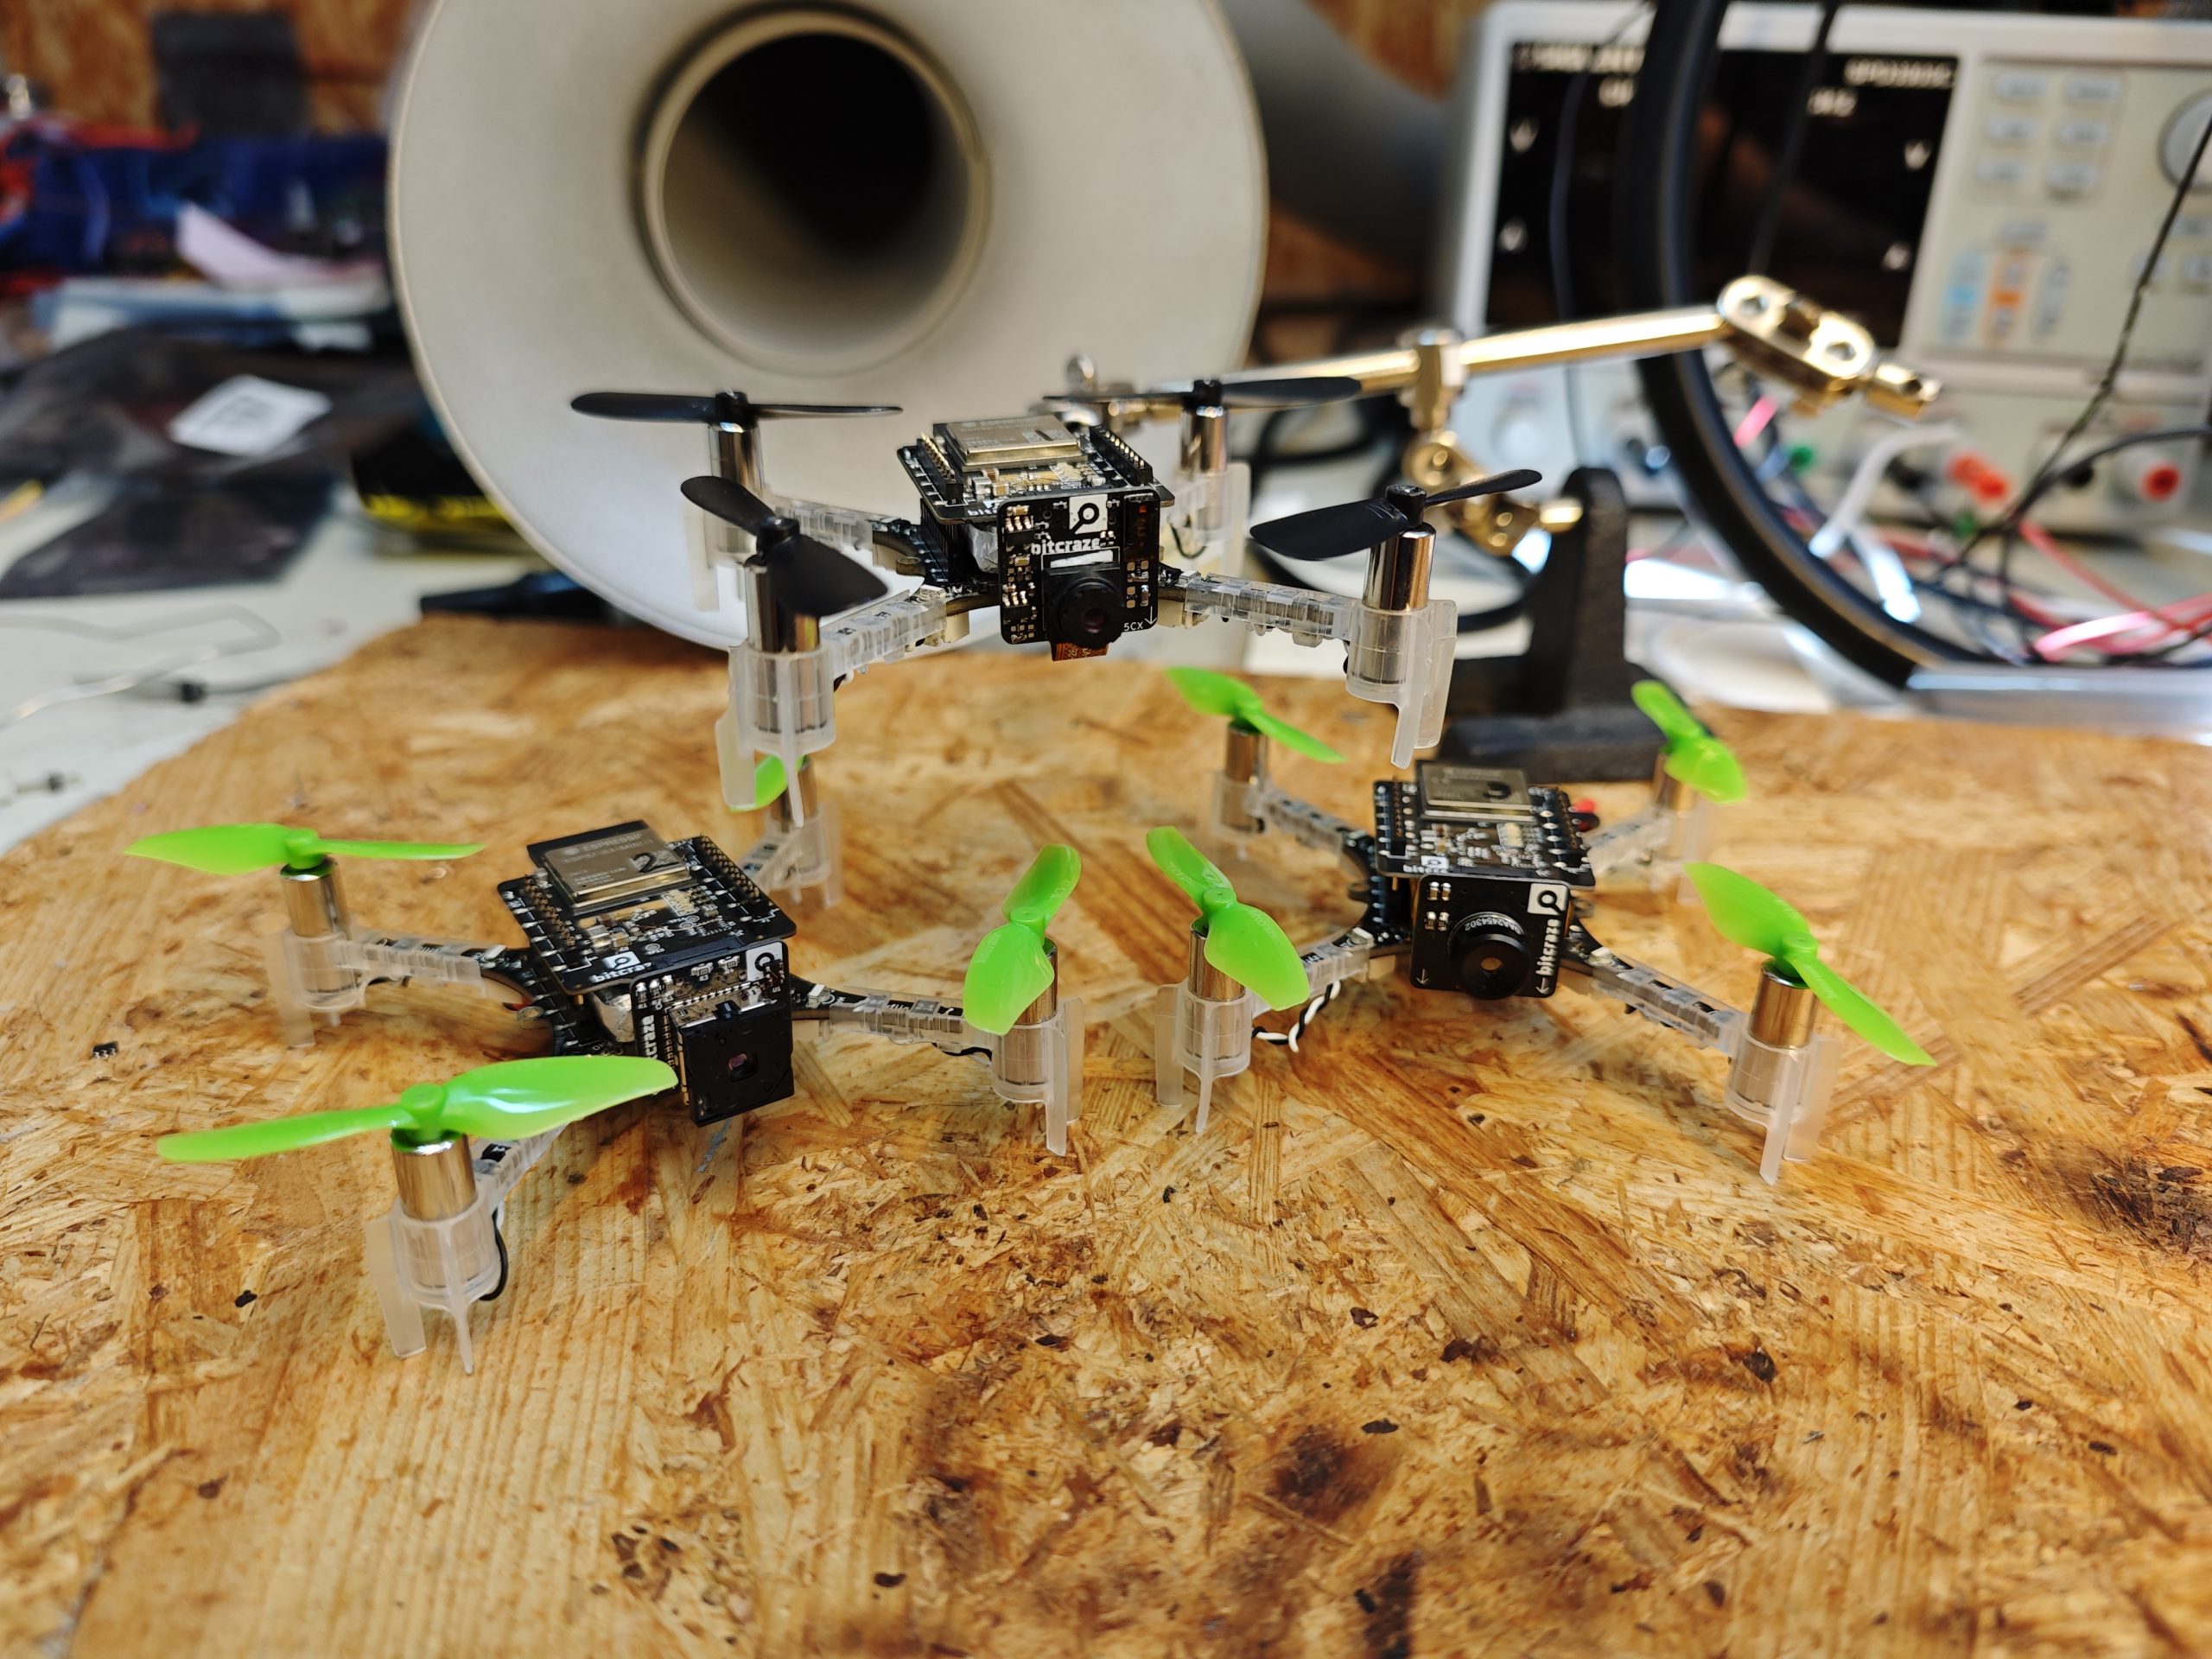
Our current prototype is made of two parts, a new deck with WiFi and more computational power as well as several smaller expansions which can be added to it. The expansions fit straight into a small right angle connector, making it easy to change boards. The current connector we’re testing has 30 positions, of which 6 is used for power and 1 for 1-wire, leaving 24 pins for signaling. The 1-wire works the same way as our current decks, additional added hardware is auto-detected at startup and can be used without recompiling or reconfiguration.
The current prototype uses an ESP32-S3 and weighs in at 3.7 grams. Added to this there are a number of expansions that we’re evaluating:
- OV2640 + VL53L5CX: RGB camera and ranging sensor (1.6 grams)
- Flir Lepton 3.5: Thermal camera (2.1 grams)
- MLX90640: Thermal camera (2.0 grams)
So the current prototype with RGB camera (and ranging sensor) weights in at a total of 5.3 grams (0.9 grams more than the AI deck).
Current status and continuation
We’re currently experimenting with connectors, modules and dimensions. In the coming months we will try to get more flight time to test the solution and we’re hoping to get some feedback from our users. So please post any comments and/or suggestions you might have.
If you’re interested in knowing more and discussing this then join our developer meeting next week on Wednesday. We will also be showing off the prototypes at ICRA, so make sure to swing by the booth if you’re attending.